Showing posts with label Belt. Show all posts

Tuesday, January 2, 2024

An Elastic Belt For a Cropped Look

 Hello Readers. It's 2024! We made it! 2023 was a rough year for so many, maybe a fresh start will help. I have seen some elastic "belts" online that can be used to tuck your top up into for a cropped look. I thought it would be handy to have and simple to make. 

Before and after.

I knew I had elastic I could use. I went digging in my supply drawer and found some elastic scraps. This belt won't show at all so any elastic will do.

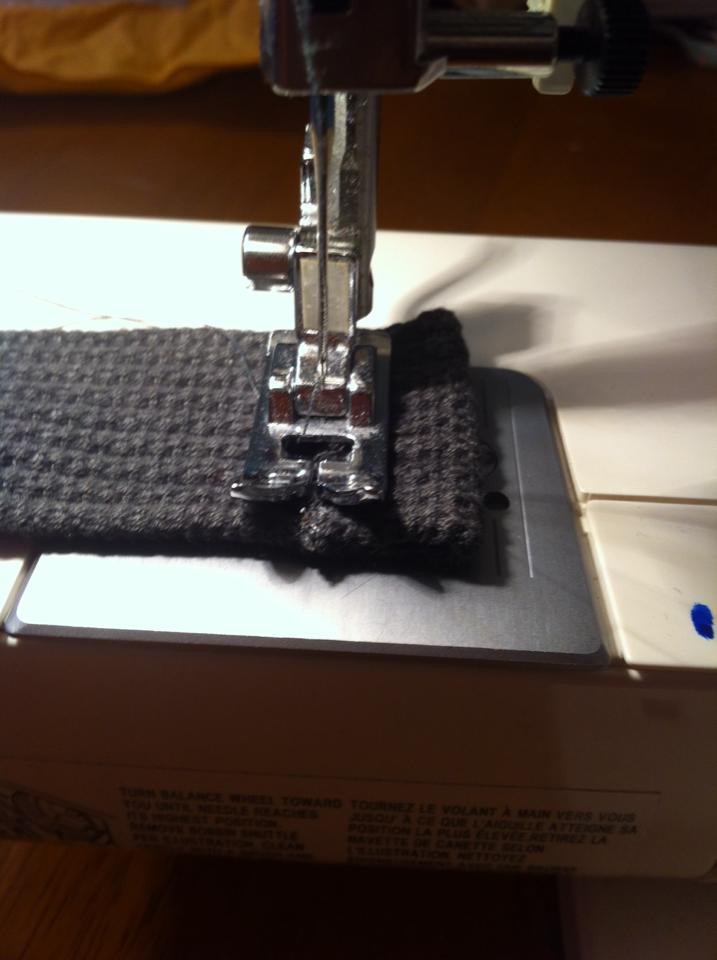
I connected my elastic using a zigzag stitch on my sewing machine. I went over the edges of the elastic a few times to make the belt really strong. I used wide elastic but I don't think it matters what the width of the elastic is. Use what you have.

I put the elastic belt over this dress. It doesn't look like much now but wait!

I put a top on top and tucked the hem of the top under the belt. That will make the top look cropped.
 
When I tucked the hem of the shirt under the belt the belt held it in place.
 
I put the belt on, did some tucking....
 
The belt held my shirt up all day and gave the whole outfit an higher waist. This was such a simple project, it only took a few minutes. It will be a great way to change the look of shirts and tops. Thanks for reading along, and happy 2024 to you.
***Year End Update***- I like this elastic belt I made to crop long tops. It's really handy. 


Wednesday, February 9, 2022

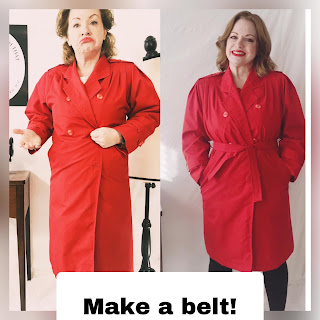
Make a Belt for My Trenchcoat

 Hello Readers. I am in the middle my red and pink Valentine series for this month. I like red any time of year so let's take a look at this great red trench coat. 

 
Before and after.

This red trench coat was a really fun find at a recent clothes swap. I really like this color red and this trench coat was a petite! That means the sleeves fit me with out any alterations needed. I was super excited about that.The only problem was that the belt was missing. I really wanted a belt. And I wanted it to be a matching belt. I could have thrown a different belt on with this coat but that isn't really what I wanted.

I was going to have to make my own belt if I wanted one. I cut the coat about 3 inches shorter. I just cut the bottom off. This will make the coat a little shorter but I am OK with that. 
 
When I was done cutting the coat I had a piece of the outer fabric and a piece of the nylon lining. I didn't need the lining so I got rid of that. Let's focus on the outer fabric.

I ironed the long narrow piece of outer fabric. I folded it under 2 twice and pressed it down. That made sure the cut edge was hidden. It also made a thicker stronger belt for this coat.  

I stitched the belt along the edges so it would stay folded together forever. I wasn't trying to be creative or invent something never seen before. I was just trying to make a traditional looking belt. I think it worked.

Look at the color match! It is perfect because I used the same fabric. No other fabric would have matched this well. I hemmed the coat at the bottom edge where I had cut the belt fabric off. 

This trench coat was perfect for Valentine's Day. 
 
It was also a great match for my distressed Valentine t-shirt from a couple years ago. (Tutorial for this fun t-shirt here.) Thanks for reading along, now go make something fun for yourself. 
*Year End Note From Chickie- I love this red trench, I just wore this, it is a winner in my book.

Friday, December 24, 2021

Christmas Belt

 Hello Readers. Red and green are so strongly associated with Christmas that a little can go a long way. 

 
Before and after.
 
 
This jacket was a lot of red and green plaid. I liked the idea of using the fabric in another way. 
 
 
I decided to make a wide fabric belt. I cut the sleeves off the jacket. 
 
 
I marked them because I wanted to make them more narrow. 

 I cut off the excess fabric and connected the two sleeves at the cut edges and that was my belt. 

 The buttons at the wrist were going to be part of my belt but how would I connect the front of the belt. This is also how I would take the belt on and off.

 
I was going to use these hair bands to make the connecting piece. 
 
 
I tied them together and they added some stretch to my belt. 
 
 
It was a fun touch to the dress. Merry Christmas to all of you who are celebrating tomorrow.


Friday, September 20, 2019

The Button Down Dress/Jacket

Hello Readers. I have yet another dress from my daughter to show you. This dress was too small on her and she passed it on to me. (It really pays to have a tall daughter!)

The dress sort of fit barely me. It had a lot of stretch so, I was physically able to get into it. I did manage to button it. It was too tight though. I could have made it into a skirt, but I had another idea.

I wanted to keep it as a jacket style shirt. Is there a real word for that? I can't think of one. I cut the dress off right under the button placket. I also cut the very bottom of the jacket off as well. I wanted that hemmed edge. I cut off a little extra so I could fold the edge under and stitch it down. It was going to be a belt. There were belt loops, it should have a belt, right?

Here is my new short sleeve jacket. It fits comfortably, as long as I don't try to button it closed. I liked how it looked a little like a trench coat. I wasn't sure about the belt. Should I let the ends hang? Should I tie the ends in knots?

I decided to connect the ends in the back and add buttons so it looked more finished. I really liked how this turned out.The ends will stay out of the way but it still looks like a belt.

I liked wearing it open and I thought it was great for a casual work day.

Thanks for reading along, now go make something fun for yourself.

Friday, September 6, 2019

Using Bits and Pieces

Hello Readers. I found this soft knit turquoise dress at a clothes swap. There was nothing wrong with it but it was a little plain. What could I do to jazz it up a little?

I am comfortable but a little bored.

This dress had a deep V in the front and a round neck hole in the back. There was a seam down the middle of the front and the back. I decided to turn it around and use the back as the front. Then it wouldn't be too low cut.

I decided to use this trim that was attached to the hem of another skirt. I just unpicked the stitches and took it off the skirt. I wanted to make this trim into a belt.

 I used the hardware from my son's old belt. This belt was faded but the brass hardware was in great condition. I cut the belt off the buckle.

I put the pretty trim on the buckle and stitched it in place with my sewing machine.

You can see from this very blurry picture that I took The sides in too.

The belt added some color and define the waist. But it seemed like the buckle was SO big. It just didn't look as nice as I imagined it would. It was a little too heavy for this lace and this dress. So, now what?

I decided to get rid of the buckle and use a snap to make the belt open and close. It is a better fit for this simple dress. And if I want to wear the dress at Thanksgiving? I can leave the belt off. Versatility!

Here is the snap I stitched on the belt by hand. Easy as pie.

Thanks for reading along, now go make something fun for yourself.
***Year End update-This dress is waiting for summer to come back out. It was a great dress for a hot summer day.

Monday, May 2, 2016

Button Down Four; The Gray One

Hello Readers. My project today is my fourth button-down so far. I am working my way through a pile of shirts and lots of ideas in my head.


The shirt started out like this. This gray shirt was pretty but too big. That gave me lots of fabric to play with.


I cut off the sleeves and collar. I took some extra off the sides too. I did the smallest seam possible on the arm holes. I followed the curve of the seam that was already there.


The top of the shirt was folded down twice and sewed it in place with my machine. 


Then I threaded wide black satin ribbon through the front and back. I left the ribbon long and tied a big bow on one side. (Full disclosure- I saw this on Pinterest.)


I used this Fray Check on the ends of the ribbon to keep it from getting frayed.


Here is my new shirt with the big bow. The wide ribbon makes a wide strap on my shoulders which I like.


Thanks for reading, now go make something fun for yourself.

*** BONUS TRACK ***

I found this belt on clearance recently. I like belts like this because no matter what size I am that day, the belt still fits. If I eat a big lunch or a huge batch of cookies, the belt still fits. The problem was I bought this belt without trying it on, it's too big, and it dangled down in a weird way. I cut off the excess.


I decided to use some of this Fray Check again. (They aren't paying me for this. I just like the product.) I used it on the end of the belt.


I let it dry overnight. The Fray Check will keep the ends together


I folded the end over once and used a zigzag stitch to hold the end down. The belt was too thick to fold over twice. My machine couldn't sew through it. I could have done this without the Fray Check but it made it much neater.


When I was done it was the right size and looked clean and nicely sewn. 


That's all for now.