Wednesday, November 30, 2022

Distressing a Denim Jacket

 Hello Readers. I got this jacket as a hand-me-down and liked the classic style. I decided to do some distressing and have some fun with it. This is an easy no-sew refashion that only requires scissors.

Before and after. 

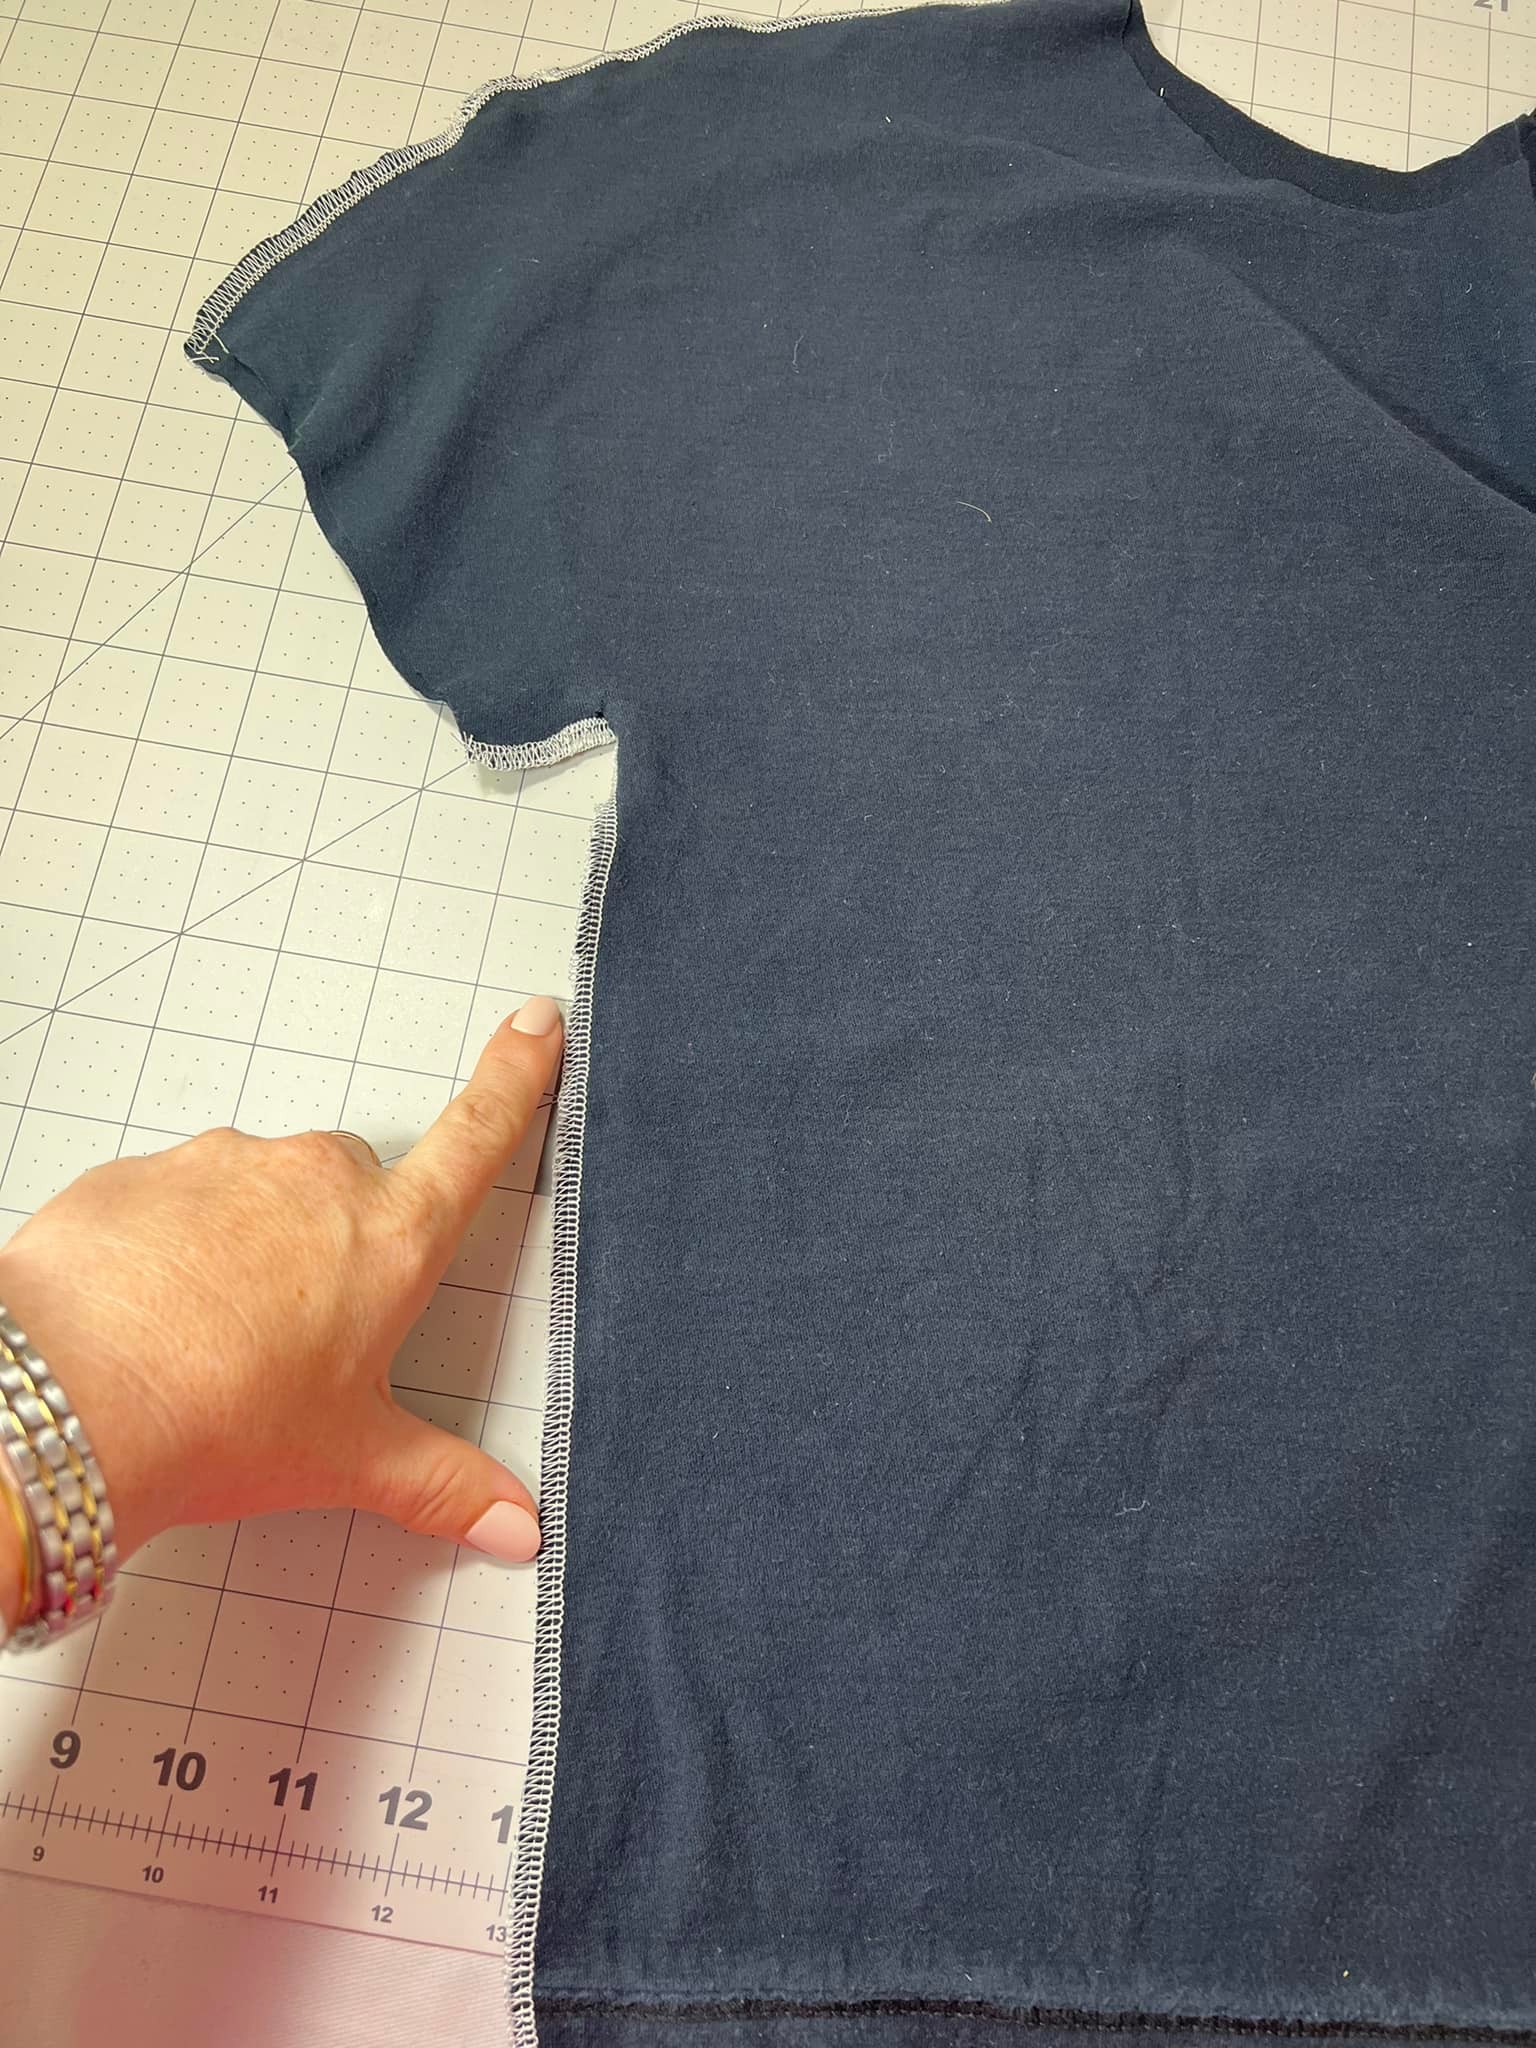
I tried my jacket on and decided on the length I wanted. Then I started cutting the sleeves and the body of the jacket to make everything shorter. I have short arms and I wanted a cropped jacket so it all needed to be cut shorter. I then got a seam ripper to start distressing the edges. 
 
 You can use anything you want to distress your jacket. I have seen people use sand paper, cheese graters, tweezers... anything that you can pull and scratch at the loose threads will work. 

I also used scissors to make little tiny cuts along the edges so I would get more fraying when I washed and dried the jacket.

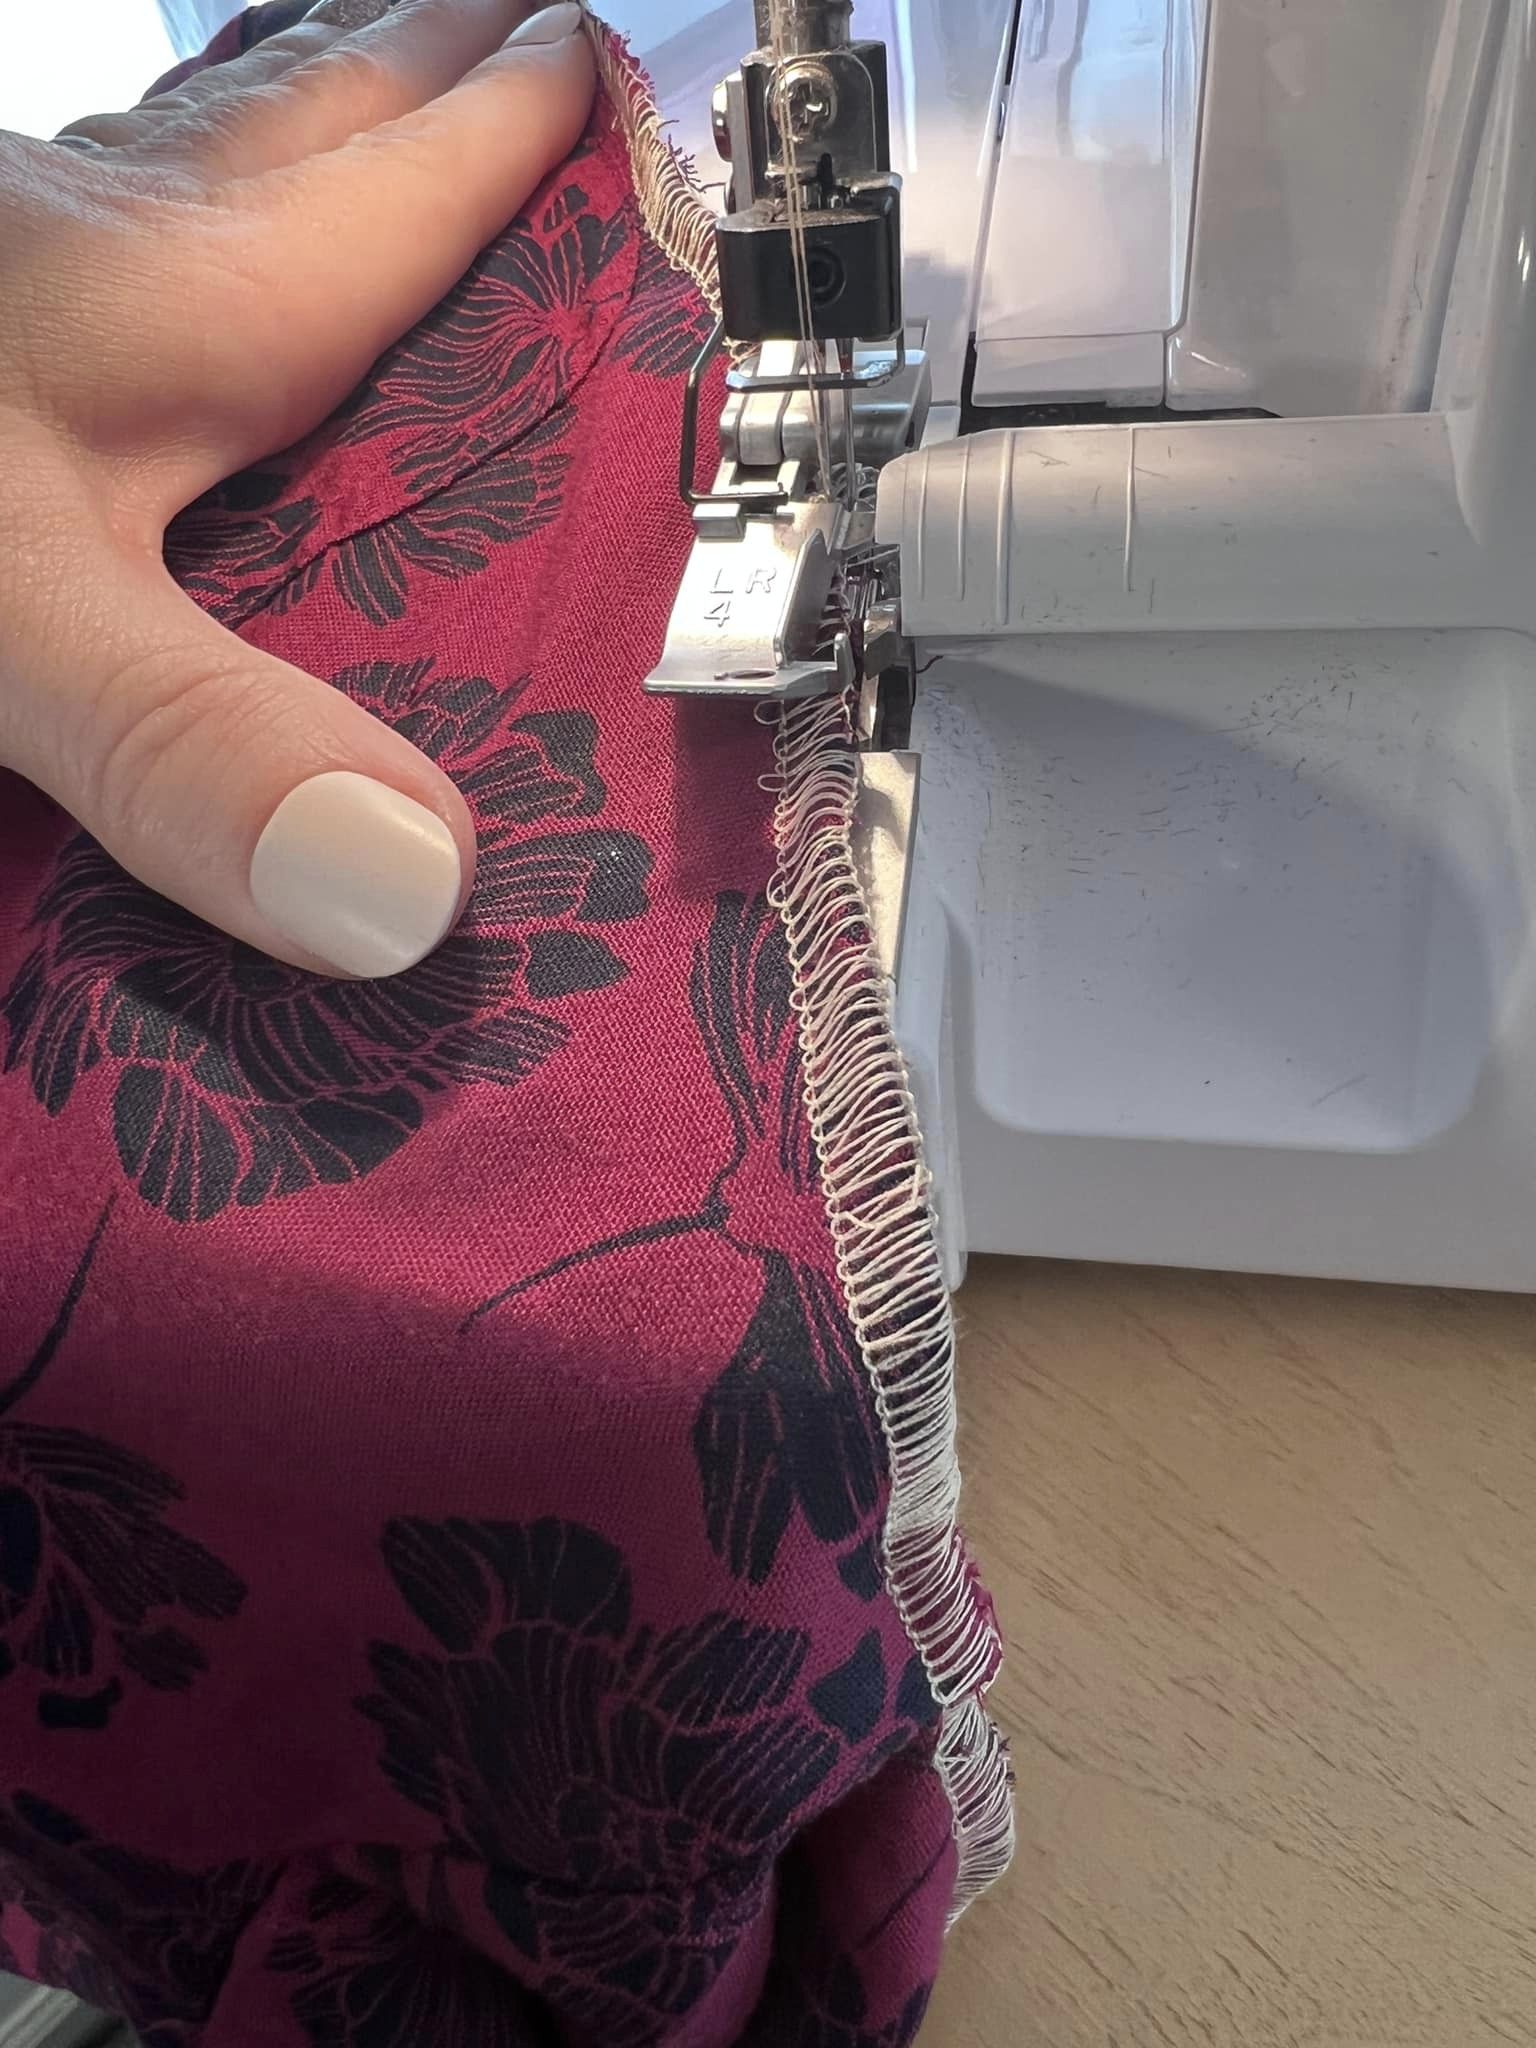
This is a look at the fraying I got after washing the jacket in my washing machine. I put it in the dryer next to get more fraying and dry the jacket. 

The washer and dryer worked really well to bring out the fraying at the edges. I like the frayed edges a lot. I usually cut the really long white threads to neaten it up a little. 

Here is a close up look at the jacket and the frayed edges.

I really liked how the jacket turned out. And the cropped length is especially great for petites too. Thanks for reading along, now go make something fun for yourself.
*Year End Note From Chickie- This was a fun project for me. The cheese grater was my favorite. The jacket still matches everything.


Friday, November 25, 2022

Sweater Weather

 Hello Readers. It is Thanksgiving this week in the U.S. and that shakes up the schedule a little. I didn't have that much time to sew but I did finish 2 small projects that made these 2 sweaters wearable again. It is getting chilly out there. I need warmer clothes.

Today is 2 posts in 1.

The first project was this purple shirt. Well, I only had part of it. I used the bottom of the shirt to make a skirt back in April 2022. But I don't throw away scraps so...

I had this very short shirt. It was just the sleeves, shoulders and neckline. I saved it because I loved the fabric. I thought maybe I could use the sleeves for something. Then I had an idea!
 
I decided to use my serger on the cut edge and use the shirt under sweaters. It would be sort of a dickie but with sleeves. 
 
The serger would keep the cut edge from fraying in the wash. 
 
This was a great partner for this purple sleeveless sweater. Let's look at sweater #2. 
 
This green sweater is a little too small but I love that acid green color. 
 
I cut the sweater open on the sides and along the inside of the sleeves. I did this so I could sew some wide ribbon into the sweater to make it bigger. This is just one long cut and I can add one piece of ribbon on each side. This is my favorite way to make sweater larger. It only takes 2 cuts and 4 new seams. Easy as pie!
 
This is a weird pose but it shows where the ribbon is. The ribbon gave me just enough extra room to wear this sweater comfortably. That's all for today. Thanks for reading along, now go make something fun for yourself.
*Year End Note From Chickie- These are 2 great fixes to give me more work clothes. I forget to make basics so when I do make them, I love them and they get a lot of wear. 


Wednesday, November 23, 2022

A Tight Dress Refashion

 Hello Readers. Sometimes our clothes get too small. (I blame Covid. I didn't catch Covid, I am just blaming it for my snack habits. ) This dress was just too tight and it had NO stretch. It was really uncomfortable so it was perfect for cutting up and using for parts. Let's refashion this!

 
Before and after. 
 
The pattern of the fabric really hides how tight and uncomfortable this dress was. It needed a change. 

I cut the top off the dress and left about 1/4 inch extra above the waistband.

I used my serger to deal with the raw cut edge. It already had a built in elastic waistband. (Yay for elastic!) I folded that edge in and stitched it down. Easy-Peasy! A new skirt. 

I used a men's t-shirt to cut out a t-shirt for me. I just cut a basic boxy shape with short cap sleeves. I used a shirt I had as a pattern to guide my cutting.

I used my serger to connect the sides and shoulder seams.

The dress had a belt and that is what I wanted to use to finish the ends of the sleeves. 

I also cut the pockets off the dress. I ironed the fabric around the pocket under.

I attached one pocket and the slippery acetate fabric was getting on my last nerve. I was starting to hate this shirt and wanted to give up. I looked at the second pocket and said, "Forget You!" One difficult pocket was plenty. I used the neckline ribbing that was on the shirt originally to finish the neckline. I was forcing myself to finished this outfit because unfinished projects drive me crazy.

I finished and added a belt. The belt did not make me feel any better. I decided to walk away for a few days and got busy with other work stuff. 

I tried the outfit on to take a picture and see how I felt about the whole thing. How did I feel? I felt pretty good at this point but its not my favorite. What do you think? Thanks for reading along, now go make something fun for yourself. 
*Year End Note From Chickie- This was a great fix for a tight dress. I love wearing a skirt and t-shirt in warm weather. I can't waist for winter to be finished.


Monday, November 21, 2022

Making an Outdoor Space Look Cohesive

 Hello Readers. My backyard has gotten a lot of wear and tear over the years. 3 kids, 2 dogs, lots of friends will do that. I wanted to simplify and refresh the whole thing but I am not a decorator.

I thought that if I chose one color and made that color the focus, it would help everything work together. You can see I chose blue. I love blue, it's calm and peaceful. (Don't we all need that?) This deck is right off my kitchen which is also blue. I thought it would harmonize well. Before I spent any money I planned and searched online. Could I find everything I needed in coordinating shades of blue? I verified that before I bought anything.

I used to have metal patio furniture. The glass-topped table and chairs were green and they were fine at first but over time they got some marks and rust on them. I had sanded and painted them to make them last but we never ate at that table. When the table and chairs needed repainting again, I gave them away and started over. These blue chairs are a resin (Plastic!) and weigh a lot. I chose them because they can't shatter in a storm and they can't rust. I also bought the little matching table to hold my iced tea. I hope these will be maintenance free. I do not want to sand and repaint ever again. These chairs are more lounge chair styles and I thought that would work better for our life style. I found the rug at Wegman's when I wasn't even looking and it was half price. It went with my blue theme so I got it when I was buying groceries. (Link to something similar.)


I made sure to get an umbrella for some shade and I made sure it would coordinate with everything else. I went all out for this blue theme. The umbrella went in my old umbrella stand. I reused what I could to keep costs down.

We were given this kids picnic table and it was great for the deck. It was blue on the sides already so You can probably guess what I did.
 
That's right, I painted the table blue! I only had to paint the top and seats. This would be easy. I washed the table all over and made sure it was dry before painting. This paint said it would bond with plastic so I bought it.
 
I put on gloves and started spraying. I kept the can moving and tried to spray an even coat of paint. 
 
I covered the whole table and let it dry. Then I went back and checked for any spots I missed. 
 
The paint went on really well and the table looked great. It gets dragged around and used for all kinds of kid fun. I also use it as a foot rest sometimes too. 

Even on cloudy days everything looks good together. 
 
 We use it a lot. Even on chilly days. Thanks for reading along, now go make something fun for yourself. And your yard!
*Year End Note From Chickie- I love my blue backyard area. It looks so put together.


Saturday, November 19, 2022

Hiding Electronics in an Ikea Basket

 Hello Readers. I think we all have electronics that we need but would rather not see. They are not very pretty and if you don't decorate in a black, they don't match the decor. I saw a way to hide them using a basket from IKEA. I loved the ides so when I went to IKEA recently I grabbed a basket. 

There is an XBOX hiding in that basket!

This is the basket I got from IKEA. It's called the SMARRA. It is a square and is really light weight. I thought I could put mt device inside and poke a little hole for the cords. It needed more work than that but it wasn't difficult.

My XBOX was too big. I found out later that the basket is large enough for most routers but I was going to have to make some adjustments to fit my device inside her and be able to close the lid.

I realized I would need to cut the back of the basket off to close the lid on my device. I tried pruning shears that I use to cut bushed but they didn't work for me. I grabbed this tiny saw ans started sawing back and forth at the corner.

It only took a few minutes to cut through the basket. I cut off more of the basket than I needed too but it worked out fine. 

I cut through the back corners on the bottom basket and the lid. The back of the basket is kind of dangling loose here. 

I cut off the back of the basket. It was easy to cut through the basket with household scissors. 

This is a good look at the basket and how it closes. When you see the back of the basket it's clear I didn't need to cut off so much but when it is pushed back on the table it looks great. 

The basket looks so much better than the electronics did. I put some pictures out with it and that was it. Thanks for reading along, now go make something fun for yourself.
*Year End Note From Chickie- My house can be a total wreck but this basket looks great. I need to hide everything in baskets like this.


Friday, November 18, 2022

Making a No-Sew Leather Wrap Belt

 Hello Readers. This post is sort of a part 2. The first part was a skirt with fringe. I had cut a lot of the skirt off when I refashioned it. What should I do with the extra? I did not throw it away, I made a belt. 

Before and after.

When I shortened this leather skirt recently I had to cut off about 5 inches from the bottom. I saved it because I thought I could make a wrap belt from it.

This is a good look at the piece I was working with. It is from the bottom of the skirt where the back slit was. It is actually a good sized piece to make a belt.

I cut the leather into a different shape. I wanted it to be wide in the center, that would go on my waist in back. The 2 ends would be more narrow, they would be wrapped around in front. If that sounds confusing, keep reading, it will be clear in a moment.

I took one end and punched a hole through it. I tried to center my hole and stay in the middle. I used a hole punch for sewing because it is very sharp and it had a mat to protect my table. 

I used a piece of leather cord. My piece was about 72 inches in length. You can adjust the cord based on your size and how any times you want to wrap it around yourself. 
 
You can see the hole I punched in the leather at the bottom of the photo. I put the cord through the hole and that was it. The belt just needed to be wrapped around me. 

You can see how the belt is wrapped here. I sped up the video a little to save you time but it is really simple. I wrapped the belt close to the body and wrapped the cord around the belt. The cord is fed through that one hole so the whole thing doesn't shift around. I didn't tie the cord to the belt. I wanted it to be totally adjustable. Thanksgiving is coming, I need all my clothes to cooperate with my stomach because I will be eating enough potatoes for 5 people. And then dessert.

I put the belt on with this black outfit. It was dressy but those pants are elastic. Perfect for Thanksgiving. Bring on the pumpkin pie!

 Thanks for reading along, And to think it was made from the scraps of this skirt, now go make something fun for yourself. 
*Year End Note From Chickie- I am really liking this. It never gets too small, adjustable is best for me because I can fluctuate in my weight. 5 stars!


Tuesday, November 15, 2022

An Almost No-Sew Leather Skirt Refashion

 Hello Readers. Let's do an almost "no-sew" refashion with this skirt. I have seen similar skirts online and I have been wanting to recreate this look for myself. This is a fun project and it is perfect for holiday parties. For this project you need to start with a pair of scissors. And a leather skirt.

Before and after.

This black leather fit fine but it was not a good length on me. It was too long for me. (I am pretty short.) I thought this would be an easy project, I just needed to start cutting.

It was easy to decide where to cut the new length of the skirt because I had to remove the bottom of the skirt where the back slit was. You can make your skirt any length that works for you.

I saved the cut off portion for later. Now I had a shorter skirt, I could have hemmed it but I had a fringed skirt in mind that was going to be more fun. It just needed some more cutting.

I started cutting narrow strips along the hemline. I wanted to have fringe all around the hemline of the skirt. (If you listen closely you can hear youngest come in my sewing room.)
 
I tried to keep the length of fringe even all the way around the skirt. I didn't obsess about it though. No one is going to inspect and measure my fringe when I am out and about in my skirt. 
 
There was a lining in the skirt. This is the only part that needed any actual sewing. I cut the lining a couple inches shorter than the starting point of the fringe. I used my serger to finish the cut edge and prevent fraying. No one will see the lining inside of the skirt but I don't want it to be a frayed mess. 
 
If you want to shorten the lining but don't want to sew, you can use some of this iron-on hem tape. It is easy to fold the edge of the lining fabric over and iron in place. Follow the directions on the package to get the best results.
 
The fringe turned out great.
 
I mean this is really fun to wear. Thanks for reading along, now go make something fun for yourself.
*Year End Note From Chickie- This is an all time favorite. Bury me in this please. I love it. And it was easy too.


Friday, November 11, 2022

Altering a Sweater Knit Poncho

 Hello Readers. My daughter gave me this poncho style sweater as a hand-me-down. I love it but I felt a little lost in there. I am too short to wear big long sweaters well. I thought I could restyle this poncho easily with a little sewing. I was in the mood to experiment until I got something that worked for me.

Before and after. And after. And after.
 
 
This poncho was pretty but the wide sides just felt like too much. Do I look like Luke Skywalker? I feel like I look like Luke Skywalker.
 
I marked with chalk where I wanted to make new side seams. I also wanted to make the sleeves a little more narrow. I used a zigzag stitch to sew these new side seams and it was easy.
 
It was easy to stitch through this material. I used a zigzag stitch to make sure it wouldn't fray when I cut off the excess material.
 
This new simple sweater was nice. I put it on top of a dress to add length and it was great. I probably should have stopped here but I didn't. I kept going and going.

My next step was to cut off some of the neck because it was so large and bulky. I used my serger on the cut edge to control any fraying. That worked out well but I kept going.

I thought I should add pockets and then I added lace too. It was pretty and a little cottage-core but it didn't turn out as well as I thought it would. I wasn't happy with what I ended up with. I thought I could unpick the stitches and remove them but I couldn't.
 
I decided to cut the bottom of the sweater off. It as the only way to remove the pockets. I used a zigzag stitch to attach that tie belt to the cut edge to finish the bottom of my new shorter sweater. I liked the ends tied in a bow at the side. Now it's shorter but loose fitting. That is all for now.
Thanks for reading along, now go make something fun for yourself.
*Year End Note From Chickie- Making this sweater was a journey but I do like the final result. It goes with everything and it's simple. Perfect for work.