Friday, April 28, 2023

Orange Dye Disaster

 Hello Readers. I love to dye bland clothes into bright fun colors. Why be bland when fabric dye is so readily available and easy to use? It doesn't make sense. This post is about how I dyed a dress in my washer and it got messed up and then I fixed it.

Before and after some drama.

This dress was is perfect condition but the color just didn't do much for me. It was like plain oatmeal. It was way too long. I tried to refashion it a couple years ago. I decided to cut the skirt off and tie it in a knot at the waist to add some waist definition. I was not 100% happy with it so it's back. 

My first step was to dye the dress. I thought orange would be a good choice because... I like orange. So far, so good. But my washer went rogue, stopped, and the lid stayed locked for 12 hours or so. I don't know why it did that. Do I need a new washer? Maybe.

While it was in the dye I made the elastic waistband I wanted to use on this skirt. 

I used a zigzag stitch to connect the ends and make this waistband. 
 
I attached the elastic to the top of the skirt but you can see what the dye did to the skirt. It was uneven because the washer didn't run properly. I did not like the patchy orange color. I would have to order more dye to try and dye it again.

I turned the elastic under.

I turned the elastic under again so it was hidden.

I used a zigzag stitch to make this elastic waistband. 

I dyed the whole thing again. I really wanted to make the color even. 

I thought the skirt was a little too loose so I took 3-4 inches out of the skirt in the back. It made a seam down the back of the skirt but lots of skirts have a back seam like that so I thought it looked fine. 

My dress was evenly dyed a fun orange color and I liked it so much that I went out in it. I went to get a hair cut. If you are ever in Hagerstown Maryland, I recommend Jessica at Frayed Berry. Thanks for reading along, now go make something fun for yourself.

***Year End Update- This orange is so much better than the oatmeal mush color.


Wednesday, April 26, 2023

Using a Belt as a Purse Strap

 Hello Readers. I love having a long cross body handle on my bag. It makes my life so much easier. When I go out I am usually carrying  a lot of things (Water, keys, mail, sunglasses, phone, coffee, snacks...) in my hands, in addition to my bag. If I can throw my bag over my shoulder I am going to have a much more productive day. 

This idea takes less than a minute and looks great.

No long handle? How sad.
 
This is too much stuff for my hands to carry. There must be an easier way! 
 
All you need for this quick restyle is a bag and a belt. The longer the belt, the longer you can make your strap. Grab a belt from your closet or from a friend, husband, boyfriend, son, mother, neighbor, anyone willing to share their belt with you.
 
Here is the miracle solution! A belt, this one didn't match my bag exactly but it coordinated well enough for me. The longer the belt, the longer the strap can be. You decide how long you want it.

Step one: Put the belt on one shoulder and pull the ends across your body diagonally. this is how you would wear the bag so that is where we will start. 

Second step: Grab your bag. Put the end of the belt through one of the handle rings. Pull the end of the belt across the side of the bag and push it up through the other handle ring.

Third Step: Pull the end of the belt through the bag handle rings enough so that you can buckle the belt. The belt needs to be buckled so that it will be secure and stay on your shoulder.
 
That is it! This new bag is all done. I love that this is more useful but it doesn't alter or damage the bag or the belt in any way. 
 
I adjusted where the belt buckle was by pulling the belt through the handle rings more and more. I wanted the buckle in the front but you might want it in back. Whatever is comfortable for you is fine. It's your bag, do whatever you like. 
 
 This idea won't work for every bag but it can make some bags much more useful when you have loads of stuff to carry. Thanks for reading along, now go make something fun and useful for yourself.

***Year End Update- I never took the belt off. I like it so much that it has become a permanent part of the purse.


Sunday, April 23, 2023

Budget/Renter Friendly "Screened" Porch

 Hello Readers. Spring and summer is a beautiful time to be outside and enjoy some fresh air. But when you do.... the bugs will attack. Mosquitos, bees, wasps, gnats... they're coming for you. What would help is a screened porch but if you are renting that might not even be possible. I have a budget friendly and renter friendly idea.

Before and after.

 
This is my daughters apartment. Its very pretty. It has a beautiful little garden space. The second story porch is large enough to sit on and shielded from the rain or hot sun. But it's not protected from the bugs.
 
The most budget friendly screen we could find was a canopy style mosquito net for a bed. It was the right shape for the porch, I needed something rectangular to fit the porch well. The dimensions do not need to match exactly because the net material is so flexible. The net we chose was a little bigger than the porch itself. There are a lot of options for beds and for camping that can work for this project. The one we chose had loops at the top to hang it from. 

Here is a look at the roof of the porch. It has beams and posts that we are going to use to hang the net. We couldn't drill holes so we had a different plan.
 
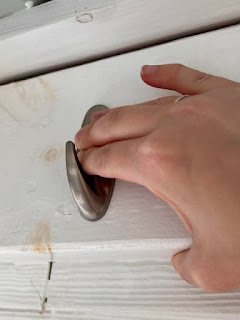
My daughter got these Command hooks to hang the net from. They won't damage the posts if/when they are taken down. 
 
These hooks are very easy to use. There is the hook piece and 2 sticky pads. The sticky pads are labeled so you know what side goes on the wall and what side goes on the hook.
 
We stuck the hooks on the posts and beams. We made sure the places where the hooks were going was dirt and dust free. The canopy would be easy to hang on the hooks. We placed to hooks at the 4 corners where the loops were.
 
We made sure to press the sticky side of the hooks to the wood as firmly as possible.
 
We hung the net up at the four corners using the hooks. Easy-peasy right?
 
To add more support and make sure the canopy would never come down. We added some string ties to the seam at the top of the canopy. (Our area can get some strong summer storms.) We used some narrow string that came with the canopy to hang the net from the rafters. We attached the string to the top of the net along the seam line. We used a needle and thread to sew the string to the seam line. We sewed the thread through the seam at the top of the screen and through the string so they were connected and then tied a double knot.
 
The net also had loops in the center of the 2 longer sides. My daughter put a hook up on the beams  in the center of the long sides for those loops. Because we were a little concerned about storms, we tied the net to the beams in between each hook with the string.
 
It is difficult to see the white ties on the white beams. I edited this pic to make it more clear. The arrows are Command hooks that hold the loops. The pink bows are where the string is tied around the ceiling beams.
 
We hung the curtain so it would pool on the floor. We thought that would keep bugs from flying under. 

The dog loves it out there.

And its a great place to sit with morning coffee and work from home without the mosquitos and gnats  attacking.
Thanks for reading along, now go make something fun for yourself.

***Year End Update- The curtains kept the bugs out all summer. It made sitting outside so much nicer.


Friday, April 21, 2023

Changing a Bland Colored Dress

 Hello Readers. It is finally warm enough to wear dresses without freezing! I love that. My daughter gave me this tie-dye dress and it had a lot going for it. But the color was sad and Zzzzzz....

Before and after.

This dress was cotton. It fit. It had pockets. I loved it. But I have never seen such a sad washed out gray dress in my life. It was tie-dye, which I liked but this was the saddest tie-dye ever. Tye-dye is supposed to be fun! This dress looked like a rainy day. I had to do something.

I decided to call on an old friend. Rit Dye. *Not an ad.

I made a hot bath in a pan on the stove for my dress as the directions said on the bottle. 

I liked how the dye turned out. There were a couple spots that were lighter than the rest of the dress. I think it looks OK because of the tie-dye. Next time I dye something I think I will use my washer. I think I get more even color in the washing machine.

The color is so much more upbeat that it was before and that works for me. Thanks for reading along, now go make something fun for yourself.

***Year End Update- I am so glad I dyed this dress. It made such a big difference.


Wednesday, April 19, 2023

Using a Vintage Pattern

 Hello Readers. I made this wrap dress using a vintage pattern from 1952. It was a wrap dress and I loved that it would be adjustable and always fit. I found some bargain fabric on sale and got to work. 

Before and after.

I found this fabric half price and bought all that was there. It had cute shoes and handbags all over. It was so inexpensive I thought it was a great choice to try this new pattern. If I really messed up, at least I wouldn't have spend that much.

I ironed and cut out my paper pattern pieces.
 
I ironed and cut out my fabric pieces.
 
It was at this point I realized that I did not have enough fabric. Or at least I did not have as much fabric as the pattern called for. I cut out the front and back pieces. I was supposed to cut out 3 skirt pieces but I was only able to cut out 2. I thought I could still make the dress and have a less full skirt. That is what I hoped anyway.
 
I held pieces up to me and tried them on as I sewed to see if things looked right. This front piece was going to get ties and it would wrap around behind my back. It seemed to go together well. I was glad I put this together with less skirt fabric than it said. The skirt was very full.

All the edges of this dress were finished with bias tape. I chose black. 

This was a fast and easy way to finish the dress. 

My dress was almost finished. I waited until the end to decide on length. I cut off about 6 inches and hemmed it. I also added 2 buttons at the waist to close the dress.

Here is an inside look at the inside of the dress. The front of the dress ties behind my back. The back wraps around the front of me and connects to stay closed.

I was able to add pockets to the front of the dress. They are hidden by the over skirt. It all kind of blends in because of the wild print.
 
  The buttons have a tied elastic to keep them closed instead of button holes. I did this because the to ends did not meet to make a traditional button and button hole. I could have used a tie in the front made of bias tape but I didn't want a tie closure in the front.

This dress was so fun. I was really glad I made it. I don't think it needed a third skirt panel. It is really full with only 2. Thanks for reading along, now go make something fun for yourself.

***Year End Update- This dress was so fun to make and it is adjustable at the waist so it always fits well. I added tights and a long sleeve shirt under it this winter.