Hello Readers. Spring and summer is a beautiful time to be outside and enjoy some fresh air. But when you do.... the bugs will attack. Mosquitos, bees, wasps, gnats... they're coming for you. What would help is a screened porch but if you are renting that might not even be possible. I have a budget friendly and renter friendly idea.
Before and after.
This is my daughters apartment. Its very pretty. It has a beautiful little garden space. The second story porch is large enough to sit on and shielded from the rain or hot sun. But it's not protected from the bugs.
The most budget friendly screen we could find was a canopy style mosquito net for a bed. It was the right shape for the porch, I needed something rectangular to fit the porch well. The dimensions do not need to match exactly because the net material is so flexible. The net we chose was a little bigger than the porch itself. There are a lot of options for beds and for camping that can work for this project. The one we chose had loops at the top to hang it from.
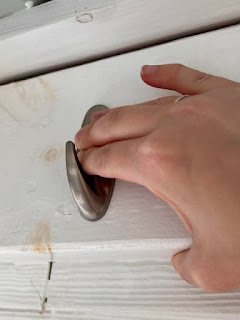
My daughter got these Command hooks to hang the net from. They won't damage the posts if/when they are taken down.
These hooks are very easy to use. There is the hook piece and 2 sticky pads. The sticky pads are labeled so you know what side goes on the wall and what side goes on the hook.
We stuck the hooks on the posts and beams. We made sure the places where the hooks were going was dirt and dust free. The canopy would be easy to hang on the hooks. We placed to hooks at the 4 corners where the loops were.
To add more support and make sure the canopy would never come down. We added some string ties to the seam at the top of the canopy. (Our area can get some strong summer storms.) We used some narrow string that came with the canopy to hang the net
from the rafters. We attached the string to the top of the net along the
seam line. We used a needle and thread to sew the string to the seam line. We sewed the thread through the seam at the top of the screen and through the string so they were connected and then tied a double knot.
The net also had loops in the center of the 2 longer sides. My daughter put a hook up on the beams in the center of the long sides for those loops. Because we were a little concerned about storms, we tied the net to the beams in between each hook with the string.
It is difficult to see the white ties on the white beams. I edited this pic to make it more clear. The arrows are Command hooks that hold the loops. The pink bows are where the string is tied around the ceiling beams.
We hung the curtain so it would pool on the floor. We thought that would keep bugs from flying under.
The dog loves it out there.
And its a great place to sit with morning coffee and work from home without the mosquitos and gnats attacking.
Thanks for reading along, now go make something fun for yourself.
***Year End Update- The curtains kept the bugs out all summer. It made sitting outside so much nicer.


No comments:
Post a Comment