Friday, July 19, 2019

The Brown T-Shirt and More

Hello Readers. I made a shirt recently and I forgot the before picture. Try to imagine a men's t-shirt, a basic brown men's size XL t-shirt. It looked a lot like the drawing below.
It was a great match for this Nancy Drew clock skirt I made a few years ago.

This was how it looked when I cut it up. The blue line is supposed to represent what the shirt looked like before I started cutting. (I know, my drawing skills are unreal!) I used the middle section of the body and the sleeves to make a new, more feminine top.

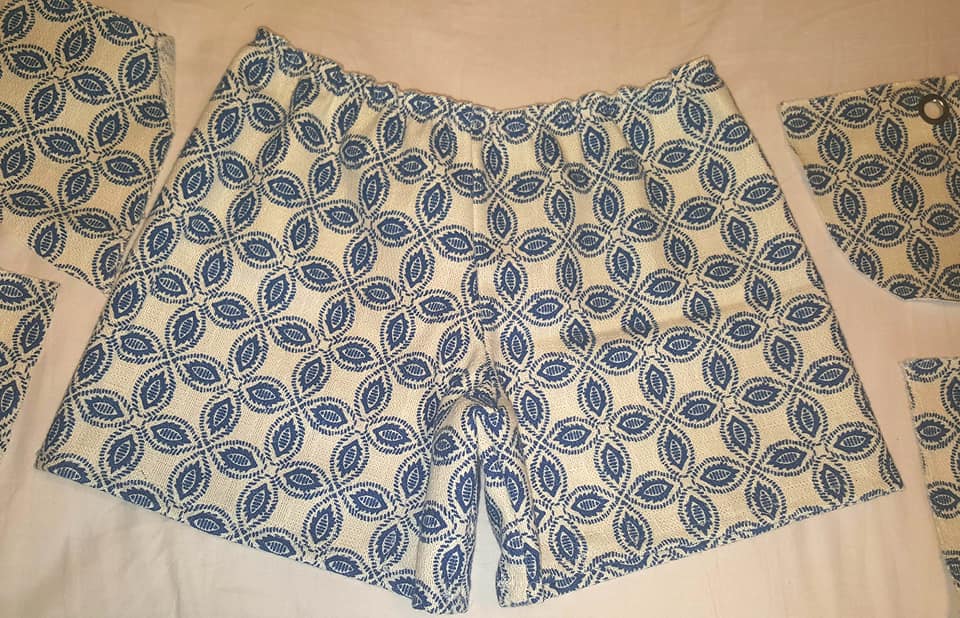
I reattached the puffy sleeves and made a square neckline. The waistband is now at the neckline with some thin elastic inside it. The elastic gathers the fabric and keeps the shirt in place.The sleeves are also upside-down. I put narrow elastic in the ends of the sleeves and used them to keep the sleeves up on my shoulders. The elastic made the sleeves gather into nice ruffles.

 The sleeves are attached to the shirt in the underarm area with a 3 inch long seam. They are longer on the outside and shorter under the arm so they can cover the shoulder and hang down like a sleeve should. This top could be worn off the shoulders too.
 

*** PART 2 ***
I also made a couple sleep bras or lounge bras recently. I used a couple old stretch style cami tops. I cut the bust off, they didn't fit comfortably anyway.  I also cut the waistband off and used the middle portion of each tank.

I used some stretch lace I had at the bottom to tighten it and act as a shelf bra. I reattached the straps the tank had originally. These are great for lounging. The stretch fabric made these bras work and fit well.

Thanks for reading along, now go make something fun for yourself.
 ***Year End update- I really like the brown shirt. I thought the square neckline was fun. I wear the bras pretty often too.

Wednesday, July 17, 2019

Giraffe Scarf

Hello Readers. I made a giraffe scarf recently. That might seem unusual. Why make a giraffe scarf you might ask. Well, it wasn't for me. It was for my mom. It was her birthday, and she loves giraffes. I mean LOVES giraffes.

I was given this giraffe fabric along with some other fabric quite a while ago. (I love when sewers share!) I soon realized it wasn't one piece but actually 4 smaller identical square pieces. I had thought about making a couple of pillows. I wasn't sure, so I kept thinking. I knew I had to make something for my mom out of this fabric. It was meant for her.

Look at that great giraffe pattern. My mom would love it!

I decided to make an infinity scarf. I could connect all the squares and it would suit the amount of material I had perfectly. I made a long tube and then connected the ends.

It looked like this when I was done. 

 It is long enough to loop around the neck easily. It's machine washable and the colors are neutral and easy to wear too. Happy Birthday Mom!

Thanks for reading along, now go make something fun for yourself. Or your mom!
***Year End update-  I never wore this. I gave it to my mom. I still think it's cute.

Friday, July 12, 2019

Skirt to Over-Alls

Hello Readers. I almost gave this plain black skirt away because it was too long and too boring! It was a nice weight knit fabric so I kept it in hopes I would think of something more fun to do with it. And I just got an idea!

There wasn't anything wrong with the skirt. It just wasn't very exciting. And it was clearly too long for me.

I decided to make a straight skirt from the top of this black skirt.  That way I could keep the waistband. That would save me loads of time. I took a little off each side and gave it a new hem. The original skirt flared out at the bottom. I determined the length of my new skirt by cutting it off above that.
I used that fabric at the bottom though. I cut 2 squares from the center of that extra fabric.

I used the squares to make the front and back "bibs". I used some more of the extra fabric to make the shoulder straps I needed. 

I had the buttons in the button stash. I chose black to keep it simple. I didn't want to worry if the buttons clashed with my shirt. With these plain buttons I can wear any shirt.

Even a wild purple floral shirt.

The back looks a lot like the front. The bib is just a little smaller.

Thanks for reading along, now go make something fun for yourself.
***Year End update-  I love black skirts. Can you have too many? I will never believe that's true.

Wednesday, July 10, 2019

Blue and White Dress

Hello Readers. I am a sucker for a blue and white pattern. A lot of my house is blue and white and when I see clothes with blue and white I am bound to like them. That is what happened when I saw this little dress.

This dress was great but the top of it was too tight. A gallon of Crisco and a crow-bar wouldn't get me in there. I really loved that skirt though, and it fit great. I decided to remove the part that didn't fit. I had this light blue shirt to wear with the skirt. I just needed to remove the teeny-tiny lace top. I think if something doesn't fit, you can cut it off and work with what you have left.
 

First, I cut the top off. Next, I turned the lace edge under and stitched it down. Guess what I had....a lumpy mess of a waistband. It was not pretty. I think if its ugly, cover it up, no one needs to know it's there.

Here is my cover up idea. This ribbon was a great match for the skirt and it was in the load of sewing stuff my mother-in-law gave me recently. (Big thanks to her!) I stitched the ribbon over the lace edge at the waistband. It covered the lumpy lace waistband and gave the skirt a nice pop of color that accented the flowers in the skirt.

The dress had a zipper that I cut in half when I cut the top off the dress. I zipped it down, and then cut it. I tucked the cut ends under and stitched them down when I stitched the lace waistband down. The ribbon covers it all.

That's all folks. I was done in no time.

I didn't want to waste the pretty lace top. But what could I do with it?
I decided to use the shoulder piece as straps to make a bralette. You know those cute bras that women wear under clothes when they know their bra straps might peak out. I used a zig-zag stitch to connect the straps to a very simple strapless bra.

The criss-cross straps in the back are cool nice too.

Thanks for reading along, now go make something fun for yourself.
 ***Year End update- I loved this skirt and shirt together. The top is perfect under low-cut things. All of these are winners to me.

Friday, July 5, 2019

Using Fabric Samples

Hello Readers. I have a very nice mother-in-law. She recently cleaned out her sewing room and sent a pile of sewing stuff to my house. She worked at a fabric store for years and had access to a lot of fabrics and trimmings. One thing she has given me a lot of is fabric sample squares.

 They are perfect squares with finished edges, 25 1/2 inches by 251/2 inches. I always thought they were too small for clothing but then I had an idea... shorts. It is hot, hot, hot where I live. I refuse to wear long pants in this heat if I don't have to.
 

They all have a cardboard tag on them with information about the fabric. The tag is stapled on so I removed it and I had some nice linen to work with.

I used my favorite shorts pattern and cut out my shorts. It was a tight fit.

 They were easy to put together. I made sure to finish the inside seams because linen will fray like crazy. I added elastic to the waist. The edge of the waistband was finished at the factory so I left it as it was.

The shorts fit and I am hoping linen will keep me cool in this heat. 

I said I had a lot of fabric samples right. I liked this striped canvas a lot. It looked very summery. It was too heavy for clothes so I made it into a summer tote. I have a 4 year so I often carry my things and his toys, drinks, snacks....

I cut the original square into 4 smaller squares. 

 I put all 4 squares on top of each other and sewed some bias tape around 3 sides connecting them all.

 The top edges were all finished at the factory so I left them as they were. They won't fray.

My bag has 3 sections. (It will probably be 1 for me and 2 for the little guy.)

I turned the bag right-side out.  Now the bias tape is inside and will keep the bag from fraying inside and looking messy.

 My bag needs a handle. I found this burlap ribbon in a bin from my sweet mother-in-law. It matched the gray stripe in the fabric. And it was just long enough for to make a shoulder strap. 

 I am hoping the 3 sections will keep me organized. I don't make any guarantees, but it can't hurt to try right?

The bag and shorts were great for going to the auto repair center to pick up my car. It wasn't very exciting but everyone does boring errands.

Thanks for reading along, now go make something fun for yourself.
 ***Year End update-I used this bag all summer. It was light and roomy. The shorts were fabulous too. They are both favorites for sure.

Wednesday, July 3, 2019

Cropped Wide Leg Pants

Hello Readers. I have seen a lot of cropped wide leg pants lately and I really wanted to make some for myself. I had a great pair of dress pants that my daughter didn't want anymore. The legs were wide and loose and perfect for this idea.

 I thought I could make these long dress pants into the cropped pants I was looking for. I also had a puke green blouse that needed to fit me a little better. (Am I the only person that likes this color? It's weird but I like this color a lot.)

The blouse had a button closure in the back. I don't really know why it was there because the neckline was so big and wide. The button opening seemed unnecessary. Originally I was going to move the button over to make the shirt smaller but it looked really lopsided.I needed a new idea.

I decided to make a new seam down the back of the shirt. It was the fastest way to take the shirt in a couple inches. I can still pull it over my head easily.

I also took some fabric off the sides and made new side seams. I didn't alter the shoulder ruffles. I really liked those ruffled shoulders, they were the best part of the shirt.

The pants were easier than I thought they would be. I just took a little out of the waist and hips to make them more fitted. I left the rest of the leg baggy so I would get the wide-leg look I wanted. I cut a lot off the length because I am short and I wanted these pants to be even shorter. I gave them a new hem and I was all done.

I was happy with my new super-comfortable cropped pants and they were so easy to make. I think I want another pair ASAP.

Thanks for reading along, now go make something fun for yourself.
***Year End update-  I loved these pants. I still love them. They were great in the summer heat and I just liked wearing them.