Saturday, March 4, 2023

Using A Coffee Table For Storage

 Hello Readers. Storage is always in short supply at my house. Maybe it is at yours too? I have never heard anyone say that they had too much storage. I was having a problem with toy storage in my family room. I wasn't sure where I could put more toys/kid stuff but I found a way to "make" more space for toy storage with different furniture.

Before and after.

This is the mad chaos we were dealing with everyday. Lego blocks were everywhere! Everyday! There had to be a better way but where could I put them all so that they would be accessible to the kids but out of my walking path? We tried a big toy box but that just got dumped out all over the floor.

I was out for a walk and saw this. (It is actually my neighbors trash.) When I saw that table I had the idea to use it in my family room as a coffee table/Lego table. First I had to get it home. It weighed approximately 300lbs. At least it seemed that way to me. Seriously, it was super heavy. I took it home and gave it a good cleaning. Then I brought it inside.

We picked up all the Lego blocks and I vacuumed. 
 
I measured the shelf under the table so I knew the space I had to work with. I found some cloth bins. I thought cloth would be light weight for kids to move around. But really any bins would work, I just needed something to hold all the Lego bricks. They would hold any kind of toys so whatever you have can go in there. (Barbies, baby toys, games, puzzles, whatever you or your kids are into, just put it all in bins so you don't have to see it.)
 
Will it always be this neat and tidy? Maybe not but now we have a way to clean up and if we have company over we can make the room look more welcoming. In a small space, you have to use every inch and this table with a lower shelf gave me some extra space to use for storage. I wish I had thought of this sooner.

If we had people over for a gathering I can use this table for my guests. It can look like a family room and not a Lego toy explosion. Thanks for reading along, happy organizing to you!

***Year End Update- This was a good solution for a while but my family is a little obsessed with Lego builds and we outgrew this table storage. This would be great for other toy or game storage, we are just hoarding to many Lego blocks for this. New table set up is in the works.


Friday, March 3, 2023

Fixing a Bleach Accident

 Hello Readers. Do you ever bleach clothes that should never be bleached? That's exactly what I did. Oops!

 
Before and after.
 
I put this jacket and flannel shirt together over a year ago and I loved it. Unfortunately, it had a terrible accident. And it was all my own fault.
 
I put it in the washer with a load of towels and added bleach, not realizing until too late that the new shirt was in the wash too.
 
I was very disappointed. I loved the gray and white plaid flannel shirt/jacket. There was no way to put the gray plaid back on the shirt. The plain white looked awful and really bland.

I had an idea to make the shirt look better. My old friend Rit Dye. (Not an ad. They do not know me.)

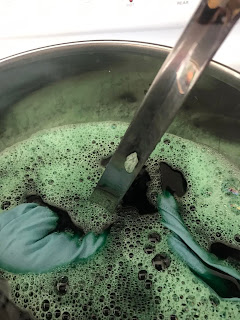
I mixed up the dye on my stove as directed. I stirred it around to get the dye evenly applied. 
 
When 30 minutes had passed it looked like this. 
 
I picked green because I like green and it's perfect for St. Patrick's Day this month. I hope your St, Patrick's Day is full of fun shenanigans.
 
 It also works with my Yoda shirt. Thanks for reading along, now go make something fun and green for yourself. 

***Year End Update- I love green so this was a winner for me. I did feel a little like a gym teacher in this outfit though.


Wednesday, March 1, 2023

Green Sweater Combo

 Hello Readers. I love the color green Is it because I am Irish? Is it because I have green eyes? I'm not really sure.

Before and after. I really like green.
 
This bright green sweater was fine. Not much to say about it it was just OK.
 
This green shirt had a lace panel in the front that was really worn out. The fabric of the shirt was OK but the lace was done. I decided to use the sleeves from this shirt.The sleeves were designed and sewn at an angle like a raglan style shirt. 

The sweater sleeves were also designed at an angle, like a raglan shirt. I decided to follow the angle on both shirts and put them together.

I put the right sides together and sewed with a zigzag stitch to keep the sweater from fraying.

That was it! I had a new green sweater. I liked the new sleeves, they add some fun to the sweater. Thanks for reading along, now go make something fun for yourself.

***Year End Update- This sweater is great because I love green and the sleeve add a little break in the color.


Saturday, February 25, 2023

Hiding Entryway Clutter

 Hello Readers. My family always seem to have so much clutter by the front door. The items we take to work and out to run errands collect and maybe even multiply. The bits & pieces and odds & ends always look messy and I can't ever seem to keep it straightened out. I decided I needed to hide it, but it still had to be accessible. We still go out of the house everyday. How could I hide things and keep them ready to grab? 

 Before and after.

Here is a look at our mess. I thought the shelf would give enough space for keys and gloves and whatever else but a lot more is collecting on these shelves. 
 
We sorted out all the items we didn't need and that helped a little. I thought these bins would help contain the mess and it would be easy to grab what we needed. They had a simple clean design and seemed to hold and hide a lot. It was getting much better but it was still right in my line of vision.

Close up look at the bin. Do we need all of this? I guess we do.
 
I decided to attach a mirror to the front of the shelves. Now I wouldn't have to see the clutter at all. I found the mirror at Walmart and it was only $7. It seemed perfect for the job of hiding my mess.
 
I used these Command strips to hang the mirror onto the shelf. They were made to hang pictures but I thought it would work for my project. The mirror was very lightweight.
 
I attached the strips on the front of the shelves. I used some extra strips to make sure it would stay strong over time.

The mirror hides it all from my view and it also bounces the light around the rooms very nicely also. I liked the effect. Thanks for reading along, happy organizing to you.

***Year End Update- I think this is the best thing I have made. It hides my husbands clutter and made me less stressed. Win-win!


Friday, February 24, 2023

Red Plaid Dress

 Hello Readers. I hope you like red plaid because I have a lot of it here to show you. This dress was at a clothes swap and it was really eye catching. It was a lot of plaid though. Like, a lot of plaid. Like too much plaid for me.

 
Before and after and after.
 
I had to give this dress some thought. I liked the colors but the style was giving me 1980's home school mom vibes. (I do home school but not in dresses like this.)

I knew the dress had to be shorter but now it was giving my school uniform vibes. I didn't like that at all.

I thought if I added the second plaid pattern by wearing this shirt under the dress, it would help. It did help a little but I wasn't in love with this look.

I decided to really put the shirt and dress together. I cut the shoulders off both the shirt and the dress. 

I literally put them together.

I liked this a whole lot more.

The bottom of the long plaid dress was a great scarf. Thanks for reading along, now go make something fun for yourself. 

***Year End Update- Y'all. I liked this but I can't find it. Where did it go? I have 3 kids and a husband so maybe it got misplaced in the laundry? I will wear it again if I can find it.


Wednesday, February 22, 2023

Crochet Blanket to Skirt and Top

 Hello Readers. The last swap I went to had a small pile of blankets that someone somewhere took the time to crochet. No one wanted them so I took them home with me. I do not know how to crochet but I had been wanting to make some clothes from blankets like these for a while. I have made a shrug and some cozy lounge wear already. Today's post is about a skirt and top.

Before and after.

This blanket had such a fresh spring feeling to it. And I loved the blue and white. It was also a fairly tight knit so it was not as see through as some crochet blankets can be. This tighter weave was going to be easier to sew and it wouldn't be see through when I wore it. I was off to such a great start. 

I used a hoodie as a size guide to cut out a loose tunic style top. 

I cut out my sweater top and stitched the sides together and then cut an oval neck hole at the top.

I used some blue bias tape to close up the neck hole.
 
  The blue matched well but after I sewed the bias tape around the neck, I turned it under and stitched it down so that only the sweater material would show.
 
 I originally thought I would just make the top but when I really looked at the scraps I knew I could make something else. 

I did some measuring and I knew I would need 3 of these pieces to fit around my hips. 

 
I used bias tape to connect the pieces. I thought it would make strong seams inside the skirt.
 
I made a simple elastic waistband. 
 
I started to second guess my decisions here. I wasn't sure I liked it when it was on the dress form.
 
I really liked it when I put it on.
 
The sweater is fine by itself too. But I really like the 2 pieces together the best. Thanks for reading along, now go make something fun for yourself.

***Year End Update- I love this sweater and skirt but it is only good for warm weather. It will come back out in spring.


Friday, February 17, 2023

Refashioning Vintage Polyester

 Hello Readers. It took about 3 years but I finally decided what I wanted to do with this vintage polyester dress. It takes me a while to get my thoughts together sometimes. This dress is a pretty blue but the top and sleeves are very scratchy on the skin. I put off refashioning it because it was so uncomfortable to wear. Then it finally became clear....just cut off the itchy sleeves. It could be sleeveless. Duh! So, let's go.

Before and after.

This dress was so long on me. It would need a cut in length for sure 

I put the dress on my dress form inside out. I started marking where I was going to cut the dress. 

I cut the sleeves off at an angle so I could have a halter look. I also cut the skirt into a much shorter length.

I turned the edges under and stitched the fabric down. I also turned the hem under and stitched it down. 

I liked the new sleeveless look and the length was much better. Now, I had to style it. I wasn't sure what I should do.
 
Should I wear black with it? Black always works.
 
Or maybe neutrals would be a good idea? I like neutrals.
 
Casual style with white sneakers and a hoodie? What do you think? Thanks for reading along, now go make something fun for yourself.

***Year End Update- I love the color of this dress but the feel of the polyester was not the best. I haven't worn it again.