Showing posts with label Pattern Review. Show all posts

Tuesday, May 5, 2026

Sewing Summer Shorts

 Hello Readers. It is "Me-Made-May". That just means people are wearing and sharing their self made clothes on social media. It has inspired me to sew some new items for myself. I have had this Simplicity Super Saver 8035 pattern for ages. I decided to try the shorts pattern with some blue fabric I had on-hand. Summer is coming and shorts would be handy to have.  

 New shorts for summer.

I cut out the pattern pieces. It seemed simple, there were not many pieces and shorts are not complicated, right?? Spoiler, It wasn't as easy as it should have been. Let me share my experience and ideas. 

I sewed my pockets together first. This was a mistake. I was supposed to sew one piece of the pocket to a front piece of the shorts and one pocket piece to a back piece of the shorts. Then I was supposed to sew the shorts together. At least I think that is what I was supposed to do, I found these directions very vague and the pictures not very helpful either. Even though this project is simple, this pattern might not be the best for a beginner. 

I sewed one piece of pocket to one front piece of shorts, then sewed one back piece of pocket to one piece of shorts. Then I sewed the pocket together. This wasn't quite what the directions told me to do but I was just trying my best at this point. 
 
I ended up with half a pair of shorts. This picture is of one side of my new shorts with the pocket sewed in place. I ironed all the seams with my iron so the seams would be flat and smooth. I did the same process for the second half of the shorts. When I had a complete right half and a complete left half, I could sew them together and I would have a full pair of shorts. 
 
I sewed all the pieces together with my serger because this was linen and linen frays easily. Here is a look at my shorts from the inside. Did I sew my pockets inside out? Yes, but let's just ignore that. No one is going to see that, and no one will ever know. Shh, don't tell. 
 
I turned the top edge down to make the waistband. 
 
I sewed the waistband casing from the outside to make sure my stitches would be very neat. My bobbin stitches can be wonky sometimes. The pattern called for elastic to be put through the finished casing. OK, let's do it. I left a small opening in the casing for the elastic as directed. 
 
When elastic is fished through the waistband, it gathers the waistband together and that will make the shorts fit around my waist. I finished the elastic and connected the ends together as directed by the pattern and closed the opening in the casing. This was easy enough.
   
I turned the bottom edge of the shorts leg under and sewed the hem of each leg. The hems looked nice and neat. That was what I wanted. This pattern was long enough to choose what length of shorts I wanted, if you want long-ish shorts, this pattern would be good for that.
 
 I used matching thread  (Similar here.) to get a nice neat look to my seams. Sometimes contrasting thread looks nice too but I wanted the thread to match and blend in for these shorts. 
 
 These shorts were fun and I was pleased with how they turned out. This was not a great pattern for a first sewing project but it is simple enough for someone who has sewn a little and ha some sewing knowledge already. Thanks for reading along, now go make something fun for yourself. 


Monday, May 13, 2024

Orange Week Part 4

 Hello Readers. If you like the color orange, this past weeks posts are for you! I love orange and it showed in the past week. 

New orange dress!

I found this fabric at the thrift store. It was covered with oranges. I like orange and it was only a few dollars. I was sold.

I wanted to make a loose comfortable summer dress. I had this pattern McCall's pattern that actually said "EASY" across the front. It is Stitch 'n Save by McCall's #8026. I wanted to make the sleeveless version of the dress.
 
 There were 2 bodice pieces and 2 skirt pieces. I cut them out and clipped them together. It was very easy to figure out how to put the pieces together. These clips helped keep the bodice and the skirt together for sewing. 

I used my serger to join all the pieces. It makes really neat seams inside the clothes. 

The basics were put together. The only deviation from the pattern is in the back. I made the waist ties much wider than the pattern called for. I just thought it would be fun. I needed to finish the arm holes, the neck hole, and the hem. 

I used bias tape to finish the armholes and neckline. I sewed the bias tape to the right side of the fabric.

Then I turned the edge in and stitched it down. The bias tape is hidden and the edges look nicely finished. 

This seemed a little too long. I used a pencil to mark where my new hem should be. 

The shorter length was going to be perfect for a hot summer day. Thanks for reading along, now go make something fun for yourself. 

***Year End Update***- This dress is loose and shapeless and I LOVE it. It's fun to wear and great in the heat.


Wednesday, May 8, 2024

Orange Week Part 2

 Hello Readers. I really went wild for the color orange and made a top to go with my orange pants. I found this orange fabric at a thrift store months ago and it looked so fun and summery. Let's make a orange top. 

You can't have too much orange, right? I hope not because I had a good amount of this fabric.

I wanted a simple shirt and this pattern was perfect. The orange fabric is the star of the show here. I chose the pink top on the front of the pattern. This is Very Easy, Very Vogue 8062. (Spoiler- It was very easy.)

I cut out all my pieces and adjusted the length of the top by folding the paper pattern piece. 

I put the neck facings in place with clips. 

I used my serger to put all the pieces together. This was a fast sewing project. 

I turned the ends of the sleeves under and sewed a basic hem and I did the same with the hemline. 

This orange shirt was perfect for my orange pants, and it is so fun. And I still have some orange fabric left to make something else. Thanks for reading along, now go make something fun for yourself. 

***Year End Update***- i can't be down with these fun clothes!


Wednesday, August 3, 2022

Collage Top Pattern Review

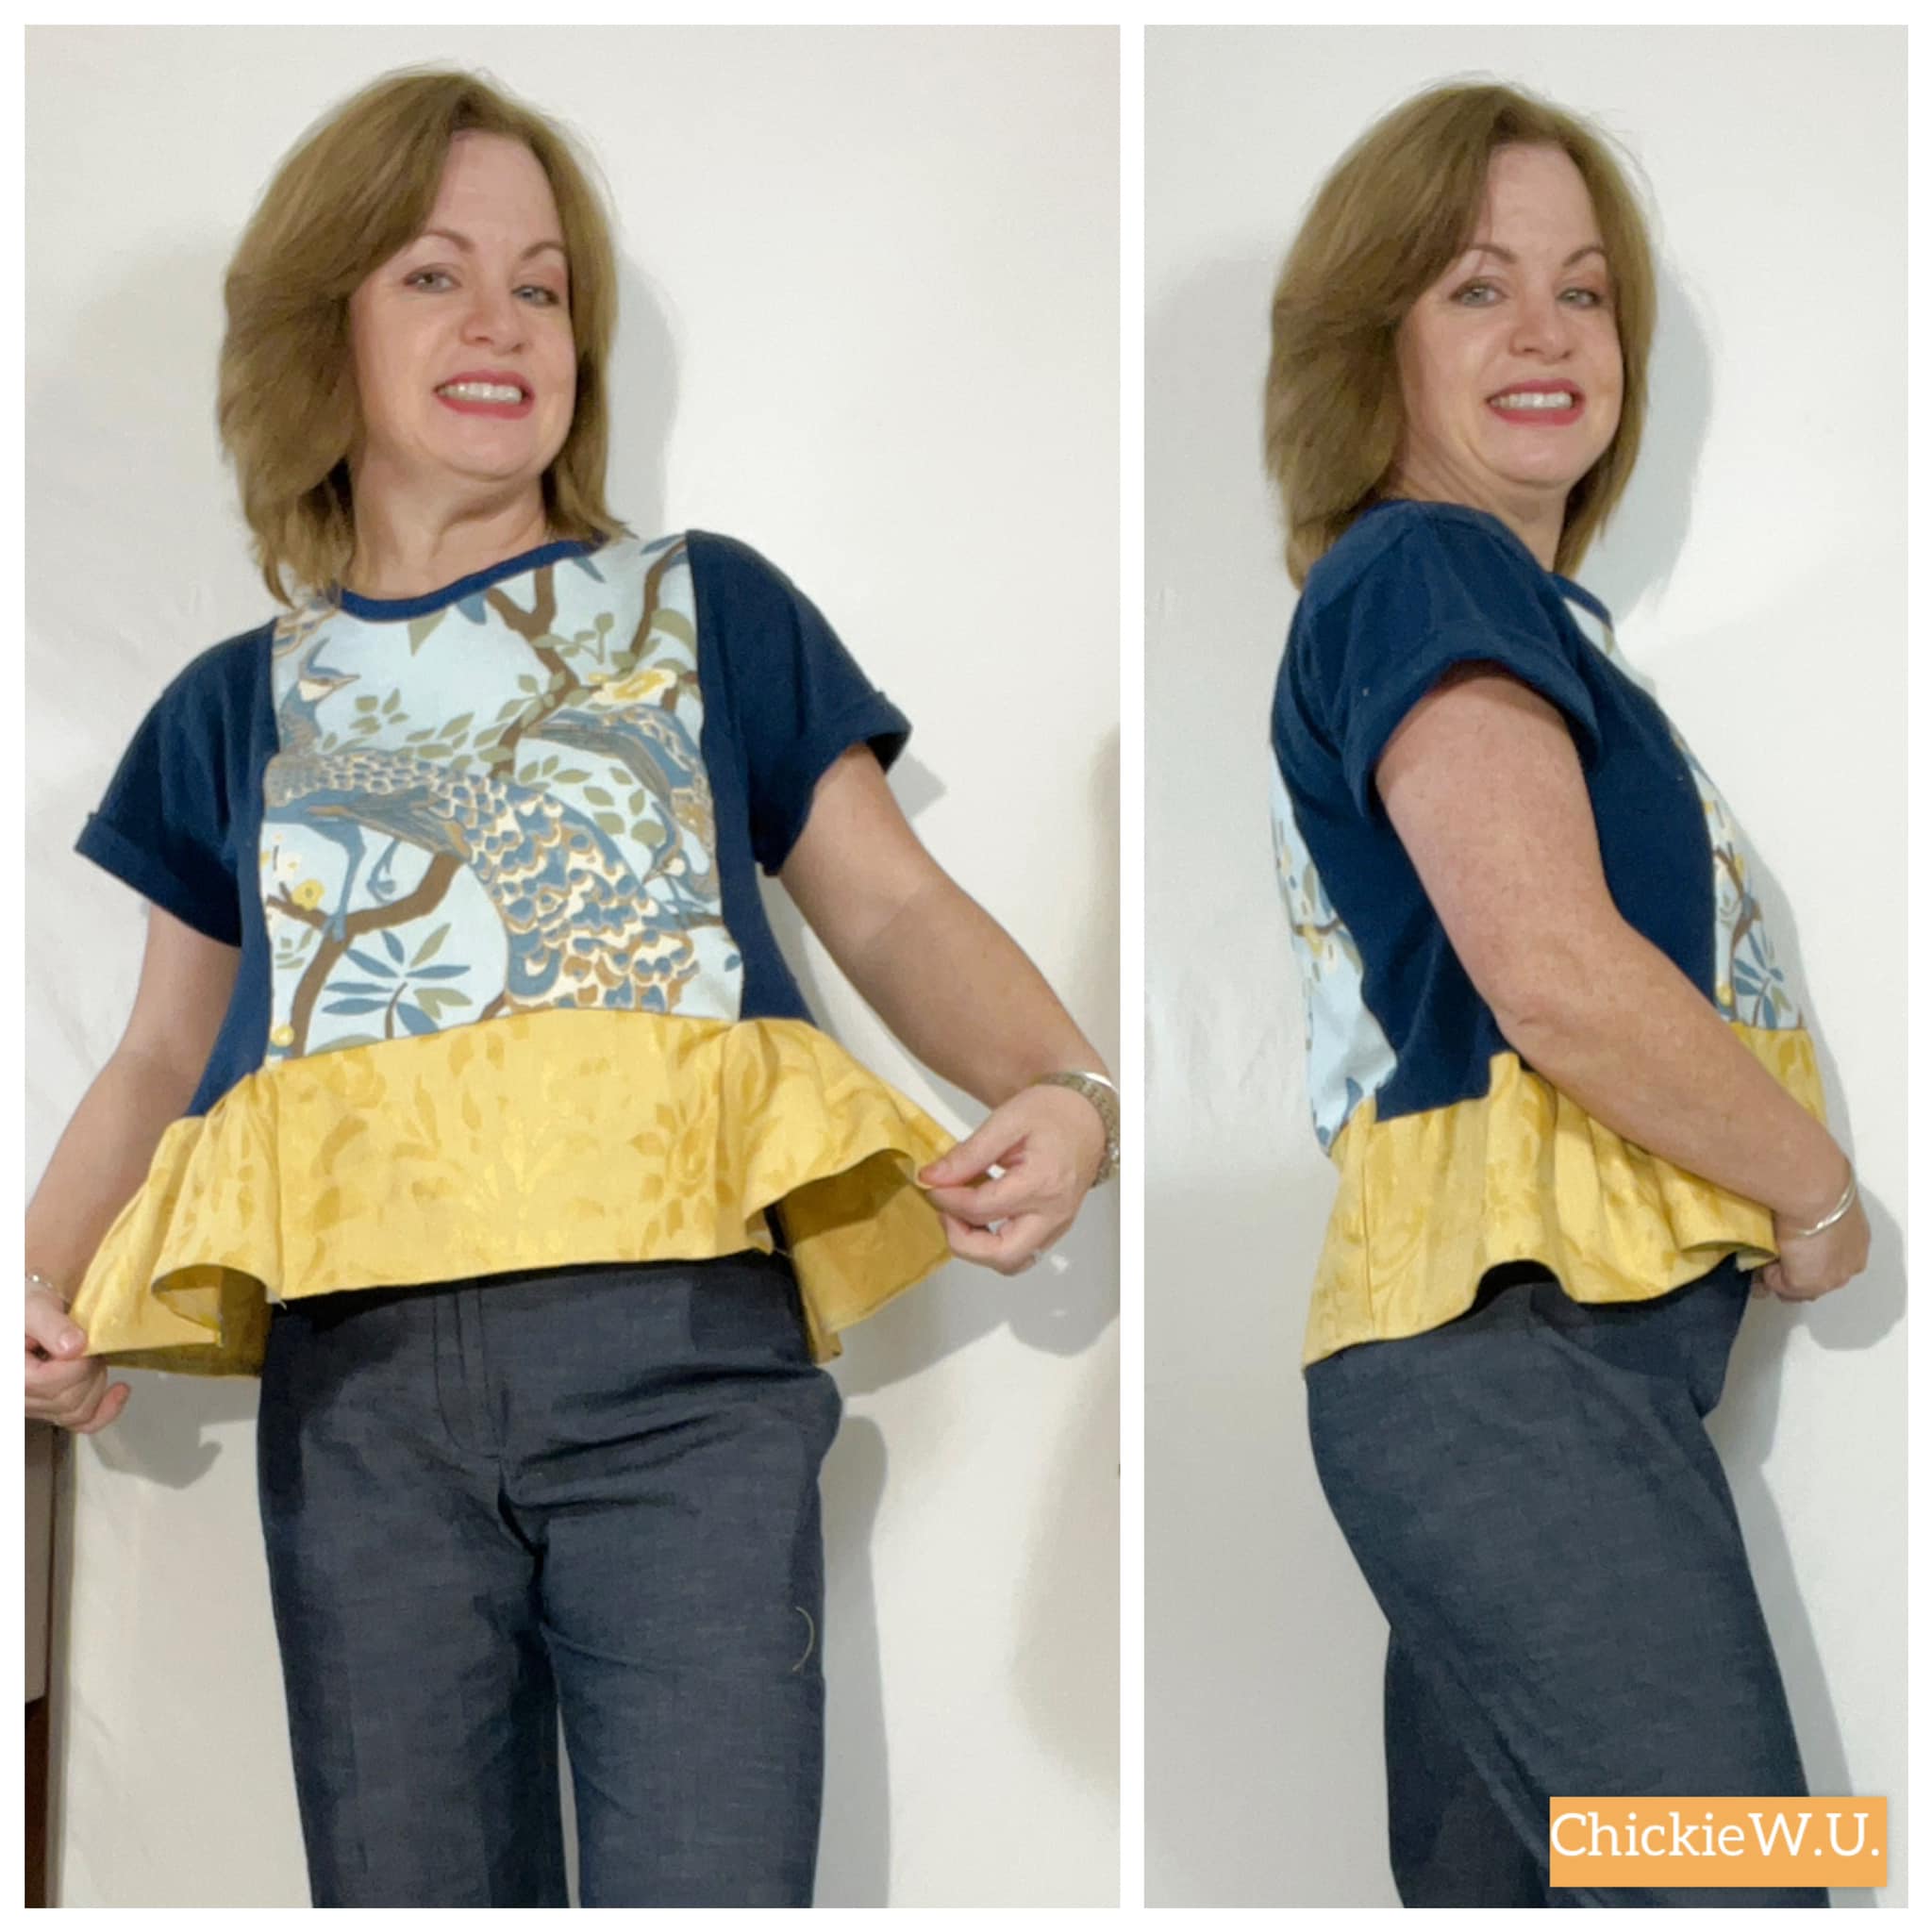
 Hello Readers. I recently tried out the new Collage Gather Top pattern from Matchy Matchy Sew Club. I really liked it so let me tell you all about it.

 I made 3 of them. Yes, I really liked it.

When I saw the new Collage Gather Top pattern online I decided to get it. I am really glad I did because it turned out so cute and it's such a great scrap buster too. 
 
I printed the pattern out on my printer, cut it out and put it together. This I was the hardest part for me, but it is nice because I didn't have to go to the store. I could print and cut this out at 11pm.
 
I used fabric samples from my mother-in-law, a stained dress, a "grandma" shirt, my husband's old shirt, tight linen pants, and scraps from a navy blue t-shirt. And maybe one or two other fabrics that I can't remember. It's great to use up pieces that are too small to make a whole garment.
 
This pattern has separate pieces for the center front, center back and multiple shoulder and side pieces. The multiple separate pieces allow you to use lots of different fabrics and mix them up. We all have small pieces that we want to use. I know I have tons of different small pieces in my stash. 
 
The shirt can have long sleeves or very short sleeves that are part of the shoulder pieces. Since it is summer and the world is on fire I decided to make short sleeves.

There are also lower pieces. They make a sort of peplum on the sides. They can also use up even more coordinating pieces from your fabric stash.

I liked this top so much that I made 3 of them. I couldn't stop. I had fun putting different fabrics together.
 
I think this one is my favorite. It has rayon center panels and lace sides, the drape was really pretty.
 

 The heavier weight fabrics would be great for cooler weather too. Thanks for reading along, now go make something fun for yourself. 
*Year End Note From Chickie- This was such a great pattern. The different pieces made it fun to combine fabrics. The heavier linen I chose was too heavy for a shirt, I recommend lighter weight fabrics for this one.