Wednesday, July 10, 2024

Shorts

 Hello Readers. It is summer and hotter than the devils backside. Let's make some shorts. Let's make some fun shorts from these wild colorful pants.

Before and after.

I used chalk and marked where I wanted the hem of the shorts to be. 

I cut the shorts about an inch under the mark I made. I need the extra fabric to fold under and sew. 

I used my sewing machine to make the new hem. I turned the cut edge under twice and stitched it down.
 
My shorts ready to wear. I liked this wild fabric but I like it more when there is less of it. 
 
I also made these brown shorts and used all the same steps. Thanks for reading along, now go make something fun for yourself.
 ***Year End Update***- It gets super hot and humid where I live and shorts are required. I love both of these.


Tuesday, July 9, 2024

Lengthen Your Shorts

 Hello Readers. It's is summertime and that means shorts. At least for me. It is really hot and humid where I live and I need to try and stay cool. What can you do if your favorite shorts are a bit short? Maybe they would be better if they were just a bit longer. We can fix that.

Let's lengthen these shorts!

These shorts are fine but they feel like they might have gotten shorter when I ashed them. They are a little short for me. I wanted to make them a bit longer. 

I unpicked the stitches at the hemline of the shorts. This was where I am going to find some extra length. The hem was folded under twice so, I didn't know exactly how much fabric was inside this folded up hem but I knew there was some fabric in the hem that I could use. 
 
I let all the fabric out and ironed it to make it straight and flat. This will help me really see how much fabric I have to work with. 

The edge was fraying so I needed to address that. I used my serger along the edge to control that fraying. Sewing with a zigzag stitch along the edge would also control this fraying. Once the fraying was under control, I could make a new neat hem. 

I turned the new hem under once and sewed the new hem in place. The edge is visible on the inside but it won't fray because I surged the edge. 

Here is the new longer shorts. The shorts are a little longer now. This will give me a little more leg coverage. 

Here is a close up of the new hemline. You can see the old hem marks above it. The old hem marks will get less noticeable over time and in the wash.

This was a quick sewing project and did not change the original look of the shorts, I just changed the length. Thanks for reading along, now go make something fun for yourself. 

***Year End Update***- The extra length added just enough coverage. And I love the jacket with this outfit too.


Wednesday, July 3, 2024

Simplify Shirt & Shorten Sleeves

 Hello Readers.When I find linen items at the thrift store I try to get them because I love the way linen feels. It breathes and feels cool in the heat. We have hit the hot summer weather where I live. I am in a "heat dome". That means we are baking around here. Let's refashion some linen.

Before and after.

This was a nice white shirt but it had these 2 front panels that didn't serve a purpose. I don't know why they are there. They are not a pocket. They just kind of hang there and they flap around when I walk. I didn't like them at all. They seem to add bulk to my stomach which is weird to me. I like to eat cookies so I can add bulk to my stomach all on my own. The sleeves were also too long on me. I would need to fix that too. 
 
I cut the flaps off with sharp sewing scissors. They just didn't work for me. 
 
The flaps were gone! 
 
I cut as close to the seam as I could. I trimmed the bits and pieces. To make it look as neat as possible. It would fray a little in the wash. I needed to do something to keep it looking nice.
 
I had this lace (Similar.) in my stash of sewing stuff. It would work well and look cute.
 
I stitched the lace over the cut parts. 
 
The lace covers where I cut the shirt. And sewing the lace on top of the shirt like this will prevent any fraying.
 
I cut the sleeves to a shorter length. It is summer. It is hot. Let's go with short sleeves. I cut the sleeves much shorter. 

I turned the cut edge under twice and sewed the end down. This made a nice neat sleeve.
 
Everything turned out really well, I was really happy. And then...
 
I got mustard on my brand new shirt. That's life. Thanks for reading along, now go make something fun for yourself.
 ***Year End Update***- I got the mustard stain out of the shirt and wore it through summer.


Tuesday, July 2, 2024

Transform a Chandelier

 Hello Readers. My neighborhood has a habit of leaving items at the end of their driveways for neighbors to take if they want. I love it. I found a ceiling medallion on one of my daily walks and brought it home. I thought I could use it to transform my plain kitchen light into a fun focal point. 

Before and after.

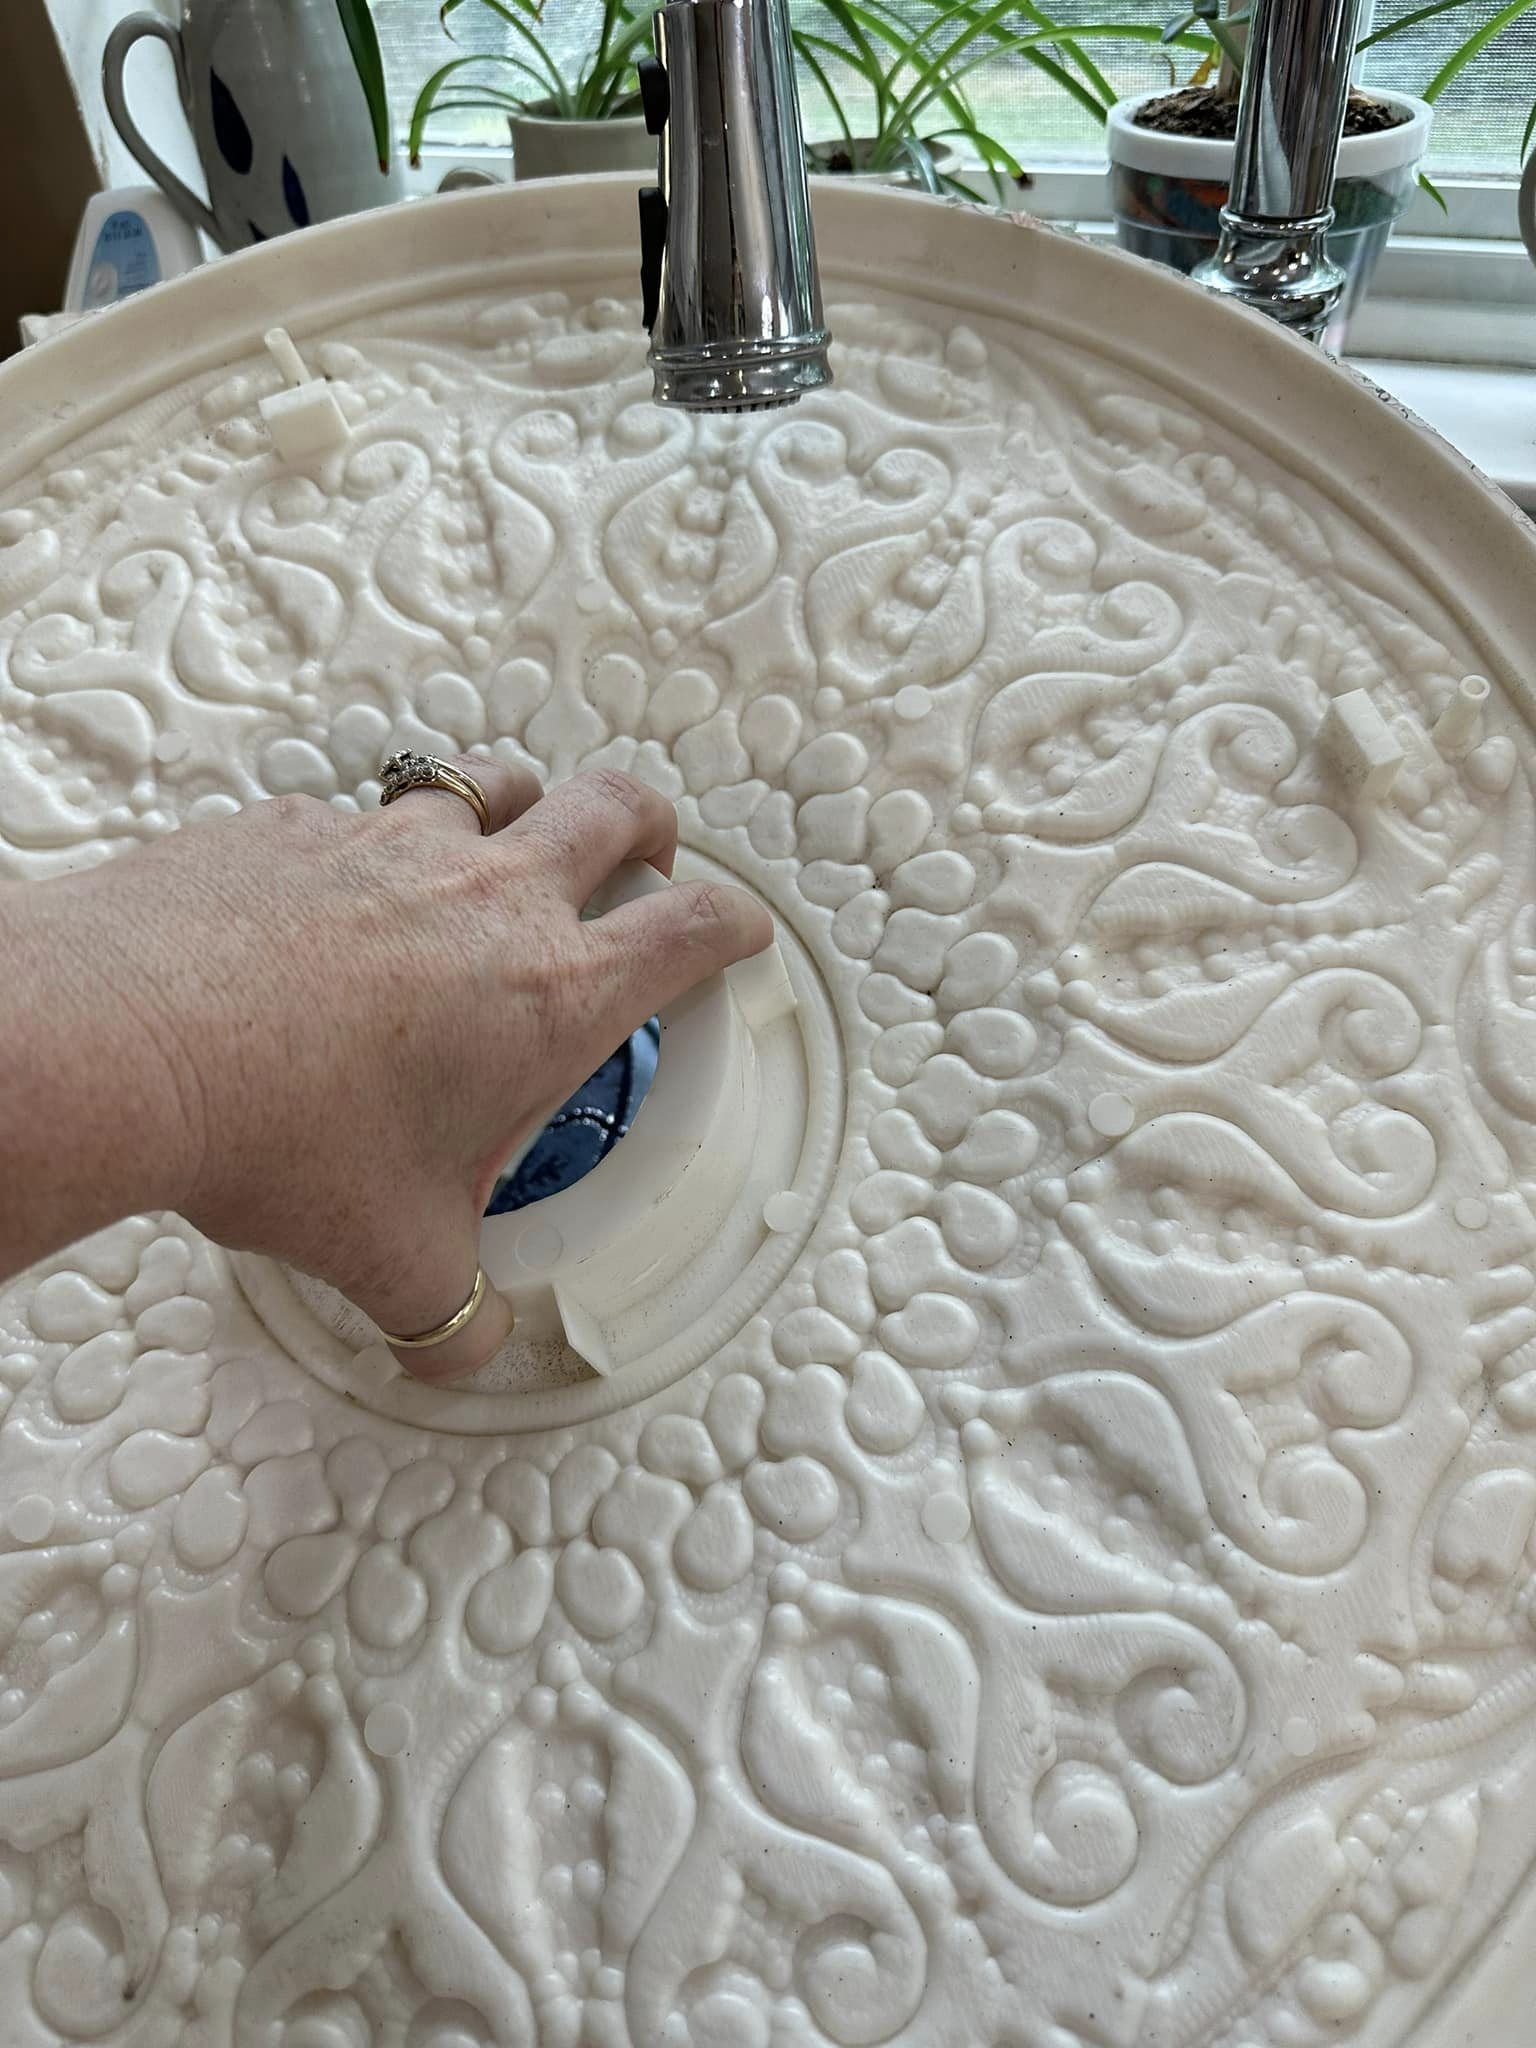
I thought it would be a fun idea to add a ceiling medallion to my chandelier. It would look fabulous. I cleaned my medallion well with detergent to remove any dirt or grime. I made sure it was thoroughly dry. I knew I wanted to paint it and this cleaning would help the paint adhere to the medallion.

As I said I got my medallion from a neighbor. It was aged and yellowed. It needed some TLC.  It was plastic so I used some acrylic paint to make it white again. My chandelier was white so I thought my medallion should be white as well. You can buy these medallions new from hardware/lighting stores and also from Amazon.

I painted the front of the medallion all over and wiggled the paint brush to get the bristles into the little crevices. I really wanted to cover all the yellow. This took a while but it was not difficult. I let it dry over night.

I shut off the electricity and had a handy men take the chandelier down. The chandelier had to come down from the ceiling to put the medallion up. Once I had it all in front of me like this I had a thought... Why was I sticking with white? I could do any color I wanted.

I decided to start over and go for something dramatic. I bought some glossy "Real Blue" acrylic paint.

Because the chandelier was disconnected from the electricity, I start by cleaning the chandelier. It was dirty and dusty. Paint would never stick to it like this. I cleaned it up and let it dry over night. Paint wouldn't stick well to if it was wet. 

I took the light bulbs out and wrapped plastic wrap around the "candles" of the chandelier. I didn't want to paint them blue. The plastic wrap stayed on pretty well and it would keep the candle parts white.

I started painting again. I painted the medallion again and made sure to wiggle the paint brush so the bristles would get into all the small spaces. I let the paint dry over night again.

The white was a little difficult to hide with the blue paint. It just didn't want to disappear. It took 3 full coats of paint to paint the medallion blue. I made sure to let it dry in between coats of paint.

I started painting the chandelier with the same glossy blue paint that I had used on the medallion. I set the chandelier upside down on newspapers and just started painting. I worked my way around the different sections and let it dry over night. It took 3 coats of paint to cover the white paint on the chandelier as well. 

I had to go back and touch up some spots that I missed. 

I made sure the electricity was shut off and I had a handy man hang everything up for me. The medallion went up first. It was very light weight plastic. The wiring came out through the center of the medallion to connect to the chandelier. 
 
I noticed some places that needed to be touched up during the hanging process. 

I kept the electricity off and I was able to touch up those spots after it was hung back up. I let it dry as it was hanging there. No one touched it so it was fine.

It turned out really well. I liked the pop of the bold blue color in my kitchen dining area. It was a fun addition to the room. There was already a lot of blue, which is why I chose that color. Adding the medallion along with the bold paint color gives it more visual impact.
 
I really like blue but you can choose any color you like. Thanks for reading along, now go make something fun for yourself. 
***Year End Update***- I love this light fixture! It turned out great.


Thursday, June 27, 2024

Overall Oops

 Hello Readers. I thought I had a great idea. I thought I could turn this dress into loose over-sized overalls. Mistakes were made. And my plan fell apart. Life is like that sometimes.

Oops!

I really thought this was going to be an easy refashion project. I was really wrong. 
 
I folded the dress in half and cut out the middle to make the legs of my new overalls.
 
I cut the dress so that there were 2 legs. This was going to be very big and so baggy that I couldn't possibly mess this up. But everyone makes mistakes and I was about to be humbled.
 
But I cut the body much too short. Even with the adjustable straps, I couldn't get my upper body into this. It was a disaster.
 
Could I cut the top off and make lounge pants?
 
No. No, I could not. This was not a good sewing day for me. Let's just quit now. Thanks for reading along, now go make something fun for yourself. 
***Year End Update***- This was such a disaster. I was never able to fix these.