Monday, December 19, 2022

Easy Fabric Ornaments

 Hello Readers. It is Christmas time and that might mean decorating a tree with ornaments. I had an idea to make ornaments using fabric and small embroidery hoops. I thought this would be a great way to save a piece of fabric or scrap from a sentimental sewing project. 

These ornaments were quick and easy to put together. They also gave me a way to use these little embroidery pieces.
 
 I got my embroidery pieces from a failed sewing project but you could use almost anything. Scraps from a wedding or christening gown. A piece of a favorite baby blanket. The character from a t-shirt your child loved but outgrew. Anything you like.
 
When you place the piece of fabric between the 2 pieces of the embroidery hoop and tighten the screw on top the fabric will be very secure and will not come out unless you loosen the screw. There will be a lot of excess fabric sticking out in the back though.
 
You can use scissors to trim that excess off. Cut as close the the embroidery hoop as you can to remove as much excess as possible. 

The back of my ornament looked OK but if you want to hide the back of your fabric you can glue on a piece of felt. Felt doesn't fray so it will be great as a backing.

Trace around the embroidery hoop so you can cut out a circle that is exactly the right size for your hoop. .
Grab some fabric or craft glue to attach your felt circle.

Put glue on the back, all the way around the hoop. 

Press the felt in place so it really gets adhered to the hoop. I let my ornaments dry over night.

The felt gives the ornament a very clean look in the back but you can skip this step if you don't think it is necessary for your ornament. 

When I bought my little wooden hoops I saw this brightly colored plastic hoop. 

I thought this would be a fun kid project. I let my son put an ornament together using basically the same method. He liked this Santa fabric scrap. He was able to put the fabric in and cut off the excess. I made sure the screw was tightened and would keep the fabric in place for him before he started cutting.

This ornament turned out cute and he was very happy with it. 

I hope you can make an ornament using this idea and I wish you very Happy Holidays.
*Year End Note From Chickie- These are still on the tree and I will pack them away after the holiday season is over.


Wednesday, December 14, 2022

Dressember #4- Plaid Overload

 Hello Readers. This is the fourth dress I am refashioning this month in honor of Dressember. Dressember is a style challenge and a fund raiser all in one. We were dresses or ties all month to raise awareness and money to fight human trafficking and assist survivors. Dressember estimated that 50 million people were living in human trafficking situations in 2021. Go to dressember.org to learn more about how you can help. 

Let's talk about this dress. This flannel was really overwhelming. It was soft and cozy but the bright plaid was too much. 

 
Before and after.

This dress was not doing anything good for me. I think the tie in the back was to improve the shape of the dress and make it more flattering but even that tie couldn't fix this dress for me. 

I put the dress on my dress form inside out and pinned the sides to make the dress fit better. I cut the bottom of the dress shorter too. It really did not need to be floor length. 
 
I used my serger on the new side seams because you can see how the fabric was fraying.
 
I thought short sleeves would be easier on the eyes I wasn't sure about this look. But then I found something else.

I thought the dress had shoulder pads and I wanted to remove them. But they weren't actually shoulder pads. They were these little fabric pieces and the fabric was pleated and looked like a little ruffle. That gave me an idea. 
 
I cut the sleeves off and left about 1/4 of an inch in place. I turned it under and stitched it down to make a sleeveless dress. 
 
I pinned the little ruffles to the shoulders so they peeked out from under the dress. They were such a great detail and they were more interesting than the simple short sleeves were. 
 
This is such a big improvement over the beginning look. The green plaid with small lines of red is perfect for the Christmas season. Thanks for reading along, now go make something fun for yourself.
*Year End Note From Chickie- I love the plaid and the extra fabric from the skirt became a scarf.


Saturday, December 10, 2022

Making a Snack Center for Your Delivery Drivers

 It is the holiday season and one thing I like to do this time of year is make a snack center to say thank you for all my mail and package delivery people. I get a lot of mail and packages all year so this is a way to give a little treat to people who help me all year. It's really easy to set up. 

This table is on my front porch and all my packages are dropped off here. It is easy to see and easy to grab a snack and/or a drink when someone come by. 

My first step was to clean up the front porch a little. This is a very small porch but it can get dusty and leaves tend to collect in the corner. I swept it clean. 

I wiped the table down too. I wanted it nice and neat before I put out snacks. 

I also made a sign so that everyone would know what the snacks were sitting there for and feel welcome to take some things for themselves. 

I got this bin from Target. I choose it because it is plastic and won't get hurt if the weather is wet. Any bin or box is fine, use whatever you like. 

I bought a variety of snacks and drinks. I picked things that were nonperishable and already in packages so they would stay safe outside. I made sure there was some sweet stuff like candy and chocolate cookies in case someone wants a treat. I also picked some things like cheese and crackers and jerky in case someone doesn't want sweets. When these snacks are gone I will replace them with others... granola bars, dried fruit, chips and trail mix would all be great. I kept the drinks simple and put out water, tea and sports drinks.

I added a Christmas tea towel to make it festive but this isn't really necessary. I tried to set up the bin so it would be easy to see everything. I used a small box to hold the small snacks and keep them neat. 
 
I lined up all the drinks so they were visible. The candy canes wouldn't stand up so I put them in a little container of their own. A coffee mug or cup would work for this too.

I shifted things around until the other snacks fit in the big bin with the drinks.
 
I don't think the specific snacks or drinks matter very much use whatever you want to share with people. I just wanted it to be a thank you to for all my many packages through the year so I didn't worry too much about it. I bring the whole bin inside every evening so the drinks do not freeze solid and explode. I put it back on the porch in the morning. I hope your holidays are happy and wish you all best snacks and treats.
 *Year End Note From Chickie- Based on how fast the snacks and drinks are disappearing, this was a great idea.


Friday, December 9, 2022

Dressember #3- The Vest Dress

Hello Readers. I am trying to wear dresses (Or ties.) all month to raise money for Dressember and awareness about their work to fight human trafficking and forced labor. Fashion in general has serious problems with it's labor practices. The Dressember organization has taught me more about the problem. Go to Dressember.org to learn more about this global issue.

This black dress was simple and classic and the vest really appealed to me. I really wanted the vest by itself. I wasn't sure what the skirt would look like by itself, but I was curious.

Before and after and after.

I thought I could remove the vest easily and it would be really a great men's wear style layering piece.

I found the connection between the skirt and the vest and knew I could unpick those stitches and pull them apart. 

This is what the vest looked like inside when the skirt was taken out  I needed to put the vest back together. 

The vest had an inner layer/lining. I tucked that layer into what I am going to call the waistband. I just had to figure out how to make it look nice and neat. 

Here is a look at what I came up with. It seemed like the easiest way was using iron-on tape and ironing the vest lining into place.

I liked the vest by itself so much. The pink tie was perfect for Dressember.

The skirt was so well put together that it came out of the vest in great shape. It just needed a little finishing up at the waist.

I turned the edge under and stitched it down with my sewing machine and I did a little hand sewing and made sure the clasp was secure. 

This skirt was a fabulous classic midi length and I was so happy I was able to save it. I liked it just as much as the vest. I think these 2 separate pieces will be more useful and wearable on their own. Thanks for reading along, now go make something fun for yourself. 
*Year End Note From Chickie- I like both of these pieces. If I grow the vest won't fit anymore. The skirt has plenty of room though. Clothes are weird.


Wednesday, December 7, 2022

Dressember #2-The Sweater Skirt

 Hello Readers. It is super chilly out there and you might be thinking it's too cold for a dress or skirt. But if you wear snuggly warm fabrics you can stay cozy and warm all winter. Today I am focused on heavy sweaters. I found this striped sweaters at a clothes swap. Men's sweaters are great for refashion projects. 

Before and after.

This is a men's sweater and it is large on me. That gives me a little extra fabric to work with. You can find men's sweaters at clothes swaps and thrift stores. You can also cruise Amazon for men's sweaters. (Not a paid ad, just an idea.)

I cut the body of the skirt away from the shoulders and sleeves of the sweater. This will be my new skirt.

I had a plan to hem the cut edge and I describe that here. 

After I used my serger on the cut edge (White thread.) I turned it under and used a zigzag stitch (Purple thread.) to stitch the hem in place. It was a little bumpy and wonky so I ironed it smooth.

I loved the new skirt. The waistband of the sweater was a perfect soft stretchy waistband for my skirt. 

I am not done with this sweater. I also cut the sleeves off. I had an idea for those too.

I was going to make mittens from those sleeves. The wrist cuff would still be the wrist cuff but my hand would be inside the sleeve. I traced (With 1/2" extra room around my hands.) my hands with chalk and cut out the mitten shapes. I cut 2 mitten shapes for each hand.

I used my serger to close up the cut edges. I stitched with the mittens inside out and then when I was done sewing I flipped them right side out and they were ready to wear. 

There was enough material at the neckline to make a kid pair of mittens too. I cut and stitched them together the same way.

Did my youngest like his homemade mittens? He really did! And they were nice for walking on a cold windy day. Thanks for reading along, now go make something fun for yourself.
*Year End Note From Chickie- It's only been a few weeks but I can't waist to wear this again.


Friday, December 2, 2022

Dressember #1-Scratchy Collar

 Hello Readers. It is December already. That means it is time for Dressember. Dressember is a style challenge and fund raiser all in one. Dressember raises money by having advocates wear dresses (Or ties!) everyday to raise money to fight human trafficking. I have been participating for a few years (You can see my daily Dressember adventures on Instagram.) and it is amazing to see how they work with partner organizations to maximize their efforts. Check out their website and visit my Dressember page to learn more and give if you are able. 

Today's post is about a wonderful wool dress that just needed a little trim to be ready to wear. I really liked this dress. It was a classic sheath dress and it was beautiful soft material. The lining was in great shape too. But that collar!

 
Before and after.
 
Look at this black and white collar. (Why is it black and white when the dress is green?) It looks like it would be fabulous. But it was as hard and scratchy as sand paper. How could I wear the dress with a sandpaper collar? It had to go.
 
 I thought I could remove the collar because it looked so nicely finished underneath. It would look great even without the collar.

So... I cut the collar off and I could see the neckline better. I cut as close to the dress as I could but I was SO careful not to cut the dress. 

I did some hand sewing to hold onto any loose threads that wanted to pop out from my cutting. This didn't add anything decorative, it was just to keep the neckline secure.

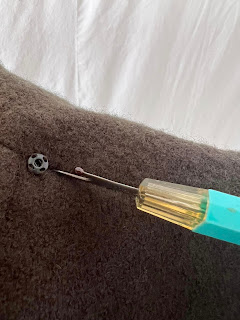
I also found these snaps under the collar. whatever they were for is missing now so I removed them with my seam ripper.
 
 I used embroidery floss to hand stitch along the neck line to hide the cut edge of the collar. 
 
I did this twice so that the thick embroidery floss would be all that was visible.

I thought this shirt would add a pop of brightness so I wore it under the dress. The dog wandered in and seemed to have doubts about what I was doing.

I made this long sleeve shirt a little more fitted so I could wear it under this dress easier. I didn't want the shirt to be too loose and/or bulky. It is still comfortable but there isn't a lot of excess fabric under the dress.

I love the dress without the black and white collar. It is a wonderful dark green color. Thanks for reading along, now go make something fun for yourself.
*Year End Note From Chickie- This dress was so much better for me without the collar. It is soft and cozy and great in winter.