Showing posts with label Dress to Vest. Show all posts

Wednesday, May 24, 2023

Gold Vest

 Hello Readers. I got this dress at a swap and the lace top really caught my eye. I didn't like the whole dress but I loved that gold lace.

Before and after.

The under part of the dress was nylon. I really don't like nylon. It is itchy and hot. But again, that lace!! It was so pretty. No one else took it so it came home with me.

The lace top was attached at the edges with tan bias tape. It also had a tan nylon lining. I thought I could carefully cut out the lining and keep all the seams and edges intact. I could have remove the vest easily. 

The edging was all in a tan bias tape and I wanted to keep it because the lace would fray by itself. The lace really needed the edges protected by this bias tape. I wanted to remove the lining by cutting it away but I needed to keep the edges in place.
 
It took about 10 minutes to fully cut away the lining. I sped up this video for you  to see. You can slow the speed if you want to see the whole thing. I cut along the edge of the lining all the way around the top of the dress. I was careful not to cut the bias tape or the lace around the edges. 
 
Here is a closer look at the lining and the bias tape around the edge. I cut as close to the bias tape as I could. I worked slowly so I didn't mess it up. 
 
I used a seam riper to remove the stitches holding the hook and eye closer in place. I didn't need the metal hook and eye anymore.
 
I turned the lace piece around and it was a really pretty vest.
 
  The tie was meant to be tied at the back of the neck but when I reversed the vest the tie was a pretty bow in front. Thanks for reading along, now go make something fun for yourself.

***Year End Update- This was such pretty lace. I still like to wear this. It is light as air and nice in summer.


Wednesday, May 3, 2023

Dress to Vest

 Hello Readers. I have been more into wearing layers as I have gotten older. (Almost 51!) I like having a little something over my basic top and bottom pieces. I am always looking for layering pieces and I thought this little dress would be a nice summer piece. It could be a great little sleeveless jacket.

Before and after.
 
I fell in love with the fringe of this dress. It was soft cotton and that fringe was fabulous.This dress was too small and too tight to wear as a dress but that is fine. If I cut the dress open in the front it will fit like an open vest.
 
I grabbed my scissors and I cut the dress right down the middle from the neck to the hem.

This dress was cotton and had a thin cotton lining. I cut the lining open too. 

I stitched the lining and the outer layer together along the cut edge. I put the right sides together and sewed the 2 edges together using my serger. The stitches will be hidden inside the new vest. I gave it a press with the iron too.

I liked the length and the fit was great now that it was opened up. Thanks for reading along, now go make something fun for yourself.

***Year End Update- I still wear this vest a lot. It just seems to work well with a lot of other clothes.


Wednesday, April 5, 2023

Faux Leather Vest

 Hello Readers. Sometimes clothes that don't fit at all are the best for refashions. This VERY tight "pleather" dress from Zara was just one of those garments.

Before and after.

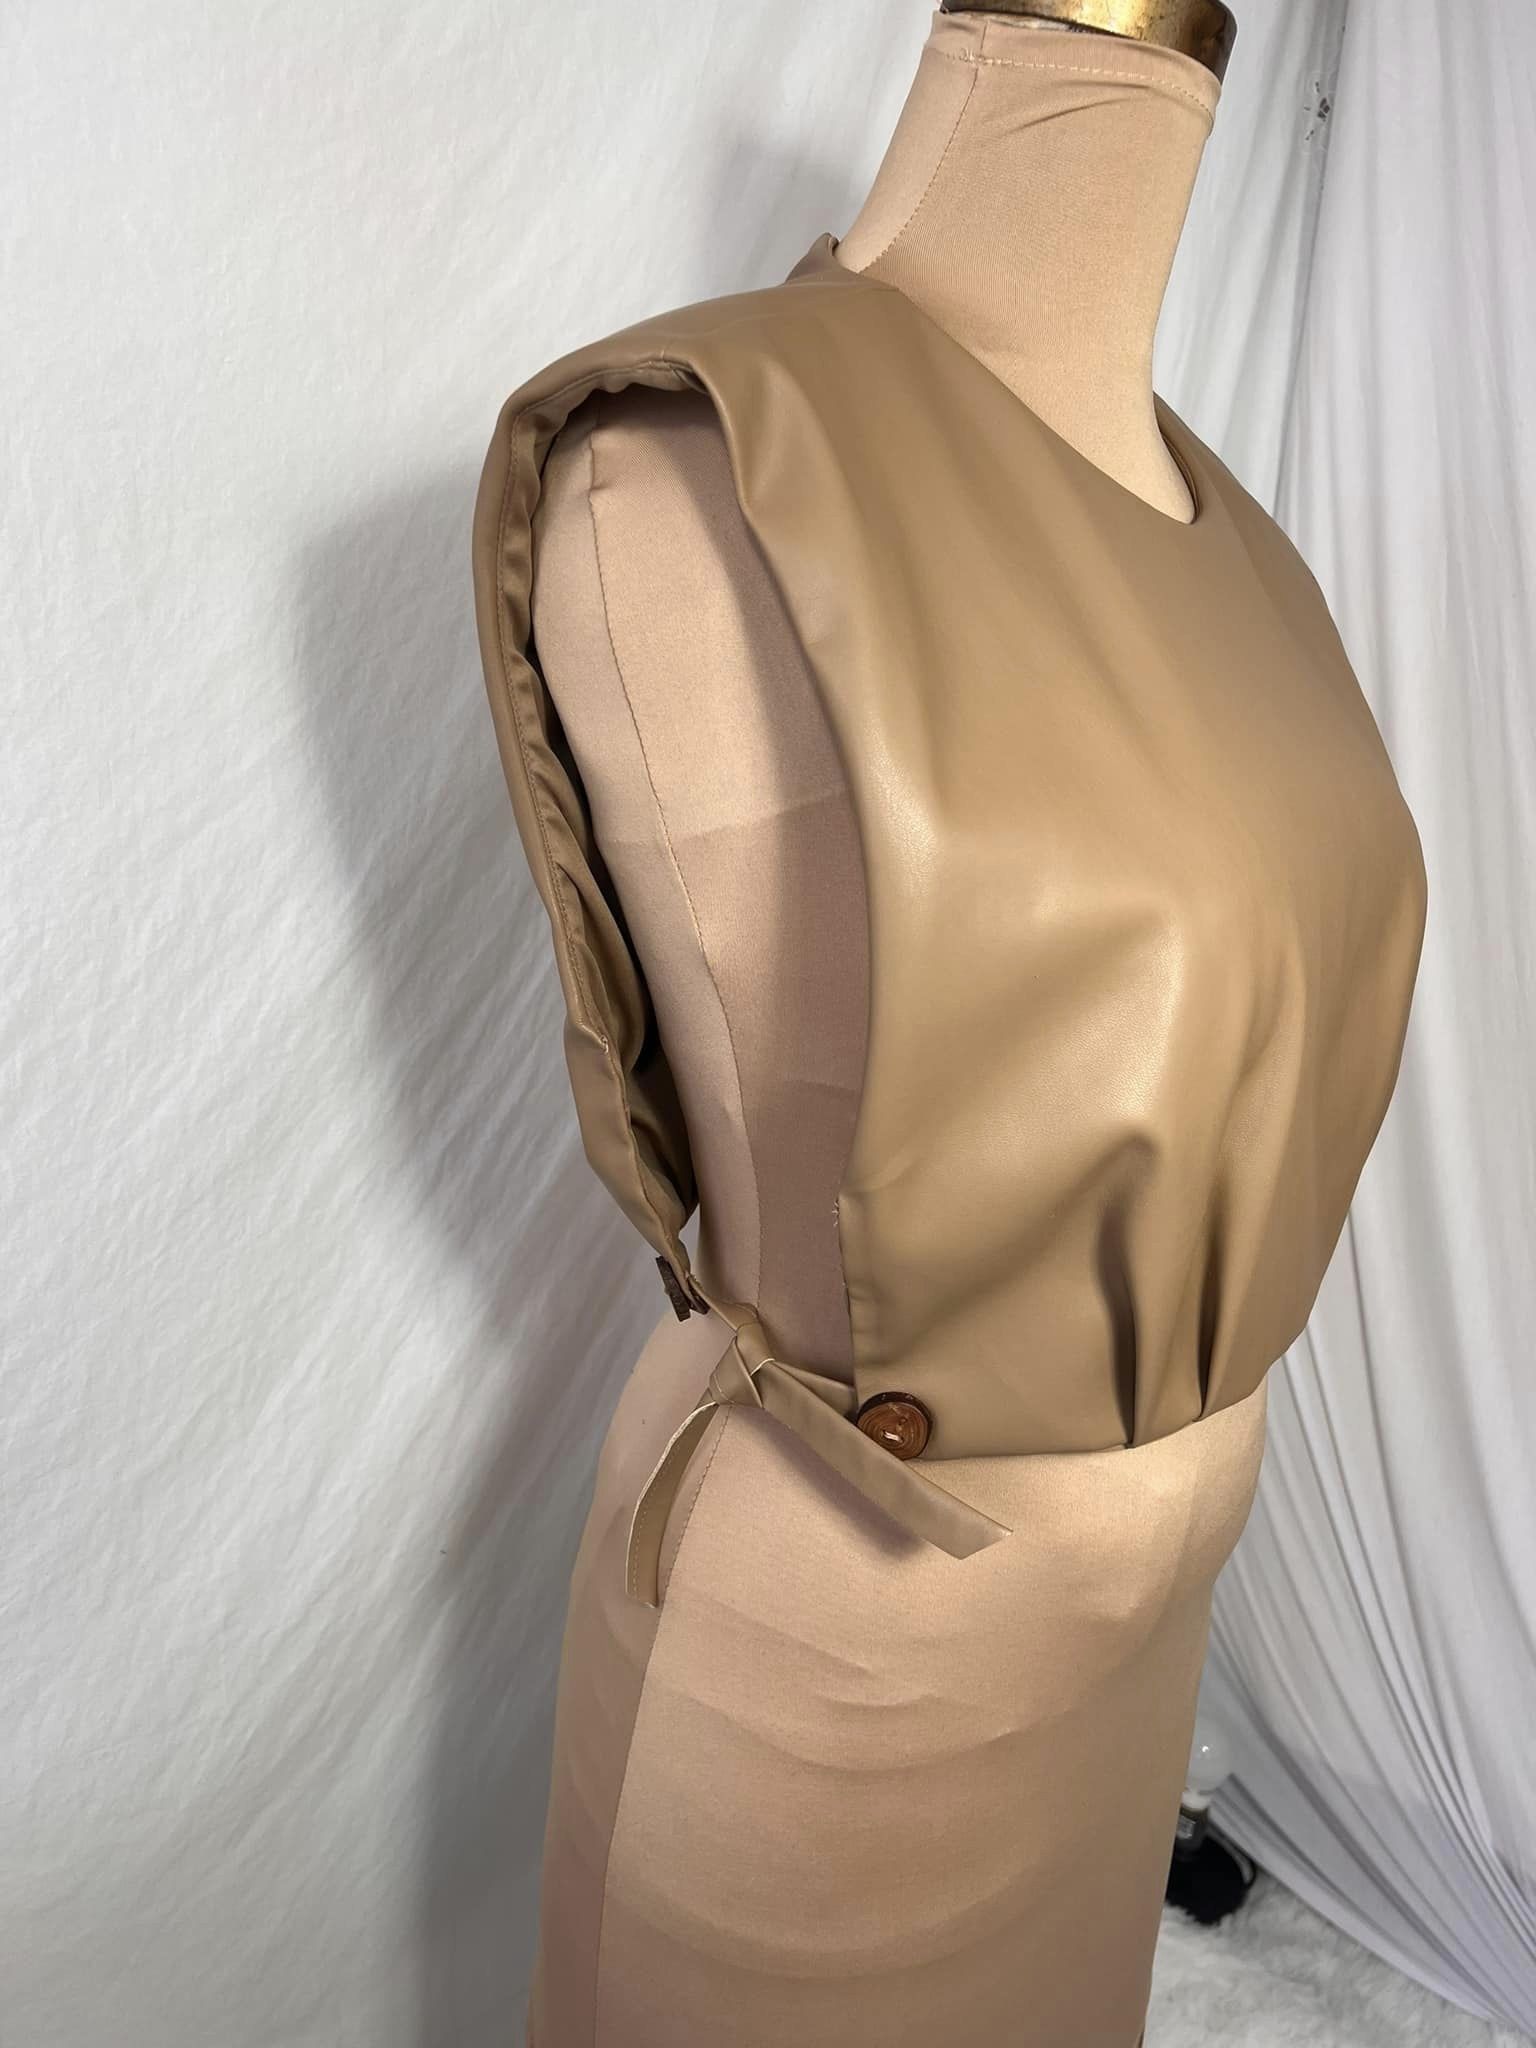
There was nothing about this dress that worked for me. It was tight and accentuated all the worst spots. I almost didn't take it home from the swap I was at. My friend D. told me to take it. I am glad she did. I came up with an idea to use it later. (Spoiler-A vest with open sides.)
 
I cut the top of the dress off the skirt of the dress. It was going to be the beginnings of my vest. Pleather doesn't fray so I just cut the skirt off.

One side of the dress had a zipper that I could use to open it up on that side. I used the seam ripper to open the other side that was sewn shut.
 
I used a needle and thread to sew the side seams back together. I made the stitches by working the needle back and forth between the 2 sides so the stitches would be hidden. I wanted hidden stitches on the side seams so hand sewing was best.
 
I used a needle and thread to sew the side seams closed. I made the stitches by working the needle back and forth between the 2 sides so the stitches would be hidden. I wanted hidden stitches on the side seams so hand sewing was best.
 
The top of the dress had pleats at the waist and a lining. I just left them as they were. My vest was a rectangle with a head hole. At this point it looked a little weird. That's OK it was going to get better.

I cut the hem of the skirt off so I could use it to make straps to connect the sides of the vest. I was making it up as I went so I wasn't exactly sure yet how I was going to attach them, but I knew where.

I used the hem of the skirt because it was folded over and had the leather look on both sides. I cut 4 equal sized pieces. It was really easy to cut. 

It was not easy to sew.  I could not get the sewing machine to sew the pleather straps to the pleather vest. It was a slippery mess. I didn't want to mark it by using pins so I had to get a needle and hand sew the straps to the vest.
 
I decided to use these buttons my daughter gave me. She got them on a trip to Iceland. These buttons were large enough to be visible and add interest. I liked the brown wood with the tan vest.

I tied the straps together on both sides at the waist. 
 
The vest had a round neck hole in front and I realized I liked wearing it backwards because the opening had a V that was more roomy and comfortable to wear. I just tucked the corners at the neck in and it looked great.

I liked my new vest a lot. It was easy to wear and adjustable with the open sides and ties at the waist. Thanks for reading along, now go make something fun for yourself.
 
 ***Year End Update- I think this vest is fun and it was fun to make. I like how it adds a fun punch to the outfit.


Friday, December 9, 2022

Dressember #3- The Vest Dress

Hello Readers. I am trying to wear dresses (Or ties.) all month to raise money for Dressember and awareness about their work to fight human trafficking and forced labor. Fashion in general has serious problems with it's labor practices. The Dressember organization has taught me more about the problem. Go to Dressember.org to learn more about this global issue.

This black dress was simple and classic and the vest really appealed to me. I really wanted the vest by itself. I wasn't sure what the skirt would look like by itself, but I was curious.

Before and after and after.

I thought I could remove the vest easily and it would be really a great men's wear style layering piece.

I found the connection between the skirt and the vest and knew I could unpick those stitches and pull them apart. 

This is what the vest looked like inside when the skirt was taken out  I needed to put the vest back together. 

The vest had an inner layer/lining. I tucked that layer into what I am going to call the waistband. I just had to figure out how to make it look nice and neat. 

Here is a look at what I came up with. It seemed like the easiest way was using iron-on tape and ironing the vest lining into place.

I liked the vest by itself so much. The pink tie was perfect for Dressember.

The skirt was so well put together that it came out of the vest in great shape. It just needed a little finishing up at the waist.

I turned the edge under and stitched it down with my sewing machine and I did a little hand sewing and made sure the clasp was secure. 

This skirt was a fabulous classic midi length and I was so happy I was able to save it. I liked it just as much as the vest. I think these 2 separate pieces will be more useful and wearable on their own. Thanks for reading along, now go make something fun for yourself. 
*Year End Note From Chickie- I like both of these pieces. If I grow the vest won't fit anymore. The skirt has plenty of room though. Clothes are weird.


Wednesday, October 7, 2020

The Leftover Vest

 Hello Readers. Sometimes refashioning can leave you with a lot of fabric scraps. I always try to use everything. I don't like to waste anything. Today's post is about a project I did to make sure I used all material from this red and white dress. 

 I made pajamas from the skirt of this dress but what about the top. It shouldn't just be thrown away.

I started by opening the front where it was connected in the front of the dress. I cut the corners off the front panels and used a zigzag stitch to close up the raw edges.


I turned those zigzag edges under and stitched them down. I added a couple of white buttons to make it look more finished.

The bottom edge was still unfinished. I didn't want the vest to be any shorter so I didn't turn it under to hem it. I added some white grosgrain ribbon to cover the raw edge. The ribbon had a beige stitching design that I thought was cute.

The top of the dress made a fun colorful vest. I like layering pieces like this so this will be a great addition to my closet.


 Thanks for reading along, now go make something fun for yourself.