Showing posts with label Fabric Paint. Show all posts

Wednesday, March 12, 2025

A St. Patrick's Day T-shirt

Hello Readers. St. Patrick's Day is coming soon. I'm not sure if you celebrate or are into this holiday but I am. I am mostly of Irish decent. (Like you couldn't tell from the pale skin and freckles right?) Anyway, I made a shirt to wear for the special day.

I didn't have a spare t-shirt to use so I decided to use this dress. It fit fine but it was too clingy and heavy. The dress was full cut but somehow thin and heavy at the same time. I didn't like to wear it, even over leggings or tights. This dress would be better as a shirt.  

I got out my handy dandy stencils. I should have checked to see if I had green paint. I didn't. I decided to mix some yellow and blue and make my own. I put some cardboard inside the dress so the paint wouldn't bleed through to the back. 

 LUCK!
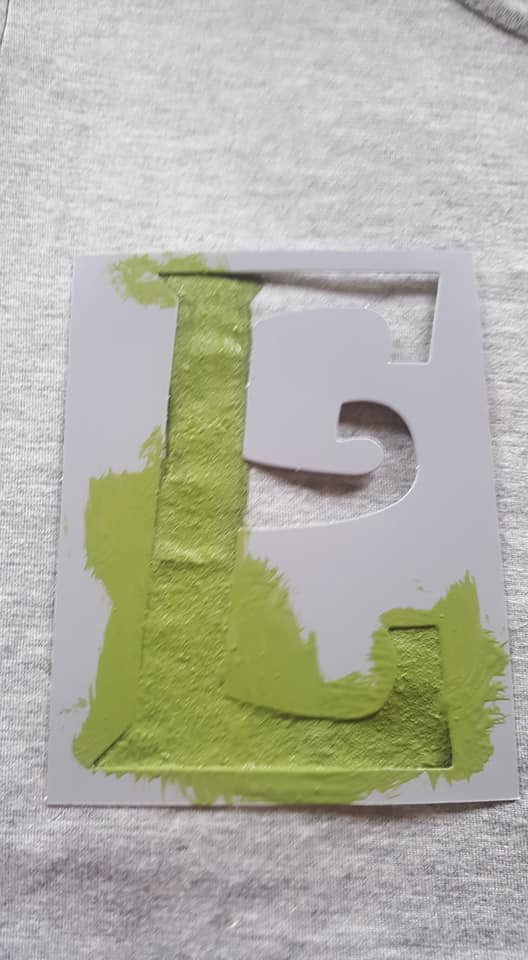
I was also missing the letter L. I used a 1 and a letter E to make the L I needed. Was I getting annoyed that I didn't have the things I needed to make this shirt? Yes, and it made me more determined to make the shirt than ever! I would not be stopped!

I did not have a shamrock shaped stencil either. I used this little foam shamrock. I painted it and used it as a stamp to get the shape. I filled in the paint where it needed it and I was done. It just needed to dry.

  I cut the bottom of the dress off. I used a shirt I liked as a guide for length. I didn't hem it because I planned to tuck it in anyway. 

I let it dry overnight and it was ready to go. Everyone has heard of the luck of the Irish, may you have a lucky and happy St. Patrick's Day too.  


Friday, October 30, 2020

A Candy Corn Fail?

 Hello Readers. Do you like candy corn? Honestly, I hate it. It is so over sweet it is too much for me. I love the color combination. That yellow and orange color combination always always appeals to me.  So what did I do to recreate that color combo? First I found a white shirt. Actually, I found 2. 

 These white t-shirts are from my husband. Yes, I have used a lot of his clothes. He agreed to it, I swear. I wanted to dip the shirts in yellow dye but leave the shoulders white. Then I would dye the bottom of the shirts orange. I thought it would be festive but not creepy for fall and Halloween.

I wanted to dye these 2 shirts to get the yellow and orange of these beautiful candies that I hate the taste of but love the look of. 

 I also wanted to try and use a cheaper method of dying the shirts. Would acrylic paint act like dye if I watered it down? I wanted to find out. (Short answer: Not really.) Acrylic paint is water based so I mixed in a lot of water and got very watery paint. I dipped the shirts in yellow water+paint and let it sit overnight. I let the shirts dry out and then did the same thing with orange water+paint. My 5 year old really liked mixing the paint and water and dipping the shirts into the dye bath. I let the shirts air dry completely before the next step.

I used a shirt that fit well to get the size and fit I wanted in the new shirt. 

 What would I wear with this candy corn shirt? Well, leggings seemed like a comfortable option. I found these black leggings at an outdoor clothes swap recently. It was great to have the swap outside where it was safer.


 They looked brand new but the elastic waistband was loose. It had broken or had been cut. I just reconnected it and stitched the waistband closed.


 I was happy enough with this craft. My son and I could could be candy corn twins. The idea of paint as a dye did not turn out as well as I had hoped. The colors were not bright and clear. The orange didn't show much at all. But it was a fun little project to do with my little guy so, that made it worth trying.He liked mixing the paint and dipping the shirts. (Full Disclosure: I gave him a donut to get these pictures.)

Thanks for reading along, now go make something fun for yourself. And Happy Halloween if you are celebrating this holiday.


Wednesday, February 13, 2019

Valentine's Day T-shirts

Hello Readers. Valentine's Day is tomorrow, at least when I am writing this. You might want to put together a quick shirt for the holiday for yourself or your kids. I have a couple ideas for that. To start you will need a t-shirt. Any old t-shirt will do.


This is definitely an old t-shirt. It has some paint spots on it and it has a logo. That is OK, it won't hurt our end result.


My shirt was black so I used a permanent black marker to color on the logo and make it less visible. It won't hide the logo completely but it will help hide it a little.


The next step involves acrylic paint and a paper doily. I put some thick paper inside the shirt so the paint won't bleed through to the back of the shirt. I put the doily on the front center of the shirt. I used a sponge to dab paint on top, all over, and a little outside of the doily.


Here is my paint. I wasn't completely happy with it at first. The paint in the left picture, looked like a monster face to me. I saw eyes and a mouth, maybe I am crazy...
I used a tiny brush to fill in some of the empty spots so I didn't see eyes anymore. 
Let the shirt dry for a few hours. I added a coat of pink on top of the red to help disguise the decal with a second coat and color of paint.


Here is my finished shirt. The decal doesn't show and the little spots of paint are blend in all the painting I did. It all works together.


I am not dressing up for Valentine's Day. My youngest is sick this week so I am going to look like this.


***The Candy Heart T-shirt
Now something for the kids. If you want to put together a fun shirt for a kid in time to wear tomorrow, here is an idea.
Grab a shirt. (This is for my son and the only plain shirt I could find was black.) I used a chalk pencil to sketch out a heart on the pocket. I want to paint a heart to look like one of those candies with a message on it.


I used some simple red acrylic paint and filled in the heart. I let it dry and added a second coat of paint. When the heart was totally dry I used some puffy paint in a squeeze tube to "write" on the heart. The heart was really small so the message was short. QT, like cutie, but shorter. If you want to write more make paint a bigger heart.

Thanks for reading along, now go make something fun for yourself.
  *Year end update-I really liked this shirt It is a little abstract. My son out-grew his shirt.

Friday, February 8, 2019

The Love Shirt

Hello Readers. Valentine's Day is coming. Are you ready? Do you even get into this holiday? Not everyone does. I wanted to make something in the theme of the day, so I made a shirt. A love shirt.


 You got to meet this flannel shirt from a clothes swap in my last post. (Flannel Baby!) I used almost all of it in that post. So why are you seeing it again?


I removed this one pocket and saved it for this refashion. Just one pocket? That's right. I only needed a small piece of fabric for this project. I also needed a simple gray shirt and I have one on hand. (Thanks Jessica P.)


 The red and black flannel was perfect to make a heart to dress up this gray shirt.  I cut the heart out of the pocket and used iron on tape to hold it in place. Next. I used a zigzag stitch to secure it to the gray shirt. Then I did my painting.


I used some cheap cardboard stencils from my craft stash and some old red acrylic paint.

 
I held the stencils very still and used a sponge to dab the paint on the shirt. It was messy and when I was done my hands looked like I had committed a murder. The letters turned out great though. I tried to paint heavily because I knew it would fade a bit in the wash. 
(*I put a piece of cardboard inside the shirt to keep the paint from soaking through to the back of the shirt.)


I wanted to add a little something to the heart and some black embroidery thread was just the thing. It would look cute on top of the machine stitching. It adds a little home-spun touch.


Yes, that's me. Yes, I have a Valentine's Day wreath on my door. Yes, I do get into the holiday a little bit. Yes, I expect some kind of Valentine from my Valentine.
 And yes, I am hoping for some chocolate.

 I am still wearing the hat you saw last week. It's cold y'all. And I didn't do my hair. Like at all.

Thanks for reading along, now go make something fun for yourself.
  *Year end update-I still wear this shirt even when it isn't Valentine's Day.


Tuesday, August 22, 2017

The Total Eclipse Shirt

Hello Readers. If you are in North America you have heard all about the eclipse. Almost everyone is suddenly eclipse-obsessed. It was perfect timing for me because I was under the weather and was home with most of my family to see the whole thing.
 (One of my big kids drove 7 hours to see the total darkness. So, yea, we got into it.)
I was challenged by someone to make an eclipse outfit and made a quick T-shirt for the occasion. I forgot a before picture of the big red shirt and used this old picture of me making the worst nasty face ever. Yikes! I look like I am asking to see your manager please.

This cranky face will NOT win friends or influence people.

Let's move on to the project. I spread the big men's shirt out so I could see the side. The front of the shirt is on the right in the picture below. I cut straight across the front and ended the cut high in the middle of the back. I wanted a loose fit for this shirt but the length needed to be shorter.


Here is the back of the shirt, I cut straight up the middle to open the entire back.


It was at this point I saw the cut I made in the sheets of my bed where I had been working. Oops!


I overlapped the two sides in the back. This made the shirt smaller and covered all the skin in the back. You can adjust the fit anyway you like. I pulled mine closed and pinned it in a good place for me. I stitched it down inside so it looks like a wrap top but can't blow open. I also stitched over the seams around the neck to connect the pieces together smoothly.
The shirt is open at the bottom around the hips so it glides over the body and doesn't bunch up.


*** OPTIONAL PAINTING ***
I started making little yellow suns with acrylic paint around the neck with a round sponge brush. The center is missing because the sun is going to be covered by the moon. I tried to paint heavy because it will fade in the wash a bit.


 I used the round brush and black paint to suggest the moon. I also used a tiny brush to paint the corona around the moon in the center.
These are a little vague and just suggest the sun and moon. I wasn't trying to be perfect or scientifically accurate. This is just a fun addition to the project, I am not turning this into NASA or anything. 


When I was done I got this loose fit shirt. Even with my arms up my tummy is covered, I like it that way. The fit and size are all adjustable based on how much you cut off and how you stitch it back together. I like knowing the yellow spots are suns, but they are not overwhelming.


If you were able to view the eclipse, I hope it was amazing. I really enjoyed it. 


Thanks for reading, now go make something fun for yourself.

Thursday, December 1, 2016

The 3-D Flower T-shirt

Hello Readers. How are you today? It is cold and rainy here. I made this colorful cheerful top to brighten up the day. I saw a top on Pinterest that I loved so I made something similar. Here is a link to my inspiration. (click)


I decided to used this mock turtleneck as my base. I needed a simple top to build on. I cut the neckband off to make it more comfortable. I hate turtlenecks, I know they are warm but they just seem to choke me. Does anyone else feel like that? Maybe I have a large neck, but I think they are trying to strangle me.


My inspiration top used red tulle to make the flowers, I used an old red T-shirt to make my flowers. (It was in my stash and therefore free.) I cut it into circles of all different sizes. I stacked them up to make flowers.


I used a needle and thread to attach the flowers to the white shirt. I used a shiny black button as the center of each flower. It was simple and quick work.


The next step involves some paint. I put some cardboard inside the shirt to keep the paint from bleeding through to the back of the shirt. I can be sloppy, so it pays to be careful.


I used this black fabric paint. It said it would be washable and it was in my craft cabinet already. (And therefore free again.)


I used the tip of the paint bottle and sort of sketched with the paint. It was difficult to make very neat lines. I decided to make it look more like charcoal sketched lines instead of perfect lines.
I got a little black paint on one of the flower petals, I chose not to worry about it.


This top is fun and cheerful, those are always good things. And I love red. 


Thanks for reading, now go make something fun and cheerful for yourself.