Tuesday, April 18, 2023

Using Egg Shells for Plant Food

 Hello Readers. It is spring and that means gardening and plants. I love plants and I try really hard to care for them. I have killed off quite a few because they needed more nutrients. I found a way to get them what they need using the eggs I already ate.

Eggs are so expensive right now. Make more use of them. 

I saved the shells from the eggs we ate. We were going to eat them anyway so this didn't cost me anything extra. 

I washed my egg shells with some simple dish soap. 
 
I let the egg shells soak for a few minutes in the soapy water.
 
 I used the spray nozzle on my sink faucet and gave the shells a good rinse after soaking.

When the egg shells were cleaned off I was ready for the next step. I could crush them by hand into very small pieces.

I decided to use my blender to make it easier to crush the shells.

I added enough vinegar to cover the shells and let them soak for 24-48 hours. The vinegar breaks down the egg shells and that is what you want to happen. The shells have calcium that the plants need to thrive.

Mine looked a little "frothy" and it smelled like vinegar. I kept the lid on while it was soaking for 2 days on my counter.

I strained my egg shells so that I would just have the liquid. (The egg shell bits won't hurt plants but I didn't want the white specks in my house plants soil.) I added that vinegar to a big pitcher of water. The pitcher I used was about 3/4 of a gallon but I didn't do any measuring.

I gave each of my plants a little drink. I have done this every 3-4 weeks for about 6 months and the plants seem to love it. They have all grown/bloomed in noticeable ways since I started doing this. Thanks for reading along, wishing you a green thumb. 

***Year End Update- I still do this, and my plants are growing well. My snake plant has doubled in size.


Friday, April 14, 2023

An Easy Elastic Waist Skirt

 Hello Readers. My daughter gave me this fabulous sewing machine fabric. It was part of a mystery box from Mood Fabrics. She didn't want it. Can you believe that?? The piece was a rectangle 52" by 24". The shape seemed like it would make a quick and easy skirt. I love to wear skirts in warm weather so I went with that idea.

I sewed a skirt of sewing machines!

This fabric was so cool. It had old vintage machines and newer models too. 

I serged all the edges because it was fraying a little.

I ironed the edge down so I could hem it smoothly. I also connected the 2 sides of my rectangle to make a tube shape. That was the basis my skirt. But it needed a waistband.
 
I wanted a comfortable cozy waistband so elastic was the way to go. 
 
My new skirt was done. 
 
I liked everything about it especially the stretch waist. I can eat as many cookies as I want and it won't get too tight. Thanks for reading along, now go make something fun for yourself.
 
***Year End Update- This sewing fabric is always going to be a favorite and it made a great skirt that goes with  a lot. 


Wednesday, April 12, 2023

Jacket From a Quilt

 Hello Readers. I made a jacket from a quilt to match the skirt I made from the quilt last week. I liked the skirt but I thought the skirt needed a matching top. 

Before and after, and after.

It all started with this quilt. I thought it was pretty and would be great for upcycling into clothing. It wasn't hand-made or any family heirloom.

I made a simple skirt and didn't feel like it was great on it's own. I wanted to have a matching top. The quilt would be too thick as a shirt so I made a jacket.

I used the Bog pattern by The Sew and Sew. I already made one jacket using this pattern and I knew it would be a good one for this quilt.

This was the initial version. I sewed this up and realized it was longer than I wanted. The skirt I made would look better with a cropped jacket.

I cut the jacket shorter and added a zipper in the front. 

My new cropped quilt jacket was ready.

A quilted suit? Sure, why not. Thanks for reading along, now go make something fun for yourself.

***Year End Update- These 2 pieces work really well together. The colors are so pretty too. The quilt was a little heavy and stiff so it isn't soft but it is warm.


Friday, April 7, 2023

Skirt From a Quilt

 Hello Readers. I think spring has finally sprung in my part of the world. There are flowers, trees are budding, I saw a bee today. We made it through winter. Before it gets too hot, I wanted to use a quilt for an upcycle project. It has taken me a while to find a quilt, that was not a family heirloom, that had colors I liked and was in good shape.

Before and after.
 
This quilt was perfect for this project. It had a lot of pretty colors and I loved the scalloped edge.
 
I used a skirt that fit well as a pattern. I chose a very simple A-line shape because the quilt was thicker than most fabrics. It was a little stiff too. A simple shape would work best. 
 
I had 2 skirt pieces and I was ready to put them together. I put the right sides together and stitched along the edge. I used a serger but a zigzag stitch would work too. I only sewed the bottom half of one side so I could sew in a zipper.

I used my serger on the cut edge at the waistband to control fraying, (You could use a zigzag stitch if you want.). I decided to use that lacey white strip as my waistband.

I turned the serged edge under and stitched it down with my sewing machine.
 
 I put a zipper in at the side so I could get the skirt on and off. 
 
I liked how the skirt turned out. But why did I wear that shirt with it? I don't like that at all.
 
 Do over? I'm not sure about this combo either. Maybe I need to make a matching top? Thanks for reading along, now go make something fun for yourself.

***Year End Update- I liked this quilt skirt. It is fun and the scalloped hem is the best.


Wednesday, April 5, 2023

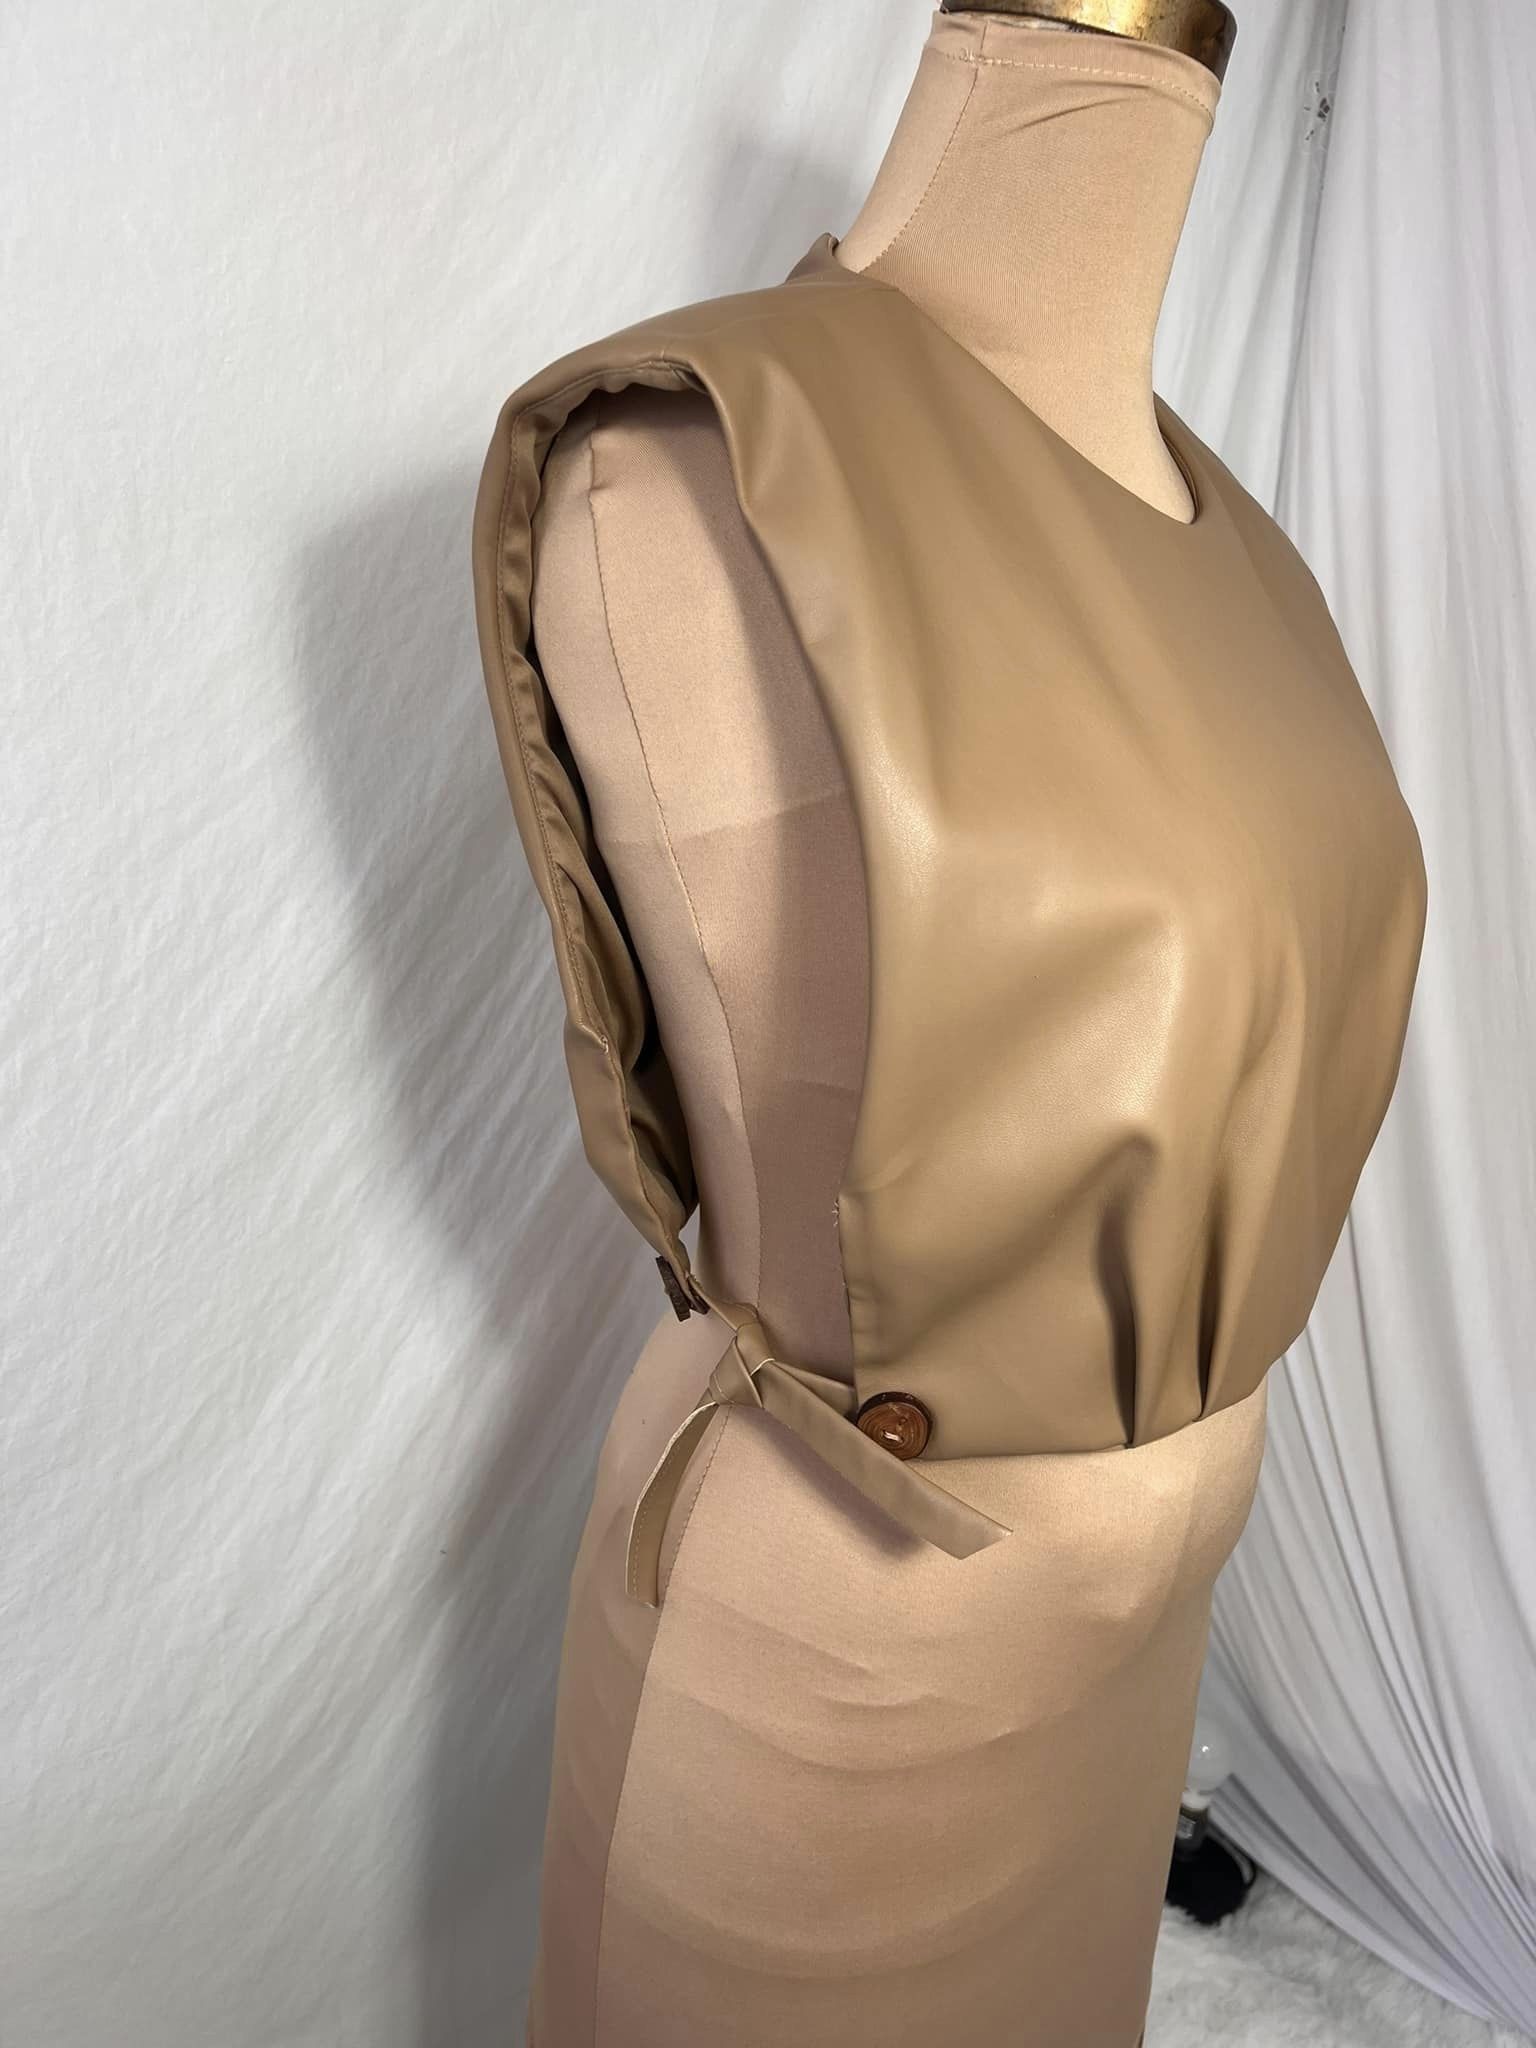
Faux Leather Vest

 Hello Readers. Sometimes clothes that don't fit at all are the best for refashions. This VERY tight "pleather" dress from Zara was just one of those garments.

Before and after.

There was nothing about this dress that worked for me. It was tight and accentuated all the worst spots. I almost didn't take it home from the swap I was at. My friend D. told me to take it. I am glad she did. I came up with an idea to use it later. (Spoiler-A vest with open sides.)
 
I cut the top of the dress off the skirt of the dress. It was going to be the beginnings of my vest. Pleather doesn't fray so I just cut the skirt off.

One side of the dress had a zipper that I could use to open it up on that side. I used the seam ripper to open the other side that was sewn shut.
 
I used a needle and thread to sew the side seams back together. I made the stitches by working the needle back and forth between the 2 sides so the stitches would be hidden. I wanted hidden stitches on the side seams so hand sewing was best.
 
I used a needle and thread to sew the side seams closed. I made the stitches by working the needle back and forth between the 2 sides so the stitches would be hidden. I wanted hidden stitches on the side seams so hand sewing was best.
 
The top of the dress had pleats at the waist and a lining. I just left them as they were. My vest was a rectangle with a head hole. At this point it looked a little weird. That's OK it was going to get better.

I cut the hem of the skirt off so I could use it to make straps to connect the sides of the vest. I was making it up as I went so I wasn't exactly sure yet how I was going to attach them, but I knew where.

I used the hem of the skirt because it was folded over and had the leather look on both sides. I cut 4 equal sized pieces. It was really easy to cut. 

It was not easy to sew.  I could not get the sewing machine to sew the pleather straps to the pleather vest. It was a slippery mess. I didn't want to mark it by using pins so I had to get a needle and hand sew the straps to the vest.
 
I decided to use these buttons my daughter gave me. She got them on a trip to Iceland. These buttons were large enough to be visible and add interest. I liked the brown wood with the tan vest.

I tied the straps together on both sides at the waist. 
 
The vest had a round neck hole in front and I realized I liked wearing it backwards because the opening had a V that was more roomy and comfortable to wear. I just tucked the corners at the neck in and it looked great.

I liked my new vest a lot. It was easy to wear and adjustable with the open sides and ties at the waist. Thanks for reading along, now go make something fun for yourself.
 
 ***Year End Update- I think this vest is fun and it was fun to make. I like how it adds a fun punch to the outfit.


Wednesday, March 29, 2023

Crochet Top

 Hello Readers. I had one more crochet blanket that I wanted to use to make something to wear. Could I make a simple sweater? I thought I could so I gave it a go. 

I did it. Before and after.

This blanket was in good shape and I loved the 70's colors. It had a lot of openness in the design. That made me a little concerned that it would be hard to sew together. Would it fray like crazy?

I used a sweater that I already had to get an idea of the shape I wanted to cut out. I thought it would fray and I was right. I cut out this shape and quickly got it to the sewing machine.

I couldn't just sew the side seams together because there were to many open spaces in the weave. I used bias tape to "wrap" the edges of cut yarn. I put the cut edges in between the 2 layers of the bias tape. I used a wide zigzag stitch to hold all these layers together. When the side seams were done I cut out a head hole and finished it with bias tape as well. 

Full disclosure- This was such a difficult project. The sewing machine did not like sewing this at all. It was so uneven that my sewing machine could handle it. The thread broke over and over and the needle broke several times too. I love the colors so much though I am glad I did it but I am glad it's over. And I don't think I will do a project like this again. Thanks for reading along, now go make something fun for yourself.

***Year End Update- This blanket to sweater was so fun and I love the warm fall colors.