Showing posts with label Robe. Show all posts

Wednesday, April 23, 2025

Light Summer Robe

 Hello Readers. I thought this sheet would make nice light weight sleep wear. I thought I could make a night shirt and coordinating robe. I had a vision and tried to see it through. Did I succeed? You be the judge. 

 
Before and after. 

 
I thought I could use the leftover half of this sheet to make a robe that coordinated with the night shirt. (Spoiler-I did not love either.)

I sewed the sleeves of the robe together.
 
I used this trim as a belt to keep this new robe shut. 

 I hemmed the robe and...... 

 
I didn't like this anymore than the night shirt I made. This looks like hospital attire too. Yuck! Well, This was not a win in my opinion, I will try again to make some fun sleepwear soon.Thanks for reading along, now go make something fun for yourself.

Saturday, April 6, 2024

A New Robe

 Hello Readers. Spring is here and I don't need to bundle up to survive the winter cold anymore. It is time to lighten up. I wanted a new robe that was lighter weight. I used the "Bog" coat pattern by TheSewSew. (Etsy Link here.) and modified it to make a robe for myself. 

 
Lighter weight robe for spring.
 
I decided to use this fabric with a leaf design. I had this in my fabric stash and I like to use what I have.  I have used it before and it washes so well. I know it will be a good choice. And leaves for spring seems like a good idea. 

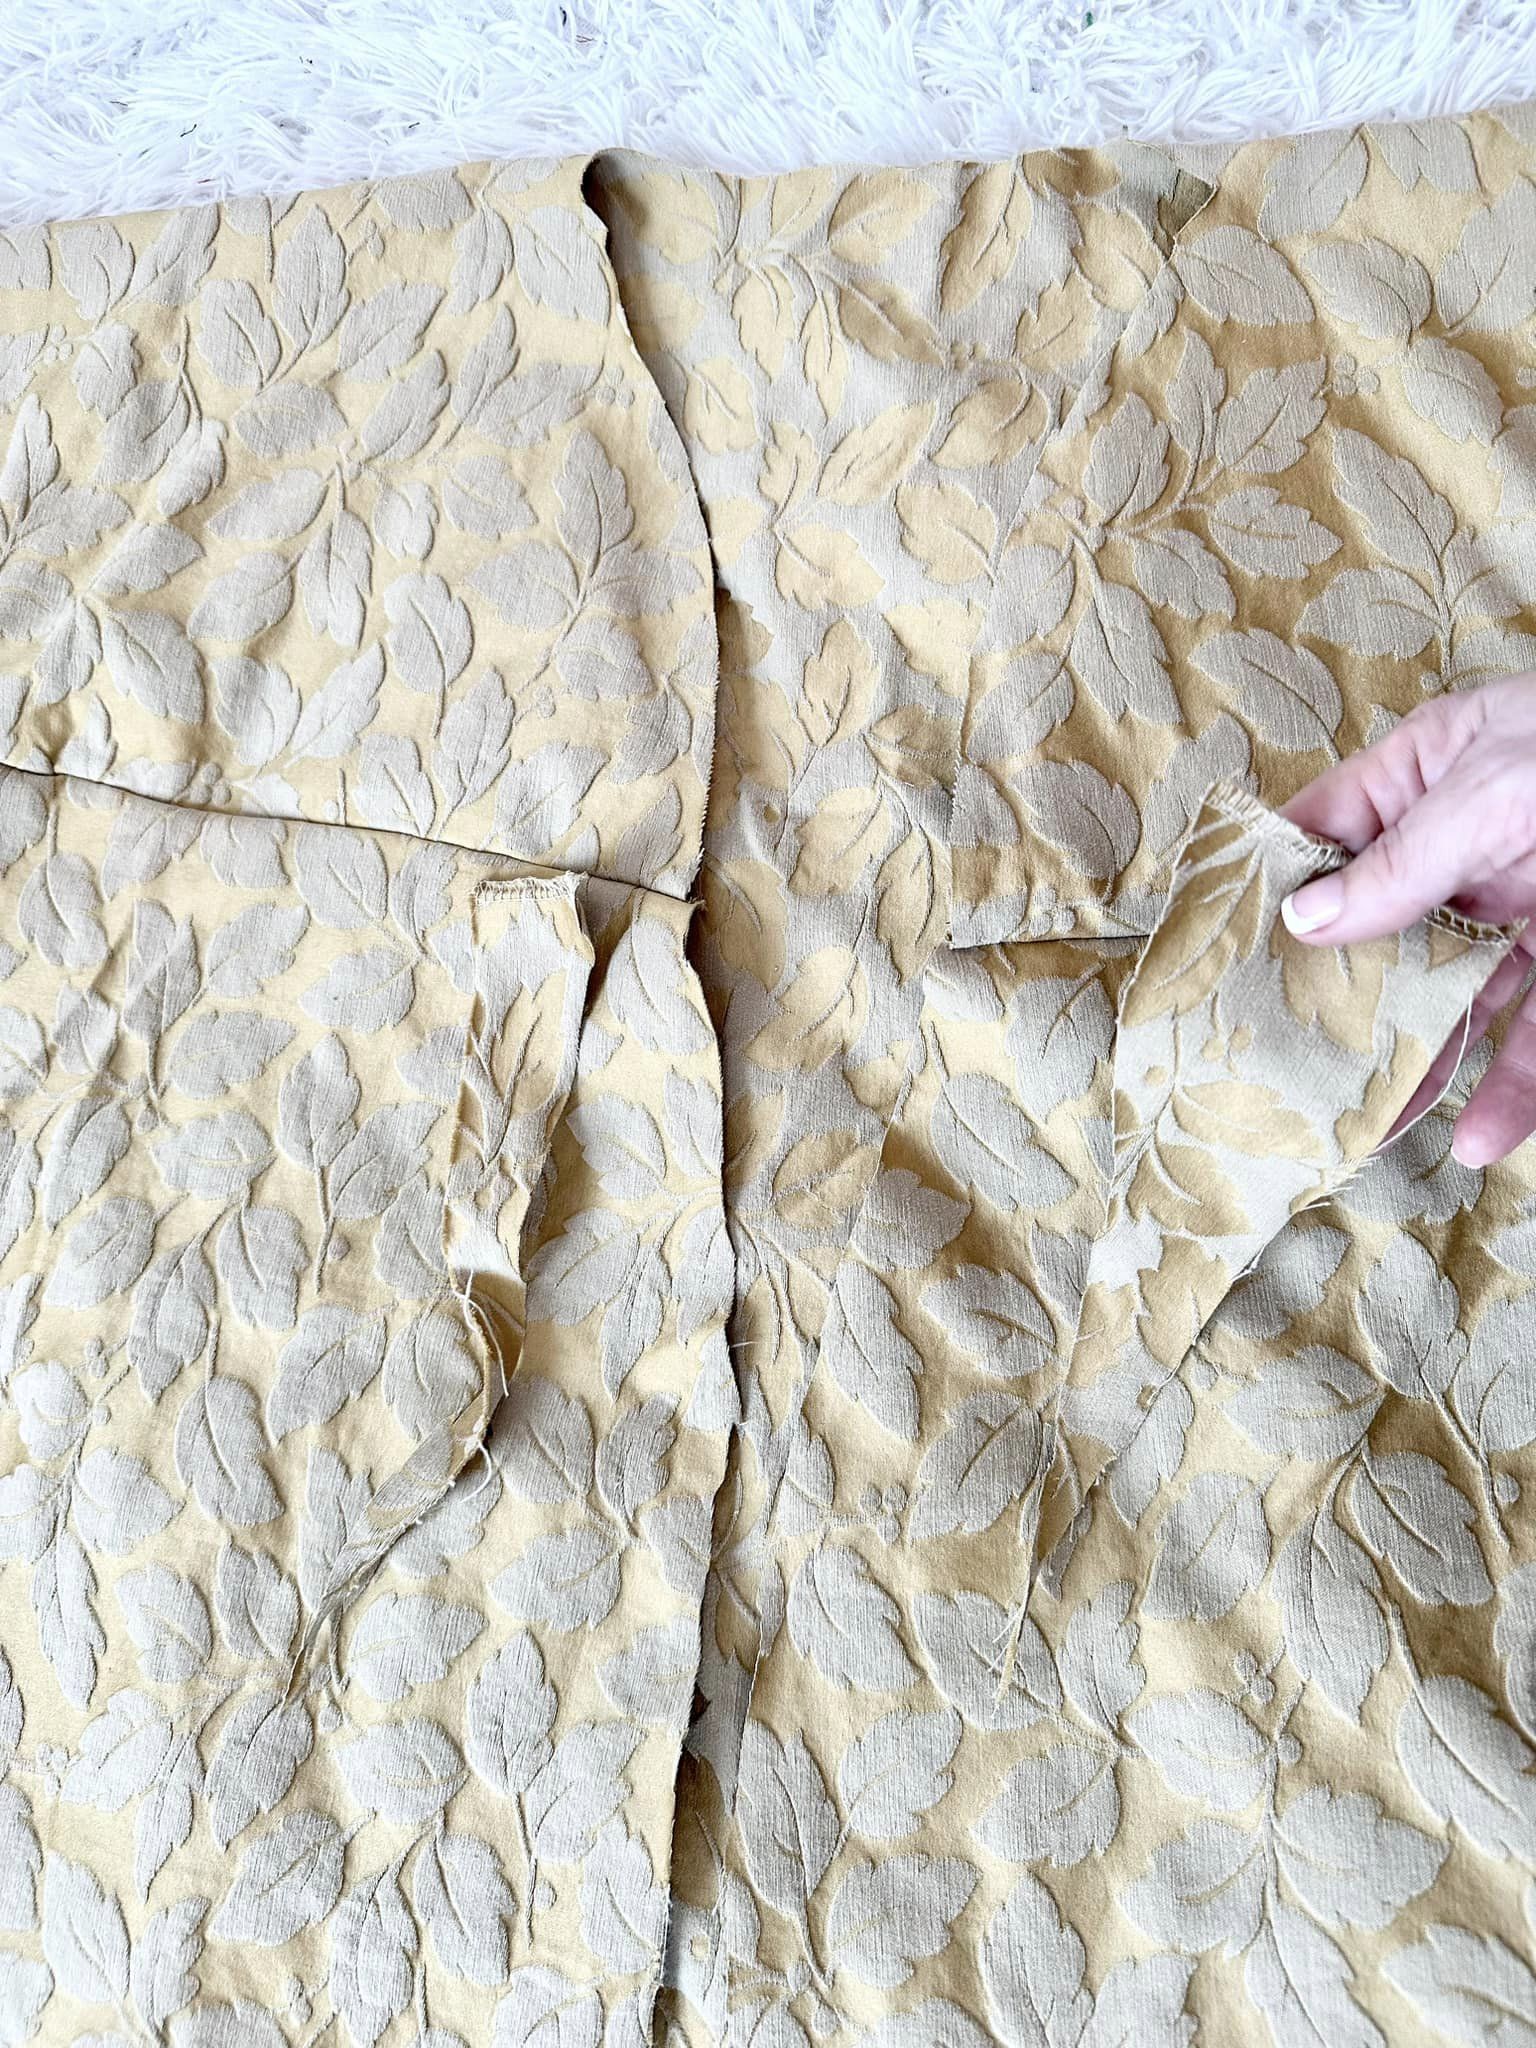
I spread the fabric out to make sure it was large enough for my robe. I folded the top of the fabric down, that is how you make the sleeves for the Bog pattern. I love how this pattern uses as much of the fabric as possible. It is very minimal waste.

After I cut the sleeves, I folded the body in. It is starting to look a little like a robe already.

I cut out the neckline. I didn't follow the pattern for this. I started using my imagination for this part. I wanted a V-neck shape. 
 
I sewed the sleeves together.
 
I stopped for a cup of tea.
 
I made my front pieces a little wider than the pattern called for. I wanted the front to overlap so I made sure there was some extra fabric. 

I cut the top corners of the front panels at an angle so they would blend into the neckline.
 
I had a small amount of this "bee" fabric and that seemed great for spring too. Bees in spring? That sound perfect. It has a pretty sheen that will make pretty trim.
 
I cut and sewed this fabric into thin strips that I could use as trim on the front of the robe and the belt. 
 
I wanted the trim on the front and around neckline. 
 
This was a lumpy mess. I liked the trim color a lot so I headed to the ironing board. 

It looked so much better when it was ironed. I made the sleeves 3/4 length. I liked the end result. 
 
I added pockets from the scraps I had left. I didn't have a lot of choice about what they looked like. I was just using the fabric I had. 
 
 Was this robe soft and cozy but not too warm? Yes. It was perfect. Thanks for reading along, now go make something fun for yourself.  

***Year End Update***- This robe gets worn so much, it's almost daily.


Wednesday, June 1, 2022

The Easy Summer Robe

 Hello Readers. It is already June and it is time for a new theme. This months theme is animal prints. I always shy away from animal prints so this will push me into having more in my wardrobe. We are going to start with this loose sort of jacket in a giraffe print. 

Before and after. 

I think this light weight piece is meant to wear over leggings. It is from a certain company that is famous for leggings. (And scandals!) It is knit material with a lot of stretch. It also had 2 big pockets. I like pockets! I didn't really need a jacket but it looked a lot like a bathrobe to me. But it didn't have a belt to tie it closed. A robe needs to have a belt to tie around the waist right?

 
I went digging through the stash in my closet and looked for some kind of brownish trim I could use. 
 
Here it is. It is brown and flat. I am going to make it work. 
 
I made sure there was enough to tie around my waist and I was ready to go. I knew this trim would fray like crazy. I folded the end in twice and used a zigzag stitch to sew back and forth over the fold. I wanted to close the end and stop all fraying. I did this to both ends.
 
I wanted to attach the belt to the robe so I put it on my dress form. You could also just try it on if you do not have a dress form. I wanted to see how the belt fit around the waist and where I could stitch it to the sides of the robe because it didn't come with belt loops. I don't want to make belt loops and I have no extra giraffe fabric to make them with.
 
I used pins to hold the belt to the robe and made sure I could fold the front over itself to close the robe in the front. I adjusted the belt a bit. I used a few stitches to attach the belt to the sides of the robe. 
 
I attached the belt to the robe so it wouldn't fall off when it wasn't tied. It seemed easier to attach it rather than try top make belt loops.

You can see where I attached the trim to the sides of the pocket here. The ends of the trim are folded in and under twice to hide all the loose ends and it is all stitched down so it won't be able to fray.

I wanted trim on the pockets but I made sure the pockets are still functional.
 
 My robe was great for the morning when it was a bit cool in the house. I liked the trim with the robe. It was a lux touch on the simple robe. We all need a bit of luxury now and then. Thanks for reading along, now go make something fun for yourself. 
*Year End Note From Chickie- I wear this almost every day. This was a great project for me.


Friday, July 23, 2021

Grandmom's House Dress

 Hello Readers. Did your grandmother wear casual house dresses or something like this when she was at home? My Grandmom did. When I saw this dress at a swap I thought of my Grandmom. Could I make it look less like a robe and more like a summer dress.

I started this refashion by deciding what I liked and what I didn't. The colorful neckline and the gigantic pockets were great. The fit of the whole dress wasn't very flattering.

I decided to cut the sleeves off. They were just too puffy. I cut them off but left about half an inch so I could stitch them under that big collar. 


I turned that cut edge under and stitched it down. 

I removed the pockets and cut them down in size. I like pockets as much as the next woman but these were very large. I wanted them to be smaller. (Note* I realized after this that I made the pockets just a bit too small for my cell phone. #Devastated)

I cut the hem off the dress. I wanted to make the dress shorter anyway. I cut the bottom 3 inches off and saved it for later. 

My next step was to try the dress on and pin it on the sides to get a better fit.

I made new side seams and then turned the arm holes in and stitched the edges down. 

I used the piece I cut from the hem to make a long thin waist tie. This dress would look much better with a belt and making one out of the same fabric means it will match perfectly. 

You can see what got removed from the dress here. 

What do you think? Does it still look like my Grandmom's house dress or is it ready to go out?


Thanks for reading along, now go make something fun for yourself. 

***Chickie's Year End Review-This dress is so great I like it so much. It has happy bright colors and it is so fun to wear.

Wednesday, January 13, 2021

Making More of My Bathrobe

 Hello Readers. I hope you are safe and well. It is cold and I want to spend some time hibernating at home. (Anyone else want to hide from the world?) I loved my blue fuzzy robe but it was not very long. My legs need some insulation too. I also lost the belt somewhere along the way and couldn't tie it closed. I had a pair of fuzzy pajama pants but they were a little short, my ankles were cold.

Actual morning photos.


 I thought they could work together to keep me warmer and cozier.


I started by cutting the hem off the robe. This was going to be my new belt. It is a great width and it is already put together for me. 

My next step was cutting the pants apart. I wanted to use one leg to lengthen the robe.  I cut the 2 large rectangular pieces on the left. I want them to add length to the robe. The other leg was going to be used for pockets. Why doesn't this robe have pockets? Everything should have pockets! I cut out the 2 square pockets on the right. 

I used a zigzag stitch for most of this sewing. The fleece was easy to work with. I hemmed the robe all the way around.

 Remember the belt I cut out? I threaded that through the waist band of the robe. 

 That was all I needed to do. Below is a fake morning picture. I am not a morning person, as you can see in the first picture.


I liked the new length a lot. It makes more sense for a heavy winter robe to be longer. The pockets are also handy too. Thanks for reading along, now go make something fun for yourself.

***Chickie's Year End Review- I wear this bathrobe everyday in the colder months. Literally. Everyday.