Thursday, May 15, 2025

More Wild Pants

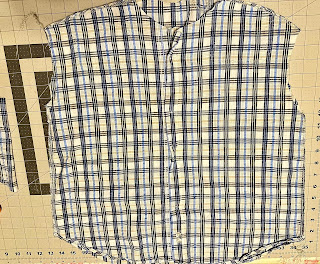
 Hello Readers. I love to sew for a lot of reasons. One of them is that when I find unusual fabrics, I can make them work for me. These plaid pants were just like that. Look at those plaids, the pattern matching was phenomenal. I have never matched my stripes or plaids this well. Let's make them fit. 

Before and after. 

These plaid pants need some help to fit well. I just need to make new side seams and make them a bit shorter. 

These pants were not huge on me, I just needed to take a little bit off the sides. 

I made my new side seams with my sewing machine because I heard on the "Love to Sew" Podcast that serger seams are not as as strong as sewing machine seams. I never knew that! 

These fit better and I made them shorter with a new hem too. 

Now that I have finished making these I can't help but wonder if I should have made them shorts. Summer will be here very soon. It's really hot where I live... I'm thinking about shorts now. Thanks for reading along, now go make something fun for yourself.


Wild Pants

 Hello Readers. I love unusual patterns/colors/designs. Look at these wild animal pants. I love them. They are so much fun. They did not fit very well so let's work on that. 

Before and after. 
 
 Look at all the plant life! Look at the animals!!!

These pants were just a bit long and just a bit big around the waist. With a bit of re-s-zing these will be great. 
 
This is a look at the inside of the pants. I tried them on inside out and made marks down the side where I wanted to make the new side seam. This helps me make them fit really well and then I know exactly where to make my new side seam. 
 
I cut off a bit of length and made a new hem. 
 
i liked how the pnts fit but should I have made shorts?? It's about to be really hot and humid where I live. What's better, pants or shorts???
Thanks for reading along, now go make something fun for yourself.


Tuesday, May 13, 2025

Simplicity 1165 Pant

 Hello Readers. It's Me-Made-May! That means wearing and sharing about the clothes you have made. I made these tapered pants a few days ago. The pattern was easy to follow and they have pockets!! This pattern was Simplicity 1165. It also had a shorts pattern included as well as the pants..

Before and after.

When I saw this pattern the pants on the model reminded me of this fabric I had in my stash. I had just barely enough to make these pants. I always seem to have just enough but no more.

I had to iron and cut out my paper pattern pieces so I could cut the fabric pieces accurately. 
 
I used my serger to put most of this together. This fabric would fray inside and the seams would be messy. I tried them on as soon as the legs were connected. I wanted to see how they fit before I put the waistband on. I am glad I did because the waist was way too big. The hips fit well so I was able to take the waist in a little before I put the waistband on. 

The waistband was elastic and the pattern had a classic casing. 

Clearly I had to shorten the legs. If I had measured how long the pattern legs were in comparison to my legs I could have adjusted them earlier. That's OK. I cut some of this length off and hemmed them. 

I liked how the pants turned out and I am excited to make more things for Me-Made-May. Thanks for reading along, now go make something fun for yourself.

***Year End Update- These were so fun and I love the colors. They were light and more appropriate for warmer weather. It is too cold for these now.


Thursday, May 8, 2025

Making a Wrap Shirt

 Hello Readers. One thing I learned from Covid was that my life and my body are always changing. I wanted to make a top that would always fit me. A top that would adjust to my changing size and shape.

A wrap top would be the best.

A while back I recovered this stool cushion with this fabric. I had some left over. It was a weird L shape and there wasn't much of it. Could I make something to wear? I always try to use my scraps so I don't waste fabric.

Here is a close up. It's such a great design. The wild print is going to help me. 

I made the L shape into more of a square. You can see the new seams here. I didn't try to match the pattern to hide the seam, the wild print will hide the new seams well enough. I wanted a wrap shirt so I needed a front and back that were the same size and shape.

I made 2 equal pieces with 1/2 of an oval in each for the head hole. I used a sewing machine to connect the shoulder seams. If I had more fabric I would have made the top longer but as long as the 2 pieces are equal the shirt will fit well. (At this point I noticed that there was a JoAnn Fabric's logo on the edge of the fabric that I had to cut off.) I made sure my design was right side up on both pieces

I made sure my design was right side up on both pieces before I sewed the shoulders together. I didn't want a bunch of upside-down faces on one side of my shirt. If I had used a solid/stripes/polka dots, this wouldn't be something to consider. When I put it on the dress form I thought it looked really short. 

I was right, it was really short. This is all the fabric I had so I was going to have to keep going with it. My shirt will be a cropped length but you can make any length you want.
 
I didn't want to lose a millimeter by turning the edges under and I needed ties at the waist so I used bias tape to finish the edges.

The bias tape wraps around the edges to cover them. I sewed the bias tape around all the edges and the neck hole. I used extra long pieces at the waist that would be used to tie the shirt around my body. That might sound confusing...
 
Bias tape close up! The bias tape is like a... taco and the fabric is the filling. (And now I want tacos.)
 
Here is a better look at the whole shirt. The blue bias tape is a great finish for the sides and neck. I used the bias tape along the waist also. I made the bias tape at the waist so long that it hangs off the edges and it can tie around my waist. 

The shirt doesn't have closed sides. I create sides when I tie the shirt on myself. The ties from the front piece are tied in the back. The ties from the back piece are tied in the front as you can see above. The ties are adjustable so this shirt will always fit comfortably.

I wore the shirt over a simple straight skirt with a very high waist, that way the shirt is the star of the show. Thanks for reading along, now go make something fun for yourself.
***Year End Update- This top is so sweet. It's the best. I could never find it at the store. That is the beauty of sewing. It is fun and I love it.
***2025 Update-Still a fav!


Wednesday, May 7, 2025

Container Gardening Without Containers

 Hello Readers. I am not a master gardener but I do like to have a little veggie garden every year. I only grow things that are easy to grow like tomatoes, beans, and this year, lettuce. I am trying a new method for the lettuce. This idea won't require me to buy containers, because containers can be expensive. I want the fresh veggies not big expenses. I only had to buy the bags of garden soil. And the seeds of course. 

Sometimes we need easy inexpensive ideas. 

This plan started to form in my head when I saw these shelves that my neighbor was getting rid of. (Yes, I am the neighbor looking over the trash before the trash truck comes down the street.)
 
These shelves were similar to this set of shelves. The parts all pop together to build it. My neighbor was getting rid of 2 shelves and that was what I wanted for this project.
 
 The 2 shelves would raise the bags of soil up and save me some back pain. (I hoped anyway.)
 
Before I could really set it all up the way I wanted, I had to do some prep work. You can see what happened when I got some rain. The water is just sitting. I needed some drainage holes. 
 
To make holes I got the power drill. I drilled small holes in the low areas of my shelf. The size of the holes isn't that important, but having some drainage is necessary.

I wanted to cover up my shelves because they were not cute. This vinyl/plastic tablecloth is totally optional. My lettuce seeds won't care about how this looks whole table lookls, but I will. 
 
I spread the table cloth over my 2 shelves. I am sort of pretending the shelves are some kind of side table. This plastic tablecloth will make the whole thing look a little better. It is also safe to leave in the weather on my deck all summer.
 
I used rubber bands to secure the tablecloth to the legs. The bags of soil will hold the tablecloth down, it won't blow away. I just don't want it blowing around and flapping in the wind.  
 
I also poked a few holes in the plastic tablecloth so water won't collect in it. I felt around for the low areas and poked holes where I had drilled holes in the plastic shelves. This will allow excess water to escape.

Now it is time for the bags of soil. These are really the most important part of this project. I can't plant seeds at all without this.
 
I set the bags in place on my little garden table and poked a couple holes in the bags themselves. Then I flipped the bags over so those drainage holes would be on the underside.  Water can run out of the bottom of the bags, and through the tablecloth and shelf.
 
After I made sure the holes were on the underside of the bags I carefully cut the top sides of the bags open.

I wanted to used the bags as containers. I cut them open but made sure the sides were intact and tall enough to hold the soil in. I added water to moisten. 

I got my lettuce seeds. I wanted lettuce because I like salad. These seeds do not need to be planted very deep. These bags are 4-5 inches deep so they won't be big enough for larger/deeper plants. I think for my lettuce or maybe small herb plants this is going to work fine. 

I planted my seeds as the packet directed. And kept the soil moist. 

Look at this! They sprouted! I can't eat them yet but I wanted to show you my bargain garden idea. Thanks for reading along, I hope it inspires you to try and find a garden spot where ever you are.