Showing posts with label Hat. Show all posts

Monday, June 5, 2023

Travel Refashions #1

 Hello Readers. I am going on a trip to England and I decided to coordinate my travel wardrobe. I am packing all new refashion projects and I will be posting about my journey and my outfit of the day along the way. This post is about a hat to keep the sun out of my eyes and cover up any bad hair days I might have along the way.

 
Before and after.
 
 
This hat was my mom's. I remember her telling me it was packable. It can get rolled and crushed and it will always bounce back. It used to have a pink hat band around it but I don't know where it went. It fell off long ago and it needed a little decoration.
 
The hat had visible glue that I could not remove so I had to cover that up somehow. 
 
I decided to use this brown ribbon. It had blue and yellow flowers so that would go with all my clothes on this trip and it was just sitting in my stash. I love using stuff I have sitting around. 
 
I did some testing to make sure I had enough ribbon to wrap around the hat and make a small bow. 
 
I got my hot glue gun and added small spots of glue to hold the ribbon. I used the glue that was already there as my guide.
 
I started gluing the ribbon to the hat in the back of the hat and when I got all the way around to the back again I glued one end of the ribbon on top of the other.
 
I tied a small bow separately. I wanted to glue and sew it onto the hat. 
 
I put a small spot of glue where the bow was supposed to go. I held the bow in place for 2 minutes while the glue cooled and dried. The bow covers the cut ends of the ribbon and it's fun. 
 
When the bow was glued in place and it was all cooled and dried I used a needle and thread to sew in and out of the ribbon and bow and the hat. I wanted a few stitches to keep it all together and strong. I hid my stitches in the wrinkles of the bow so they wouldn't show.
 
It would be a good idea to use something like Fray Check to keep the ends of the ribbon from fraying.
 
You can just apply tiny amounts along the cut edge and let it dry. It will keep the cut edge from fraying.
 
The new look is fun and will be great for vacation. Thanks for reading along, now go make something fun for yourself.
 
***Follow up review***
My trip was so much fun.- I wore this hat everyday. I am glad I made it. It kept the sun off my head, it kept the breeze from blowing hair in my face and it hid my bad hair days. 

***Year End Update- This hat was so handy for traveling. It helped with the sun and with bad hair days.


Friday, November 15, 2019

The Bun Hat

Hello Readers. Have you ever wanted to wear a hat but your bun got in the way? I know there are bigger problems in the world. But sometimes as a mom I need to put a hat on and run out the door. And sometimes I need to put my hair in a messy bun. When those 2 things intersect it can cause a problem. What I needed was a hat with room for the bun.

I started with this plain black hat. It was $1 at Walmart.

I marked the top of the hat with chalk.

I cut the top of the hat out with sharp scissors. That left me with a raw cut edge.

 I wanted to use this bias tape to cover that cut edge.

Did I try to use my machine to sew the bias tape on the hat? Yes, I did! It was easy to sew through the hat.You could sew this by hand or even hot glue it.

This is the hat with a bun hole on the top.

Here is my daughter modeling the bun hat for me. (I had a lot of trouble getting a good picture of the back of my own head.) The bun fits nicely out of the top of the hat.

 ***The Slippers***
Its cold y'all. Really really cold. I will be wearing these boot slippers every minute I am at home. They were designed to be folded down but I wanted them up to keep more of my legs covered and warm. But they had a rough seam hidden under that folded down fur. I decided to cover that seam and add a bow for fun.

Thanks for reading along now go make something fun for yourself.

Friday, February 1, 2019

Honey, I Shrunk The Sweater

Hello Readers. Have you ever done something stupid, careless, clumsy? Yep, that's a big yes from me. I mess up often and all over the place. It would take and entire separate blog to record it all. But that's not why we are here today.


 I had a laundry accident recently. I washed a favorite sweater with a load of towels. It was a hot water wash and the sweater came out about half it's original size. I was really bummed. What was I going to do with this tiny sweater?
 

I loved this sweater because it was black, it went with everything, and it was cashmere! I was not going to throw this away.


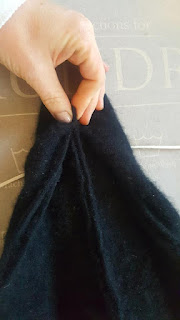
 It was still soft and because it shrunk, it was even thicker than it was before. I cut off the body and saved the sleeves for later. I stitched the front closed and cut off the excess material with the buttons.


Here is a look at it inside out. I used the side seams and the front seam I had just made to make it smaller and more tapered at the top. I didn't measure, I just tried it on and did my best to make it fit comfortably. I took a little off each side to keep the seams evenly spaced around my head. It wasn't perfect, but that's OK.


When I had the size right I folded the top end in on itself and tied a piece of leather cord around it to hold it closed. I thought the leather would be strong and have good grip. It did hold well, I cut off the excess from the top.


I turned it right side out and I had an head shaped shaped hat. I had this furry pom-pom in the sewing stash and decided to add it on top. I used thick embroidery thread and sewed it on by hand.


The pom-pom made it more fun and this is the softest hat I have ever felt or worn. It is really warm and cozy too. I am not taking it off until the polar vortex weather has gone back up to the north pole where it belongs.


That's not all we can do with a shrunken sweater!
Now what to do with the sleeves? I decided that because Valentine's Day is coming,  I would make a mitten for two. I know it sounds weird, stay with me.
I cut the sleeves in half and took the cuff halves for this project.


I found some red fabric scraps and cut out two heart shapes. I stitched the two hearts together around the outside edges.
(This fabric doesn't look red, but it is.)

I left two openings so I could insert the little sleeve pieces. I had to sew them in by hand. I added some big white embroidery stitches around the edge for decoration. 
The idea is that I will put one hand in and my 3 year old will put one hand in and we can hold hands when we go for a walk. He is smaller than me so his hand would be lower than mine. 
If you want to make this for two adults, you could put both hand openings at the top sides of the heart.
(See I told you it was red.)


Here is my little guy and I holding hands in the heart. It is so bitterly cold we couldn't go outside for a walk though. He thought it was funny that we both put our hands in the heart.
(I may have bribed him with a plate of cookies to get this photo.)


Thanks for reading along, now go make something fun for yourself.
Authors Note: The cold polar vortex is over. I went for a walk with my 2 little buddies. The mitten was a hit.
 *Year end update-I wear this hat all winter and my little guy still likes this mommy and me mitten. Win-win.