Hello Readers. I sometimes clothes don't fit as they should and that is when we need to get creative to make them work. This dress was one of those situations
Before and after.
This dress had some super cute shirring at the top. But it was very tight and also very low cut. I wore a shirt under it to cover all the cleavage but it wasn't comfortable like this. It just didn't work for me. It was a nice hand-me-down from a lovely woman. (Thanks T!) How could I make it fit me and be comfortable.
I cut the top of the dress off. I saved some of the shirring to use as a waistband.
I got some matching thread and threaded my serger. This dress was multicolored so I could have used any of the colors in the skirt fabric. I went with black.
I used my serger to finish that cut edge. I didn't want it to fray.
The serger has a tail of thread that hangs off the garment when you are done stitching. Some people tie it in a knot and cut off the excess. I like to take the whole tail and use a needle to tuck it under the serger stitches. It holds nicely and looks neat.
Then I went back and made the waistband smaller and used gray thread to finish the cut edge. As always, it's nice to customize the fit.
I needed a top to go with my new skirt. I grabbed this J.Crew tank from my refashion rack. It would match the gray flowers in the skirt. I didn't like that long fake white layer that hung down from the shirt.
I decided to cut it off.
I left about 1/4 - 1/2 an inch of the white layer so I could use my serger on it. The serger stitches will keep it from fraying. This was a lot faster than unpicking all the stitches and removing the white layer.
The little white edge is hidden under the gray shirt anyway. No one but us will ever know it is there. (Shh, don't tell anyone.)
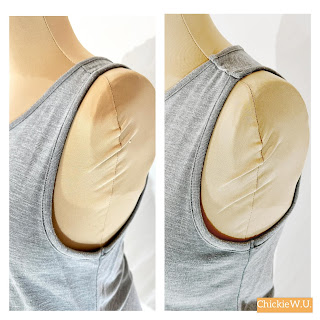
The armholes of this tank were really low. I don't know why they are so low but half my bra would be showing like this. That isn't the look I want so I needed to raise this armhole.
I cut the shoulder straps and made them shorter. This will raise the armholes.
All my important bits will be covered now.
My outfit is ready to go. And where did I go?
I started my day with a walk. These 2 kept me company. Thanks for reading along, now go make something fun for yourself.
***Year End Update- This was a great outfit for hot days and the skirt was so comfy.


