Tuesday, January 30, 2024

Quilted Vest From Fabric Samples

 Hello Readers. I have a lot of fabric sample that my mother in law gave me. She used to work at a fabric store and these sample pieces were on display. They are squares and 30" by 30". They are not always big enough to make clothes but I had 2 of these quilted pieces. That was enough for the front and back of the vest. I love quilted items and this quilting was already done for me. 

Sewing from my stash? I love it!

This fabric was a few layers thick because of the quilting. I liked the off-white color. 

I started by using pattern 8632 by Simplicity. I made my vest larger so the pattern was more of a loose guide, but it helped.

This pattern was so simple it was easy to work with.

I put my vest together. I left these small openings so I could add some pockets. I thought that would be easy even with no guide or pattern. It should have been but I sewed the pockets in with the seams showing on the outside. Twice. Ugh!!! It was OK, I just kept going.

I used bias tape on all the cut edges to finish the vest. I didn't want to turn the edges under because it was thick and it would be bulky. It was OK, I just kept going.

The bias tape was great until I ran out. You can see the left armhole is not done. It had to wait for me to get to the store. It was OK, I just kept going.

I used these buttons that my daughter got for me as a souvenir from her trip to Iceland. They are made from bone or antler... I can't remember. I have been wanting to use them for a while. Sewing them on was easy.

I had to make the button holes without a buttonhole maker. I just eyeballed it and used a zigzag stitch. My sewing machine is from 1943 and it doesn't have a buttonhole feature. It is the only thing from modern machines that I wish I had. 

Here is a look at the back. (I did get more bias tape and finished that armhole.) 

It was really OK, I finished it! This vest is very neutral in color. It should go with everything and be easy to wear. Thanks for reading along, now go make something fun for yourself.

***Year End Update***- This vest is great. I get cold but I hate big winter coats in the car. It's worn often.


Thursday, January 25, 2024

A Men's Shirt Refashion

 Hello Readers. Not every project works out well. Mistakes are made. Disasters happen. C'est la vie! I tried to make this men's shirt into a dress and messed up. I mis-measured and it was a bit shorter than I wanted. 

Before and after.

I started marking out where to cut the skirt and the bodice from this men's shirt. I measured the skirt correctly. Now that I can look back, I measured the bodice wrong and did not noticed. 

How did I not notice how short the top was? This is crazy.

I used my serger on all the cut edges. I thought it was all OK so far.

I turned the edges under and stitched them down. And I was about to see my mistake.

I thought I would use this gray ribbon as a waistband. It could have been great. 

I put it on my dress form and it didn't fit at all. I made this dress form to match my measurements and if it doesn't fit the dress form, it's not going to fit me. The bodice is way too short. It needs another 4-6 inches.

This is not comfortable, it is too tight, it is too short... The top is not long enough. I really messed it up. Sometimes that happens. Oh, well. Thanks for reading along, now go make something fun for yourself. And measure carefully!
***Year End Update***- This was sadly a little too short to wear often.


Wednesday, January 24, 2024

Making a Leather Clutch

 Hello Readers. I need to start with a full disclosure statement that I do not know what I am doing and just learning as I go along. (In sewing and in life.) I wanted to try and work with leather so I tried it. Let me show you what I made.

Before and after. 

I was given this leather. It was the scrap pieces from a sofa project. (Thanks P. G.) I don't think I would go buy leather but I was going to have fun trying to work with it. It was very soft and pliable. Could my sewing machine sew through it. Did I need special equipment? Let's find out.

I decided to make the simplest bag I could just to start easy. I cut 2 rectangles the same size. It was not hard to cut through the leather but it did move a lot and that was annoying. I had to do a lot of trimming to make everything even. 

Using a book to hold the leather piece helped a little.

I wanted to cut a circle in both pieces as a handle. Tracing the circle was very easy.

I thought I should cut both circles at the same time so they would match. This was impossible. 

Would a rotary cutter work better? No. I also tried a box cutter and it was awful. 

Mistakes were made.

This was the only way I could cut the circles. The curves were really difficult. I almost gave up because I wasn't even sure I would be able to stitch through this leather with my sewing machine. 

I lined up my 2 rectangles. I did not have special needles or thread. I had a universal needle and all purpose thread. and it was so easy to sew through the 2 layers of leather. I started slow and it went well. I sped up a little and never even broke a needle. I never broke the thread. I could not believe the sewing was easier than the cutting! It was easier than some denim I have worked with. 

My bag was done.

When the top folds over it makes a nice clutch bag. Thanks for reading along, now go make something fun for yourself. 

***Year End Update***- This bag actually turned into a great IPad cover for packing in a bag.


Thursday, January 18, 2024

Dress to Apron Upcycle

 Hello Readers. I am a messy cook. There is no other way to say it. I spill, I splatter, I drip, I drop.. and I ruin my clothes. I don't want an apron so I can look like Betty Crocker, I just want to save my clothes! This apron is easy because I made it from a dress. I was halfway done before I even started.

I like to thrift shop and go to clothes swaps and they only downside is that I can't try anything on. Sometimes I make mistakes and things don't fit. This red floral dress was so pretty, it really caught my eye. I got home and realized it was way too small so I made an apron.

This was a wrap dress that couldn't quite wrap. 

I cut the top of the dress and the skirt apart. I cut approximately 1/4 inch above the waist seam.

I cut this square from the back of the dress, between the shoulders. The size was based on the size of the back panel. It was approximately 9"x 9".
 
Here are my 2 pieces. I noticed those thin strings on each end of the skirt. Those would come in handy later. 
 
I cut those strings off and saved them for the end.
 
I serged all the cut edges of the square piece and the cut edge at the waist of the skirt piece, to prevent fraying right away. (You can also use a zigzag stitch on a sewing machine for this.)
 
You can see the white stitches across the top of the skirt piece here. I gathered the skirt piece across the top so the apron front would be nice and full. 
 
I sewed all the pleats down. It was lumpy and my sewing machine didn't like it but I got it done. The stitches were not pretty but it will get hidden later so it's OK. 
 
I added some lace around 3 sides of the square. It hides the stitches around the edges and it's so pretty. The fourth side will be hidden by the waistband, so it does not need any lace. (I also added some lace around the hem of the skirt but this is optional.)
 
I needed to attach the side of the square with no lace to the skirt. So I sewed the square to the skirt piece. I just put the square on top of the gathered waistband of the skirt. I made sure it was centered in the middle of the apron.  
 
I wanted to use this ribbon at the waistband. It is long enough to tie in the back and it hides all the lumpy gathers and the all the stitching holding everything all together. I pinned it so it was even and each end of the ribbon was the same length. 
 
This ribbon covered all the gathers and gives a nice smooth waistband.
 
Remember those thin strings for the skirt that I cut off? It was time to use them. I took them to make the neck straps. I stitched them to the top two corners of the apron so they could tie behind my neck. 
 
Here is a look at the waist and neck ties from the back. 
 
My apron was done and ready to use. As I told you, I am a messy cook and I can ruin my clothes getting food together. Hopefully this will help me stay nice and neat. 
 
***Year End Update***- The colorful flowers of this fancy apron make me feel like Martha Stewart in the kitchen. (Minus the prison record.)


Wednesday, January 17, 2024

A Quick & Easy Shrug

 Hello Readers. Are you in the middle of the arctic freeze where you live? It is COLD where I am. I wanted to make something warm and cozy. I found this crocheted baby blanket at a thrift store and thought it would make a great shrug. Now is the time for more layers!

Before and after.

This baby blanket was made by hand and that always appeals to me. It was beautiful, it was in great shape and it was a rectangle. That is what I needed. If I put it across my shoulders lengthwise it could be used as a shawl but shawls always slip down and I hate fussing and fixing things like that. If this blanket were made into a shrug with sleeves, it would stay on and that would be easier to wear.

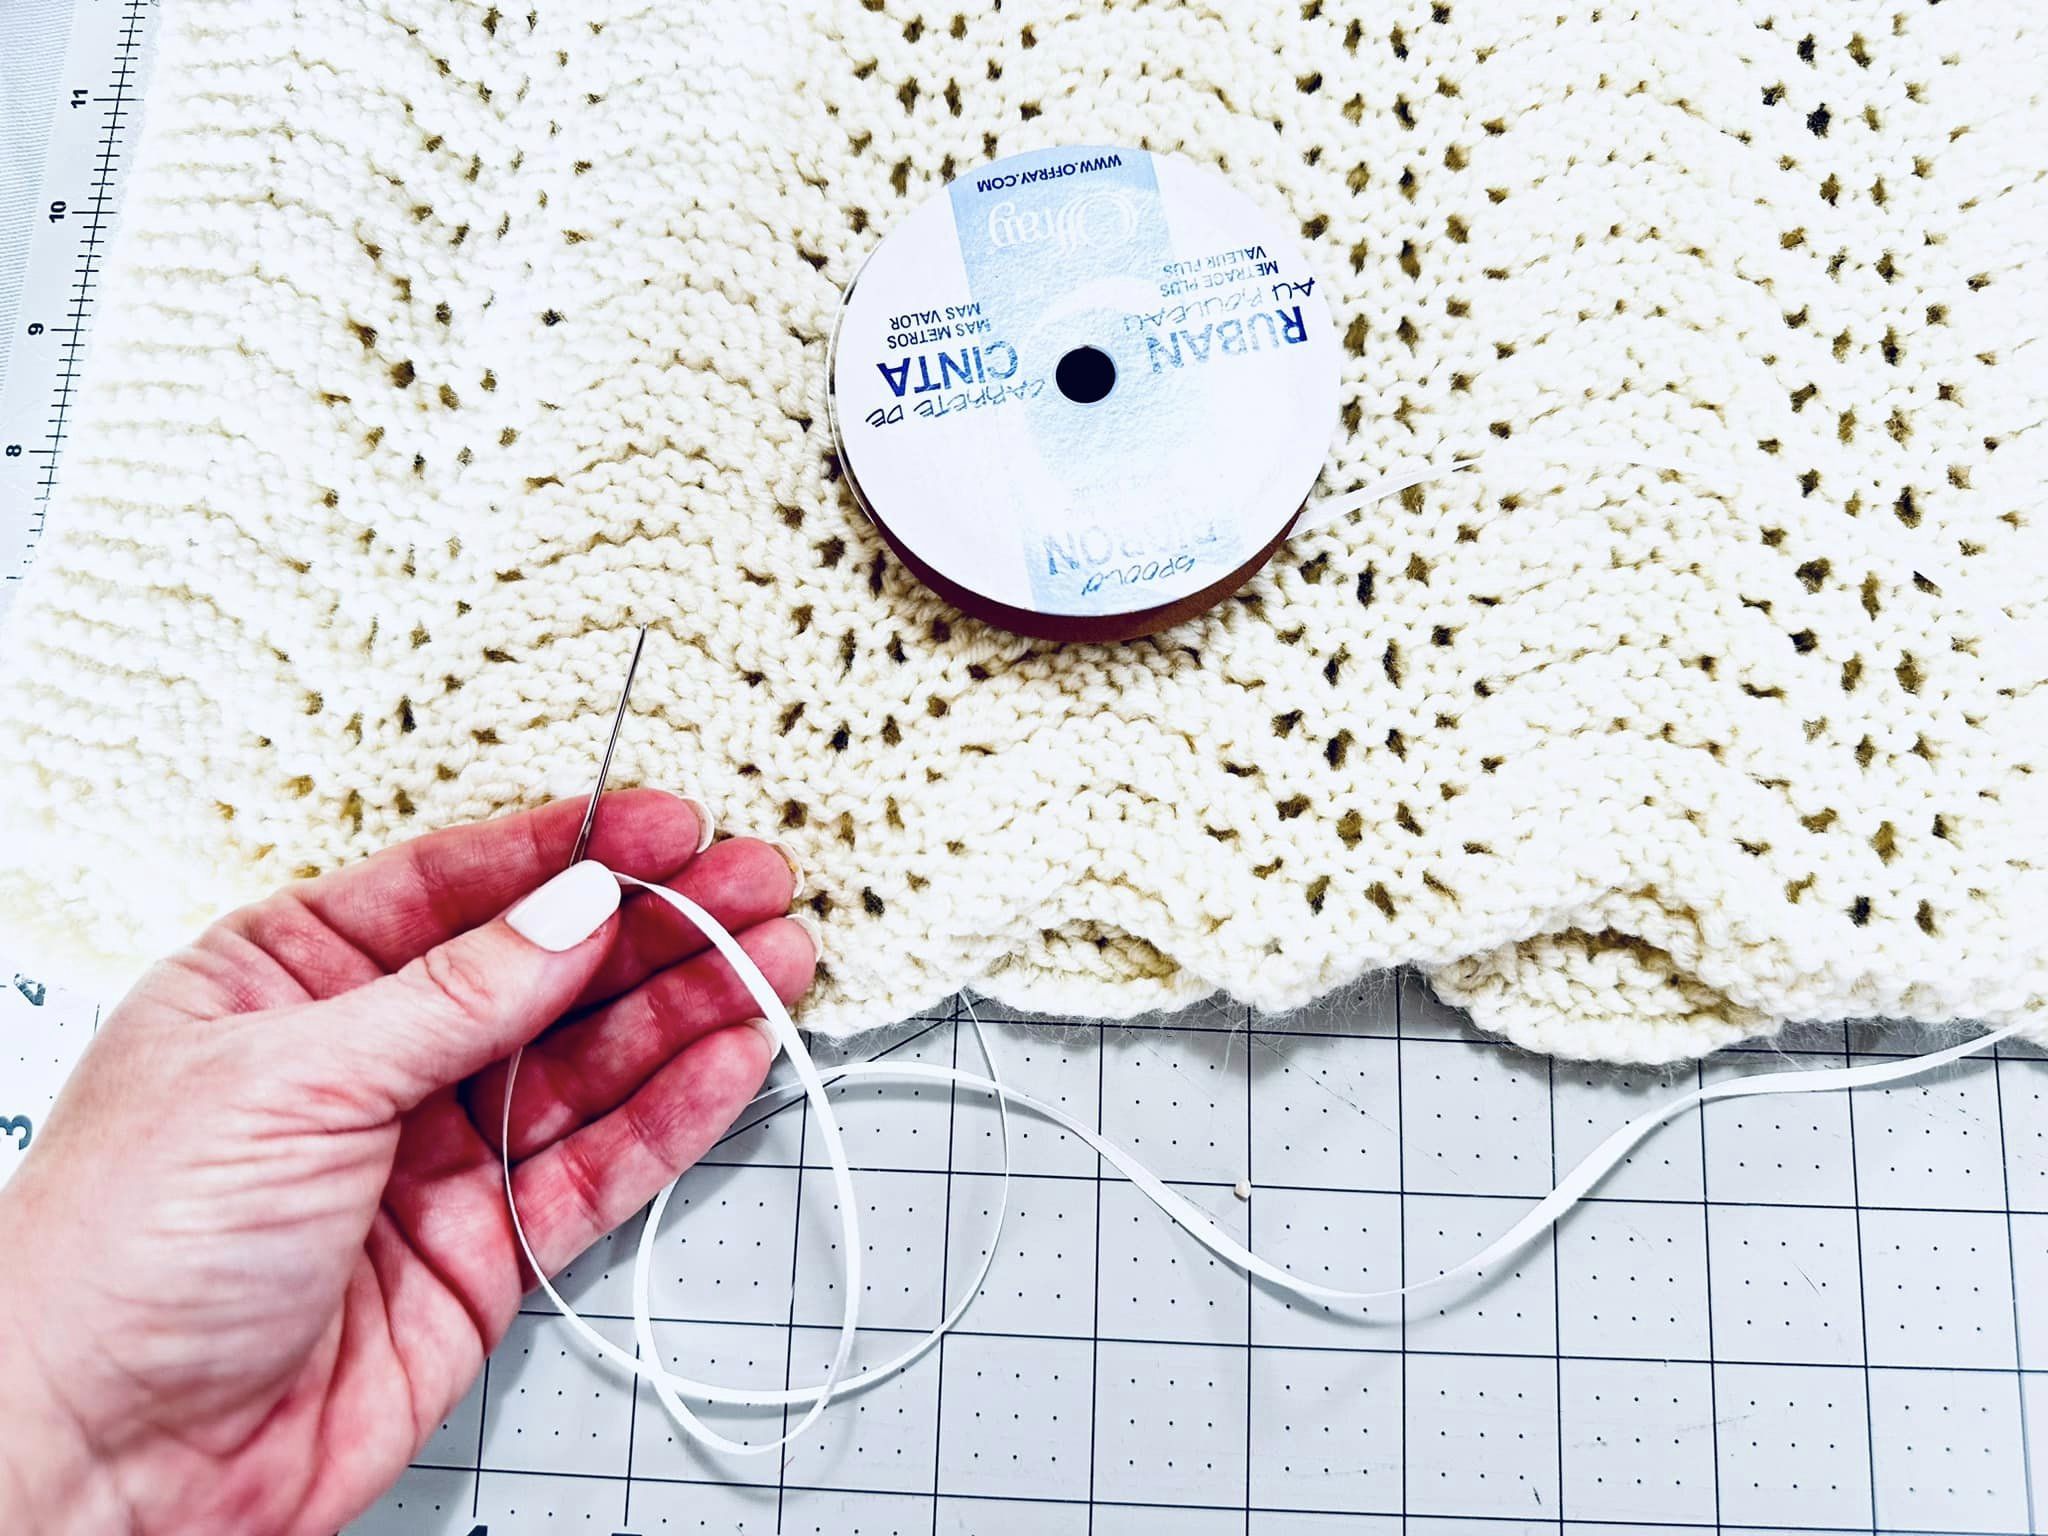
I folded the little blanket lengthwise with the right sides facing each other. I got some very narrow ribbon from my craft supplies. (Matching yarn would also be great for this.) I used a very large embroidery needle and threaded the ribbon through the needle. I started "sewing" the 2 layers of blanket together, starting at the outer edge on the left.
 
I want to point out I left a long "tail" of ribbon when I was sewing. I did not tie a knot or secure the ribbon to the blanket. I let it hang loose because I will sew back to it and tie a knot when I am done. Let me show you what I mean. 
 
I pushed the needle in and out of the 2 layers of blanket. I made large stitches and they will be hidden so this is just to hold the edges together. It doesn't need to be pretty.
 
 I sewed approximately 6-7 inches across from the left outer edge. This will be the sleeve.
 
Then, I sewed all the way back to the outer edge where I started. 
 
When I had stitched my way back to the beginning I tied the 2 ribbon ends in a knot. 
 
I made sure my knot was tight and cut off the excess ribbon. I stitched the other sleeve with my ribbon in the same way.
 
When both sleeves were done I turned the shrug right side out. All of those stitches will be hidden inside the sleeves and the beautiful crochet pattern will show. 
 
I tried it on and here is a look at the back. It has a loose "one-size-fits-all" fit. That makes it a nice project for almost everyone. 
 
This shrug is warm and cozy and only took about 15-20 minutes. Thanks for reading along, now go make something fun for yourself. 
 
 ***Year End Update***- This is one of the most used/most useful things I have ever made. 5 stars