Showing posts with label Tshirt. Show all posts

Wednesday, March 12, 2025

A St. Patrick's Day T-shirt

Hello Readers. St. Patrick's Day is coming soon. I'm not sure if you celebrate or are into this holiday but I am. I am mostly of Irish decent. (Like you couldn't tell from the pale skin and freckles right?) Anyway, I made a shirt to wear for the special day.

I didn't have a spare t-shirt to use so I decided to use this dress. It fit fine but it was too clingy and heavy. The dress was full cut but somehow thin and heavy at the same time. I didn't like to wear it, even over leggings or tights. This dress would be better as a shirt.  

I got out my handy dandy stencils. I should have checked to see if I had green paint. I didn't. I decided to mix some yellow and blue and make my own. I put some cardboard inside the dress so the paint wouldn't bleed through to the back. 

 LUCK!
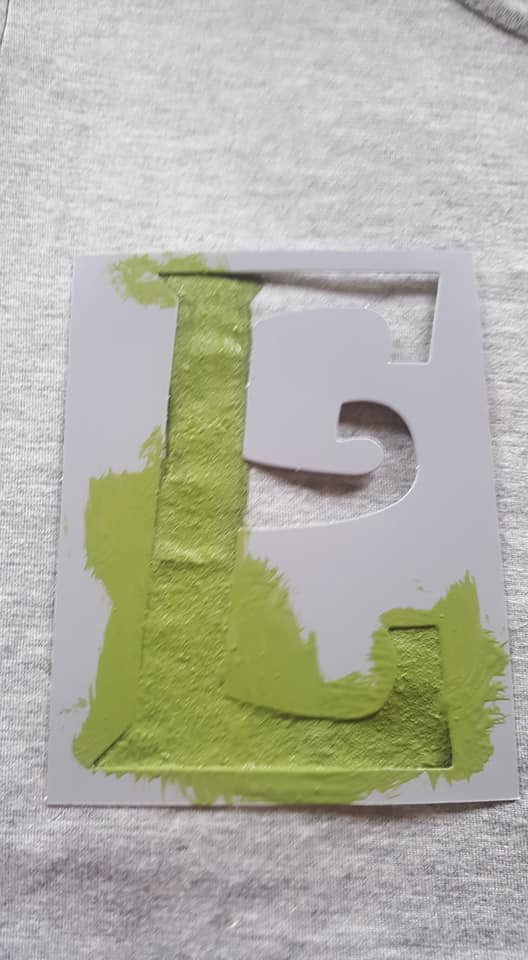
I was also missing the letter L. I used a 1 and a letter E to make the L I needed. Was I getting annoyed that I didn't have the things I needed to make this shirt? Yes, and it made me more determined to make the shirt than ever! I would not be stopped!
I did not have a shamrock shaped stencil either. I used this little foam shamrock. I painted it and used it as a stamp to get the shape. I filled in the paint where it needed it and I was done. It just needed to dry.

  I cut the bottom of the dress off. I used a shirt I liked as a guide for length. I didn't hem it because I planned to tuck it in anyway. 

I let it dry overnight and it was ready to go. Everyone has heard of the luck of the Irish, may you have a lucky and happy St. Patrick's Day too.  


Thursday, August 29, 2024

The Back to School Shirt

Hello Readers. It is "Back-to-School" time in most of the U.S. Do other countries start the school year in late August or early September? I'm not sure.....but I have a fun project for you! This is a great shirt with a school theme. It's perfect for teachers, school kids, homeschoolers, parents really excited about school... and no sewing is required.
 
You need any white cotton t-shirt. The thicker the fabric, the easier this project will be. 
(I learned this the hard way.) You also need a blue and pink fabric markers. Regular markers will not work well for this project.
 
 I put something inside of the shirt in case the marker went through to the back of the shirt. I tried to draw straight horizontal blue lines across the front of the shirt. My shirt was very thin and stretchy. The shirt stretched when I wrote on it. It would have been better if the shirt was not stretchy, it would have been easier to draw my lines. It's OK, it doesn't need to be perfect. This project is supposed to be fun. Don't stress about it. The mistakes are all part of the fun.
 
I drew one pink vertical line on the left. I let the lines dry over night. The next day I searched around for something round and found this bottle. I wanted to make the 3 holes on the left that notebook paper has. I painted the top of the bottle and used it as a giant stamp. 
 
I made 3 big gray dots and let that dry over night too. I kept something inside the shirt so the paint wouldn't go through to the back. Newspaper or cardboard will work for this. 
 
You can wear this shirt to school. Or to shop for school supplies. Or to meet the teacher. Or at home while you homeschool your kids. Or anywhere! 
 
Thanks for reading along, now go make something fun for yourself.
***Year End update-  This shirt was so useful. It was part of a "Rock, Paper, Scissors" costume at Halloween. I wore white jeans with it and my costume was ready.

Wednesday, January 11, 2023

Refashioning Pajamas for Daytime

 Hello Readers. What can you do with a flannel pajamas shirt besides wearing them as pajamas? I loved the plaid flannel. It was soft and cozy but it was pajamas, I couldn't wear pajamas out in the world. I was inspired to put 2 different items together in big block pieces. Read on and I will show you what I mean. 

Before and after.

The flannel shirt had red piping along the edges. It was clearly a pajama shirt, I couldn't pretend otherwise. I loved the flannel and the sleeves did not look like pajamas to me.

 
This red shirt was on clearance for $1. I am a serious cheapskate but even I can afford a dollar.
 
 The plaid shirt got cut into 3 pieces. This will make more sense when I put it all back together but this was my first step. 
 
I also cut the red shirt into 3 pieces. 
 
I wanted to put the middle of the red shirt together with the 2 plaid side pieces. That way the red piping and collar would be replaced by the red shirt. I thought it wouldn't look like pajamas anymore. I would sew the cut pieces together with the right sides facing each other. This will be easy to do because it is just 2 straight seams.

I used my serger to sew this but you could also use a sewing machine to do it. The flannel doesn't have any stretch so it would be easy to stitch with a straight stitch (To connect the seam.) and/or a zigzag stitch (To keep the seam neat inside the shirt.).
 
Shoulder close up.
 
My new shirt is done. I knew how big I had to make the shirt to fit me well. You can measure yourself before cutting the pieces to make sure you make your shirt the size you want. The bigger you make the shirt, the looser and baggier the shirt will be.A loose over-sized fit would look great too.
 
I really liked the plaid sides with the solid red center in this shirt. 

I thought I could put the other pieces together and I was right. The red piping really makes this look like pajamas to me. I can wear this as pajamas. Thanks for reading along, now go make something fun for yourself. 

P.S.
My son and I were matching in red and black and he thought we should take a photo together. Of course, I agreed.

***Year End Update- I still like this combo of fabrics. And my son is still trying to get in pictures.


Friday, October 28, 2022

Dress Up a Free T-shirt


 Hello Readers. I got a freebie t-shirt recently and wanted to dress it up. Free t-shirt just seem to happen, you can't get away from them. Let's have some fun with this one.

 
Before and after.
 
This was a simple t-shirt. It was kind of boxy and shapeless like they all are and it had a logo on the back too. That's OK, I have a plan for this.
Life Happens! That is for sure. The first step in this project was to mix up some acrylic paint. I wanted to try and match this late color.

I mixed up a color close to the right shade and I started painting over the white and green writing. 
 
Here is a look at the shirt when I was done painting over the lettering. I let it dry over night when I was done painting. The acrylic paint will last forever, it never washes out. It's not perfect but it will work great.
 
When the shirt was dry I used iron on tape to hold the lace on the shirt. You could use pins but I was afraid it would shift around. I cut the lace off a cropped shirt I found at a clothes swap. The shirt was old and tired looking but the lace was still very pretty, so I saved the good part.
 
After ironing I was ready to sew the lace down across the top and the sides.
 
Actual stitching!
 
I used a zigzag stitch on the sides to really secure the edges.
 
I cut the neck binding off and I also cut the sleeves at an angle so they would have a fluttery look. 
 
I cut the logo off the back when I cut the neckband off.
 
 The shirt is casual and fun and more feminine with the lace. It's easy to wear and no ironing needed ever! I love T-shirts. Thanks for reading along, now go make something fun for yourself.*Year End Note From Chickie- I love this shirt for work. I can't really ruin because it's brown.


Wednesday, August 17, 2022

A Tea Shirt

 Hello Readers. I love to sew and refashion but you don't always have to sew to refashion your clothes. No-sew refashions can be a lot of fun and easy to do. Let me show you a couple recent refashions like this.
Before and after.

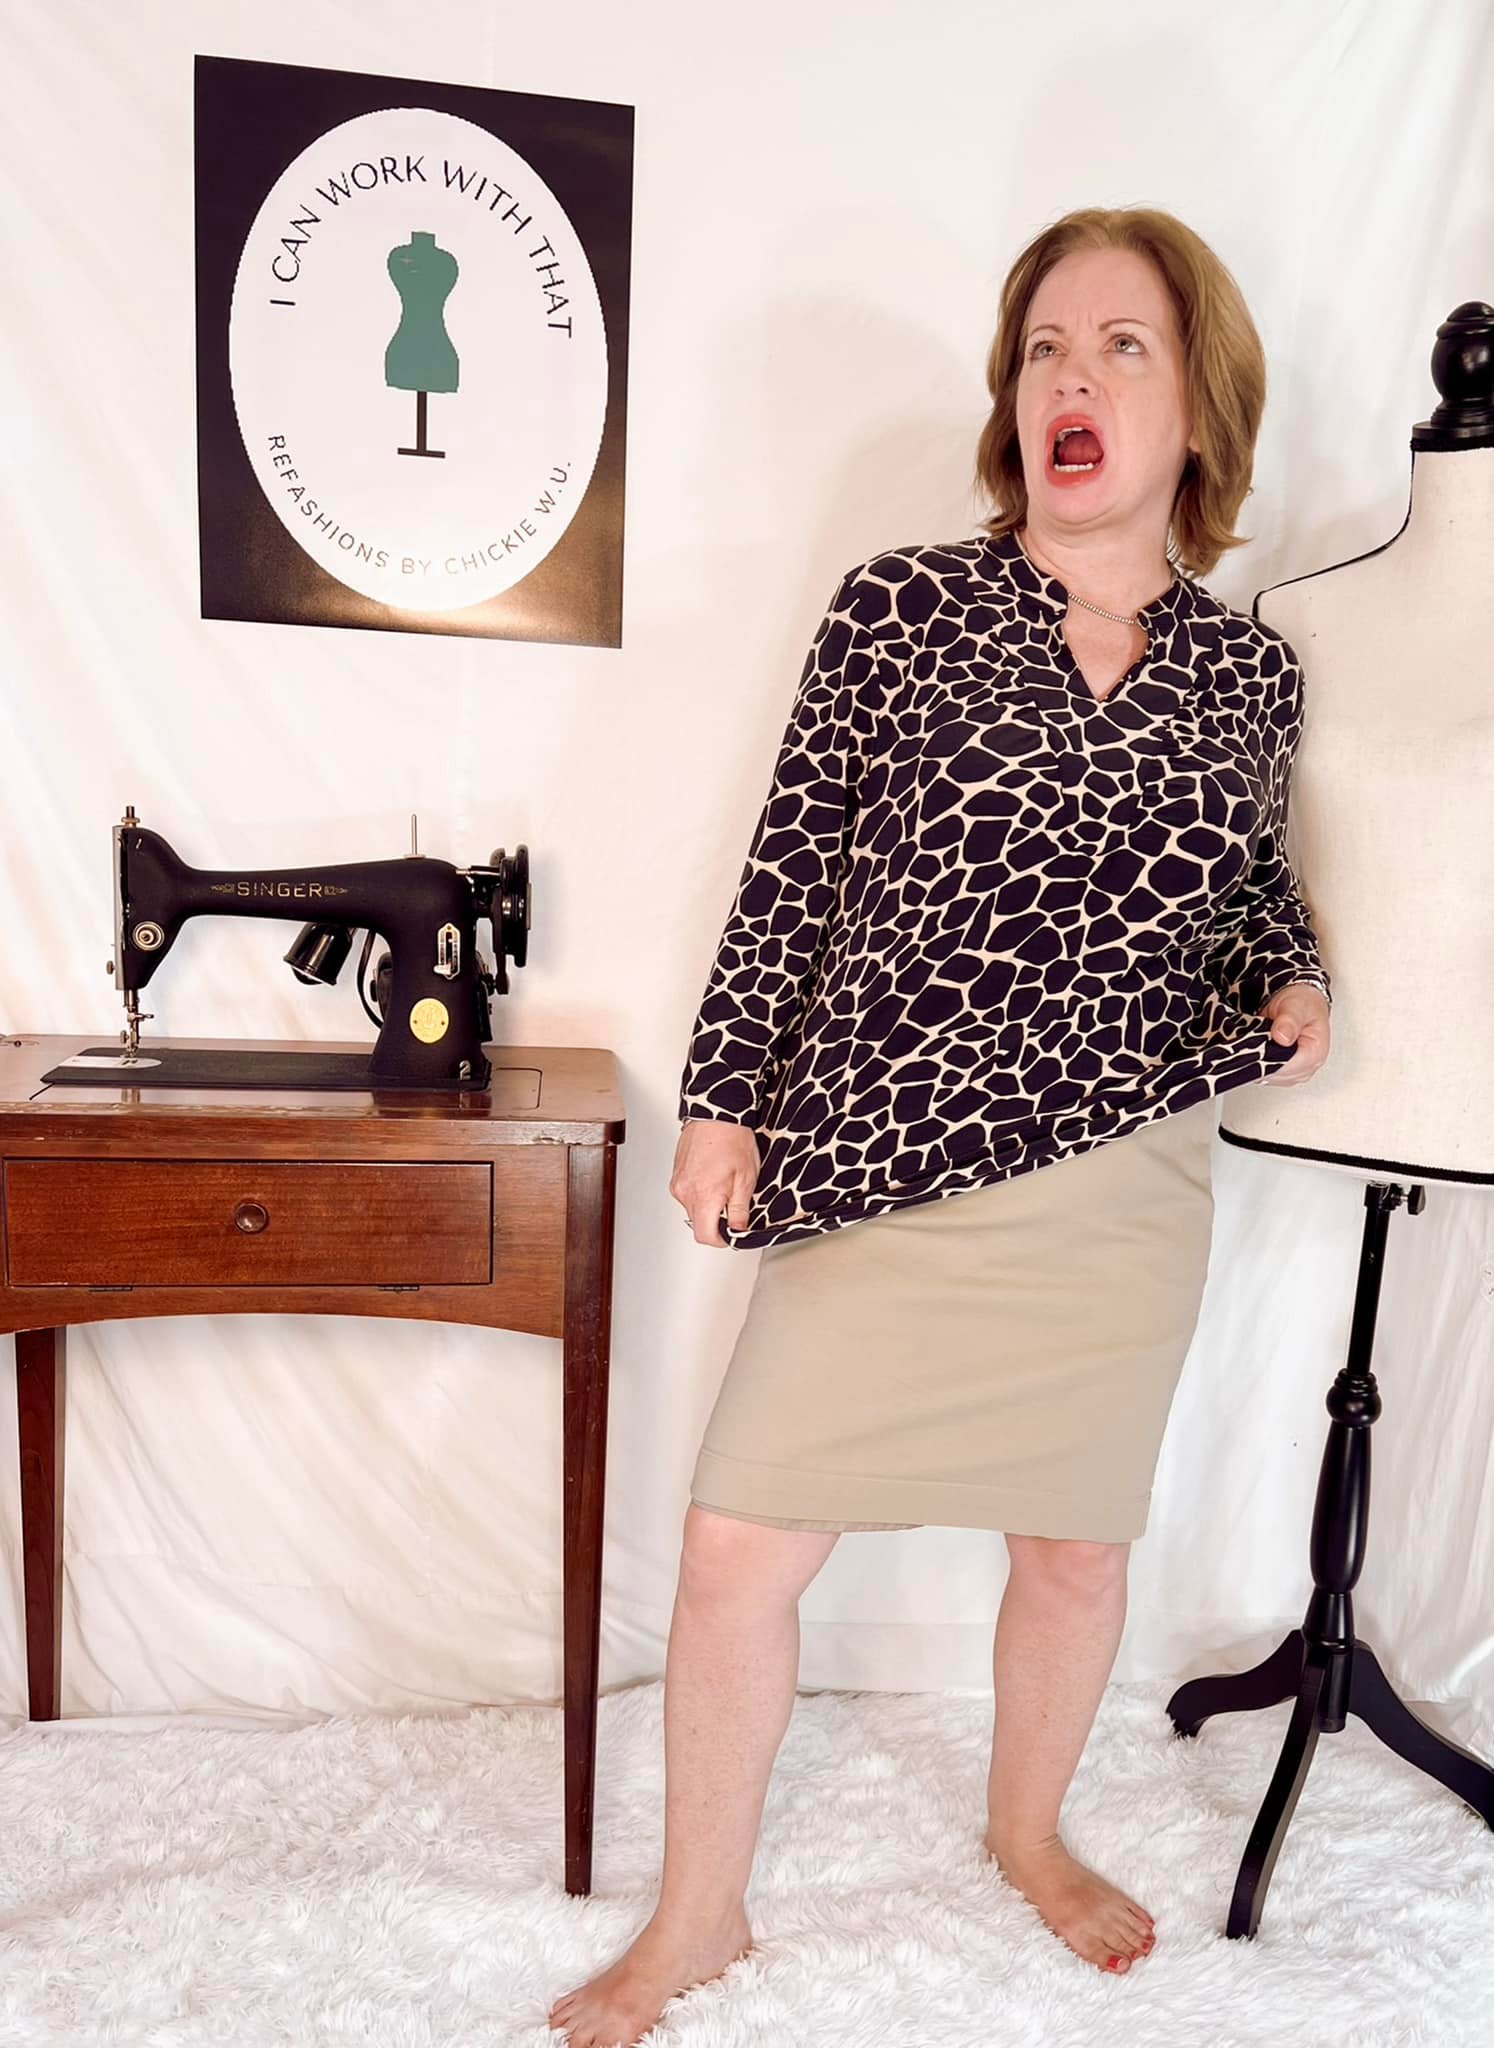
I am still in my happy yellow phase this month and this shirt was a fabulous find for me. I am a tea drinker and I love a good pun. This shirt had everything I could want in a tea/T shirt. It was a little boxy so I decided to do some quick work on it.

I usually find the round high neck on t-shirts to be uncomfortable. I like to cut the neckband off. The knit fabric will not fray so you can cut the neckline however you like most, round or V shape. Removing the neckband opens up the neckline, elongates the neck which is more flattering on me. It also feels more comfortable to me when I am wearing it. 

My next step was to cut off the end of the sleeves. I cut mine at an angle so I would get a little cap sleeve look.

I pulled on the cut edge so that the fabric would roll up in a curl. I like this look and I thought it would look cute on the short sleeves. I wanted them to be as loose and fluttery as possible.

I cut off the bottom of the shirt. I also pulled and stretched the cut edge to make it roll. Then I cut a slit in the center of the shirt. I liked the curled up edge. 

I tied the 2 corners into a knot in the front. The knot looks cute and it pulls the sides of the shirt in and gives shirt more shape. With no sewing! It's so fast and easy.
*** PART 2 ***

These black jeans fit perfectly and were very comfortable. But they were too long. I am really short so that was not surprising. I wanted to make them shorter. I could have just cut the jeans straight around each leg but I wanted to do something different.

I cut the jeans shorter and made it fun too.

I washed and dried the jeans and I got some great fraying. I cut off the really long strings so they wouldn't tickle my feet. (No tickling allowed ever! I hate it.) You can cut off as much of the jeans as you want. Have fun with it. 

The shirt was easy to wear and felt light and open. I tucked it in for this picture. The jeans were now the right length and I liked how the back of the leg is longer than the front. I really liked the fit of these jeans. They are Gloria Vanderbilt from Kohl's. They make my mom gut seem to disappear. (Not an ad. I just like them.)

I like the knot detail on the front out as well. Thanks for reading along, now go make something fun for yourself. 
*Year End Note From Chickie- I love this and will forever. A "tea" shirt! Come on now, that's funny.


Friday, June 17, 2022

One Last Giraffe

 Hello Readers. I know this month has been a lot of animal prints and most of them were giraffes. But... I have one more giraffe to share. This long sleeve shirt was soft and stretchy but I just felt like it might be too much. Like too much giraffe print? Let's see how we can calm down a print that feel like too much. 

Before and after. 

This shirt was a little baggy and a little long on me and the skirt was a mid knee length, that wasn't great on me either.

I decided to size the shirt down a little. 
 
These cut edges just need to be put together again with a zigzag stitch or a serger. Use what ever you have.
 
The skirt got a little trim and a new hem for the lining and the skirt itself.

I loved how this outfit turned out. It was looking much better but...it was so hot when I wore it that I went back to the sewing room asap.

I decided the sleeves needed to be shorter and the length of the shirt could be shortened also. I wanted to use my serger and do a flatlock stitch. I am still learning how the serger can do different things. 

I stitched the right sides together and then ....

Here is a close up of my first flatlock stitch. This will be great for other knit clothes too. Thanks for reading along, now go make something for yourself. 
*Year End Note From Chickie- I love this shirt. It is soft and gets a lot of wear. I haven't worn the skirt as much. Maybe tan is not fun enough for me?


Friday, March 4, 2022

Green T

 Hello Readers. What should I do with a green T shirt from a camp I never went to? I decided to refashion it into pajamas. I could have just worn it the way it was but it's more fun to refashion.

 
Before and after. 
 
This very basic camp t-shirt could use a makeover. I liked the green and St Patrick's Day is in March. Can I refashion all green items this month? It will be fun to try.

I cut the center out of the shirt. I cut away a pie shape to remove the logo.

I used that piece to cut out a replacement. I put the piece from the camp shirt on top of the lighter green shirt and cut a piece the same exact size. The light green shirt did not fit so I wanted to use it for something.

My new pajama shirt was easy to put together. I wanted some light green edging. 

 
I cut strips of light green t-shirt material for the trim. It curled up a lot and was annoying to work with. I folded each strip horizontally and stitched them onto the edges of my shirt.
 
 
The shirt was perfect for these pajama pants. The pants just needed to be a bit shorter and more narrow in the legs. I cut some excess from the inside of the legs so I could keep the pockets in place on the hips.

    My new pajamas were perfect to lounge around. I wasn't feeling well and I just wanted to be a a couch potato. Thanks for reading along, now go make something fun for yourself.