Friday, May 27, 2016

The Porch Makeover

Hello Readers. Believe it or not, this cotton blouse is responsible for decorating my whole front porch. I know. It sounds crazy. Read on and I will tell you what happened.


I have had this blouse for ages and I don't like it because when I look at it all I can see is this, I would feel like a big fat candy cane in this blouse.


Here is what my front porch looked like all winter. It's pretty plain. 


I suddenly realized this blouse also looked like the stripes on the American flag. I had this small piece of blue flag fabric and when I realized it is almost Memorial Day, it all came together in my head.


I cut the arms and collar off the blouse.


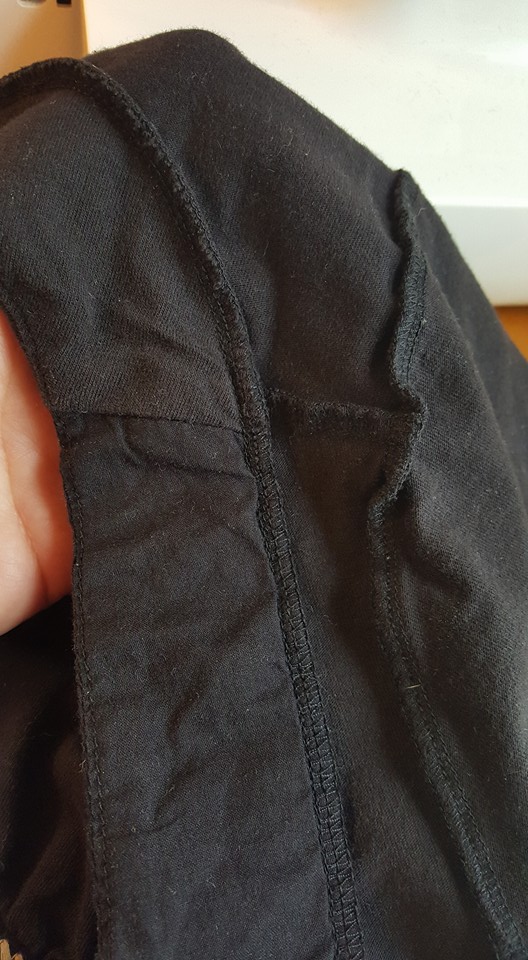
I turned it inside out and sewed all around until I had a rectangular shape. I used the button front to open and turn the shirt right side out. It isn't a perfect rectangle and the darts of the blouse are visible. Don't worry, it won't matter.


It is going to be a pillow. I am going to stuff it for free too. Here is a look at my free pillow stuffing. Plastic bags from the grocery store. I don't do this for pillows in the house but it will be great for outdoor use.


The buttons down the center let me open the pillow and stuff it with bags and then button it back up.


Here is my finished pillow with a little bow on it. I cut a strip of fabric with  pinking shears and tied it in a bow. It is pinned on to the pillow from the inside with a safety pin. The buttons are in the back but they might be cute in the front too.


I put some of the blue flag fabric around the inside of my flower pot. It is a good liner and keeps soil from washing out the bottom when I water the daisies. I also hung up the flag that was put away in my garage.


Memorial Day is usually considered the beginning of summer. I wish you all a summer of fun where ever you are. And a big thanks to all our military past and present.


Thanks for reading, now go make something fun for yourself.


Wednesday, May 25, 2016

Blue Suede For Days Part 2

Hello Readers. This project has been in the works for a long time. This top is part of an outfit made of faux suede. I posted about the skirt half of the original outfit here. For a long time I wasn't sure what to do with this top. I love the color but how much baggy shapeless blue suede does one person need?


The top was too big and it had no stretch or give at all. I couldn't just take it in, I wouldn't be able to get it on and off. That is what kept me from doing anything with it for so long. I just wasn't sure what to do with this top. I cut it straight up the back.


I turned the raw edges under and stitched them down. This took the shirt down in size just a pinch. I also added a button and a buttonhole at the top. That would connect the two sides. I liked the idea of an open back shirt but I don't like to show that much skin. How could I make it open but not show anything?


My solution? Hidden snaps down the back.


You can see the back is open at the bottom but not up the back. The shirt fits better at the top, especially the armholes and is loose at the bottom so it skims the hip area and doesn't ride up. It's a loose fit in front but not huge and shapeless.


Thanks for reading, now go make something fun for yourself.


Monday, May 23, 2016

The Too Short Shorts

Hello Readers. I am still waiting for warm Spring weather. We have been having rain for three weeks straight. We don't usually have this much rain and cool weather in May. If it ever warms up I will want some shorts. I found these great shorts at a clothes swap. They were in great shape and fit well but seemed a bit short. I decided to lengthen them a little. I have seen similar ideas for adding trim to shorts elsewhere and decided to try it for my self.


I ordered this lace trim from Amazon. The selection is great and the price was really good, but I had to buy 5 yards. I will be using this trim in many projects in the future. Whatever the project, I will have some navy blue lace to add to it.


I attached it to the inside of each leg. Super easy.


Here is the finished look.


It added a little more length and I liked to see the change in how they looked. Wider lace would add more length to the legs.


Thanks for reading, now go make something for yourself.

Friday, May 20, 2016

The Shapeless Sack of a Dress

Hello Readers. I found this dress at a thrift store for $1 so I decided to bring it home and see what I could do with it. It was a little dumpy and shapeless. I didn't like the green and white color scheme. But it was in great shape and light weight for warm weather.


I thought a change to light blue would look better. The polyester blend of this dress didn't absorb much dye as you can see from the picture on the right. I wanted more of a change.


I dyed the dress again with a darker blue. It was for denim so I thought it would be pretty dark.


It came out darker and toned down the green. I liked it better than the light blue. The pattern is more subtle. I cut off the bottom 4 inches of the dress. I had a use for that cut off fabric. I folded the raw edge down and made a long narrow strip of fabric that was about 1 inch wide.


I used this buckle I found in my button stash to make a simple fabric belt. I couldn't believe how well it matched and it has been unused for years and years. I think it was from my mother's sewing stuff.


Here is my new finished dress. The belt fixed the shapeless middle of the dress. It didn't need major alterations. It just needed to be a bit shorter, and cinched in the middle. 

Hats. The best cure for a bad hair day.

Thanks for reading, now go make something fun for yourself.

Tuesday, May 17, 2016

The Crazy 80's Dress

Hello Readers. I found this gem of a dress and thought it was a flashback to the 80's. Are you old enough to remember the 80's? Big hair, shoulder pads and no seat belts in the car, that's what I remember most. This dress has the shoulder pads I remember from the 80's. Why did we all want to look like line-backers?


Here is a before picture of this dress. It is really a busy design. The blue areas look like a bright impressionist painting of flowers. At least sort of. It was a very heavy acrylic material. It's probably highly flammable. Don't light a cigarette around me please, I could burst into flames.


It has this strange polka dot detail going on too. I guess it's to break up the crazy design. Meh.


It didn't do anything for me so I cut it off. There is just too much of this colorful fabric. The top is going to have to go. I cut off the top and left a half an inch seam allowance. I folded it down and zigzag stitched it under. The waistband is elastic and the zigzag gave me enough stretch to get it on and off. 


I wore it with blue. I like it as a skirt, It has nice pleats that are machine wash proof. (I washed it when I got it and believe me those pleats are not going anywhere.) No ironing needed. Ever.


Thanks for reading, now go make something fun for yourself.

Monday, May 16, 2016

The Hawaiian Church Dress

Hello Readers. I have had this fabulous knit dress in my refashion pile for a while. I have been saving it since the winter. It seemed like a great summer dress and I love the floral design. It reminds me of a Hawaiian shirt. The problem? It is a horrible length on me. I seem to have shrunk about 8 inches in the picture on the left. 


 I could just shorten the dress to a better length but this great dress is also a little shapeless in the middle. I need to fix that too. And if I save the bottom, it will be a fuller skirt and already hemmed.


I took out a big chunk from the middle. I am going to put the top and bottom back together again. I am hoping it will raise the waist and define it a little.


Here is a picture of actual sewing. I put the right sides together and pinned them at the back, middle and sides. I stretched the top a bit as I attached it to the bottom because it was a little smaller.


I kept the length fairly conservative because I wanted it for church and I didn't want it to be too short. I also took it in a little through the top of the dress. It was easy to do with the knit fabric. The hem is still in place, so I am already finished.


Thanks for reading, now go make something fun for yourself.


Friday, May 13, 2016

Repairing a Damaged T

Hello Readers. My project today was an effort to save a shirt I was really attached to. It isn't anything special but it is one of my favorites. Why? I guess because it matched everything and it is stretchy and comfortable. Do you have a favorite T-shirt?


Here is the problem. The bottom got ripped and I had to remove the bottom 3-4 inches. Now it was a bit too short and it looks pretty rough. I needed to add some length and clean it up.


I decided to attach some wide 3 inch lace to the bottom of it. It would be longer, cover the rough edges, and it will look more finished. I chose lace in the same color family but not an exact match. I put the right side of the lace and the right side of the shirt together and stitched along the edges and  then attached the ends.


Here is the new bottom of the shirt. I had just enough to go all the way around the bottom of the shirt. It still matches everything and it's still comfortable. Now, it's a bit fancier and more unique.


Thanks for reading, now go make something fancy and unique for yourself.

Wednesday, May 11, 2016

The Armholes Are Too Low

Hello Readers. This was a quick project on a knit shirt that I liked and almost fit. It is a cute top with nice details at the neckline. It is loose through the body, which I liked but the size that fits around me is too big in the armholes. I am not going to show you that they are too low. There is too much visible from the sides, you just have to trust me on that. (We're friends now right? You can trust me.)


It also had this tie attached to it that should have tied in the back but it made me look pregnant. I hate that. My little guy is a year old. I was SO excited to be pregnant. I loved my belly. But now I am not pregnant. Looking pregnant is the last thing I want. I appreciate the idea of a built in belt, but this is not attractive.


First, to correct the armholes. I found the shoulder seam. I was going to use it as a guide to raise up the whole shirt. I don't want to change the size of the shirt just make the armholes less revealing.


I don't know if this picture is helpful. It is the shirt inside out. I sewed along the shoulder seam about 1/2 an inch in. I stopped at the arm sleeve. The sleeves are poofy and ruffly (Are those words?) and it will cover the uneven connection between the new shoulder seam and the cap sleeve.


I also cut off the waist tie as close to the shirt as possible. I didn't throw it away. I have a plan for that tie.


It seems that some of the beads on this waist tie got lost. I connected the two ties and made a long "belt" with a bead on each end.


I like the waist cinched in all the way around rather than just in the back. And the sleeves look good with the new seam in the shoulder. It just makes them look more of a ruffle. If the sleeves were fitted the new shoulder seam wouldn't have worked out well.


Here is a picture of the armhole. I feel weird posting a picture of my under arm but since that was the point of the whole project I thought I needed to show it.


Thanks for reading, now go make something fun for yourself.