Tuesday, November 12, 2024

Easy Felt Pie Decoration

 Hello Readers. Thanksgiving is my favorite holiday. It has all the warm fuzzy feelings and yummy foods.  It is November so that means Thanksgiving is coming to my part of the world soon. I wanted to decorate with that in mind and made this felt bunting to hang for the holiday. Pumpkin pie is a big part of Thanksgiving and fall in general. Let's celebrate with pie.  

 Pumpkin pie with whipped cream anyone?

Get out all your felt. Or go to the craft store and buy some felt pieces. You will need a lot of tan for the pie crust pieces. And orange for the pumpkin. You will want a bit of white for the whipped cream too. You can also make red-cherry, blue-blueberry or brown-chocolate pie. You can make whatever you like best.

 
I cut triangular pieces from the tan fabric for my pie crust. 
 
I wanted the tan pie crust pieces a bit larger than the colored "pie filling" pieces. That way the pie crust would peek out just a little.
 
I cut tan strips for the crimped crust around the edge of the pie. I cut these pieces about 1/2 inch wide and 6 inches long. It does not need to be exact, you can make it all fit when you glue the parts together. 

I used my hot glue gun to attach the triangles together. Hot glue guns can be very hot, mine is approximately the temperature of lava. Use caution. 

When I glued the crust to the edge of the pie piece I pinch or crimped it together as I glued it. I held it in place for a minute so the glue could set up. 

I traced and cut out some circles. 
 
 They were not very large, approximately 3 inches in diameter. These are going to make my whipped cream. 
 
I folded the white circles so that there was a point at the center. I glued the center of the circle to the piece of pie. You can use 2 circles to make a large sized dollop of whipped cream. 
 
When each piece of pie was done, I added them to one long string. 
 
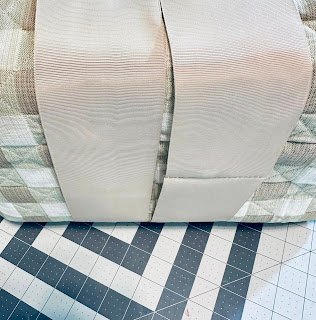
I glued white ribbon across the back of each piece of pie.(Any ribbon or string will do.) I glued one after the other so that it would make a wide bunting to hang up. 
 
I added a bow in between each piece of pie because it seemed pretty. 
 
 The bows are just decorative. You can skip them if you want. 
 
The pie bunting is cute anywhere, over the mantel, in a classroom, in a kitchen window, or in this case in an office. Thank you for reading along, now go make something fun for yourself.


Thursday, November 7, 2024

A Corduroy Skirt

 Hello Readers. I have had some corduroy fabric in my fabric stash for a long time. I decided to make a vest and matching skirt with it. The skirt was going to be very simple because I did not have as much fabric as I thought I did. 

Before and after.

I had just enough for a simple knee length skirt. I was not using a pattern I was just winging it! I was going to make an elastic waistband because it would be simple and easy. It would also be hidden under the vest I made yesterday. I had 4 pieces of fabric here to make my skirt.

 I angled the top of each piece to make the waist a bit less bulky. 
 
I connected each panel with my serger.
 
That made a tube. 
 
I hemmed my skirt and made the casing for the elastic waistband. 
 
 This skirt was so simple and kind of a basic. It would match so much. It could be alone or with the vest.
 
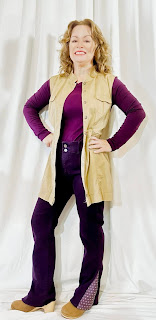
I like them separate the best I think. The vest and skirt seem a little stiff and formal together. I am usually going more casual. Thanks for reading along, now go make something fun for yourself.


Wednesday, November 6, 2024

A Courduroy Vest

 Hello Readers. I have had this corduroy fabric sitting in my stash for a few years. I finally decided what to do with it. I could make a vest. 

I used pieces I had on-hand. Stash busting!

I used this pattern. It is Vogue 7084. 
 
I started cutting out my pieces and realized it was going to take more fabric than I thought. I omitted the collar and the little front pockets.
 
 I also used a different fabric on the the back. It matched well and it was an easy way to use up some more of the fabric stash. This paisley was a sample piece so it was just bog enough for the back of the vest and that's all. 
 
I tried to follow the directions which is difficult for me. I don't like authority figures telling me what to do and how to do it but I was pretty sure Vogue knew more than I did. 
 
I sewed the outer shell and then the inner facings. It was all going well. 
 
I put in my button holes and I thought everything was great. I could not find good buttons in my button collection. Nothing seemed right. I went with clear buttons for now. 
 
 It was bigger than I wanted. I wanted it to be more fitted and it also seemed too long. Ugh!


I shortened it, took in the sides and added darts to each arm hole to improve the fit. I didn't like it over this sweater but I thought it was much closer to my vision. 
 
 My vest was finished and I liked the back fabric a lot. Thanks for reading along. I will be back tomorrow with a matching skirt.


Tuesday, November 5, 2024

Simple Appliqued Sweatshirt

 Hello Readers. Today is election day. I hope you can get out and vote if you are in the U.S. I wanted to make a shirt for the day that went with the voting theme. (I really love a shirt with a theme.) I wanted spell out the word vote but this idea would work for any word. (Thankful for Thanksgiving, Love for Valentine's Day, Luck for St. Patrick's Day...) I don't have a fancy embroidery sewing machine so let me show you how I did this.

Vote!
 
This sweatshirt was plain and simple and it would be a perfect base for adding some letters. 
 
I had a small piece of cotton fabric with the names of the states. It would be perfect for my letters. And the fabric looked pretty good with my sweatshirt. 
 
The thing that made this project so simple was fusible interfacing. Follow the instructions on the packaging to iron this onto the fabric you want to make your letters out of. 

I used my iron to fuse the interfacing to my fabric. I put my fabric face down and put the bumpy side facing the fabric. I used some scrap white cotton as a barrier between that and my iron. I made my 4 small rectangles because I knew I was going to make 4 letters.
 
The interfacing made the fabric a little thicker and stiffer. It would be easier to handle, cut and sew like this. 

I used a ruler to help me sketch out my letters. I made boxy letters with straight lines. They were easy to draw and they will be easier to sew to my sweatshirt. I used pencil because it will wash out easily.

I cut out all my letters following the pencil lines I drew. 

I arranged my letters on my sweatshirt and made sure I liked the arrangement. These are off center for 2 reasons.
 1. It looked more fun to me. 
2. If I try to line the letters up perfectly straight and they shift even a little in the sewing process, it will be very obvious. Doing it this way will make it easier later. 

I pinned the letters to the sweatshirt. I put pins in all around the letters and made sure they were in different directions to keep the letters in place the best I could while I was sewing.

I used a wide zigzag stitch to attach the letters to the shirt. I sewed all around the edges of the letters. This will keep the edges from fraying and keep the shirt in good condition wash after wash. 

I used different color thread for each letter just for fun. The colors you use are up to you. 

When I was done it was a little wrinkled and the letters had shifted a bit in a couple spots but it's OK. I am not trying to launch a rover to Mars, it doesn't have to be perfect. We are here for a good time, don't stress. I loved how my shirt turned out.
 
 I ironed the whole shirt to smooth out the letters.

My shirt was finished. 
 
Thanks for reading along, now go make something fun for yourself. And vote if you can.