Showing posts with label Tank. Show all posts

Wednesday, July 29, 2020

The Paper-Bag Skirt

Hello Readers. How in the world are you? Sometimes I am fine and sometimes I am pretty sure I am on the Titanic and I just saw some water in the ship.
I sew because I like it and it keeps me from overthinking.
This outfit came together because I have been wanting something with a paper-bag waist for ages now. Have I bought anything with a paper-bag waist? No. I don't normally buy clothes. I waited until I could figure out how to make something. Here it is!

This top was lightweight and I loved the design. It was perfect for the fire hot days of summer. It was just too low on me. There was a tie at the neckline that made a little keyhole opening. It was not in a good place on me.
The skirt was a little roomy but not huge. The waist was loose enough to make the paper-bag waist I wanted.


Tank top style shirts are so easy to alter at the shoulder. I usually just remove a little from each shoulder and I get a much better fit.
it is an easy way to raise the neckline. I used a tight zigzag stitch to prevent fraying. This only takes about 5 minutes.

The skirt was next. I cut off the bottom of the skirt, just above the hem. This was going to be my belt. A zigzag stitch or so Stitch Fix will keep it from fraying.

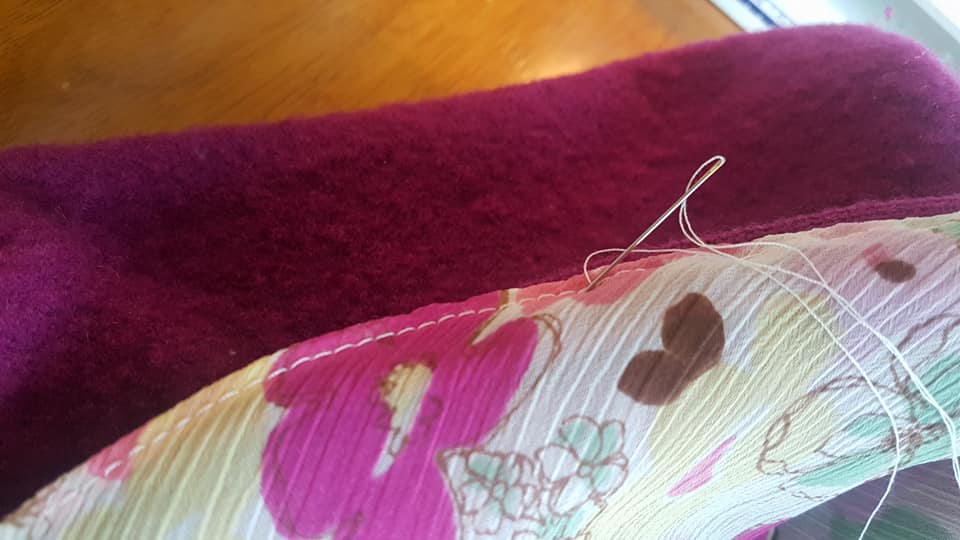
I gave the skirt a new hem. I didn't want the skirt TOO short so I  used a zigzag stitch on the edge. I  turned it under once and used a straight stitch all around the skirt.

Now, what about that belt? I stitched it down in the back so it would stay at the height I wanted it. I made sure I stitched next to and not on top of the zipper. 


The belt cinches in the waist and makes that gathered paper-bag look I wanted.

 I liked how this outfit turned out. The skirt is a new favorite. The belt is just a tie, I can make it whatever size I need. (Corona snacking is still a thing right?)

Thanks for reading along, now go make something fun for yourself.

Wednesday, November 13, 2019

The Summer Dress in Winter

Hello Readers. I found myself with a pair of soft corduroy pants. I honestly can't remember where they came from. I liked the light blue color a lot though. I also got a striped tank dress in the same light blue. So what did I do? I put them together.

These corduroy pants were great but they were approximately 12 inches too long. This is usually how it goes for me. Short girl=Short legs

My daughter gave me this dress because it was difficult to wear. The racer back was too low to work with any bra. (Yes, I tried it on with all my bras.) I decided it would be better as an under layer. It would be warm and if the bra peeked out no one would know.
 
When my daughter handed me this simple white V-neck sweater, I had an outfit idea.

I took a lot of fabric off the length of these pants and made a new hem. I made them a little more narrow through the legs too. I thought I could remove the pockets from the front but you can see the corduroy was permanently marked by the pockets. Easy-peasy!

I cut the dress in the middle so I had a shirt. It would make a great layering piece and it would fill in the deep V-neck of the white sweater. What about that lower part of the dress?

The bottom of the dress made a perfect infinity scarf. I wear a scarf almost everyday in the winter. I hate to be cold.

The whole combo was easy to wear and cozy in the cold weather.

Thanks for reading along, now go make something fun for yourself.

Friday, August 9, 2019

The Pro Bowl Shirt

Hello Readers. I think it is fun to play around with clothes and try to make something new. It can be an experiment. What can I make? How can I change things up?

I put this shirt and skirt together because the colors seemed the same. The Pro-Bowl shirt was my son's but he outgrew it. It was big and masculine. The skirt was from a clothes swap. The skirt was almost on the ground! The shirt was big and masculine. It wasn't a nice looking outfit. Free clothes are great but it's not great when they fit like this.

I started by cutting off the sleeves and collar off. I was seeing a tank top shape so I went with that. Check out the cool football and floral fabric.

I cut more of the front away to remove the big logo. I tried to keep each side even. I had now cut of so much of the front it was not going to cover me enough. I had a plan for that.

 I turned it around and use the back off the shirt as the front. I re-tied and adjusted the straps so the V-neck wasn't too low.

The shirt was big enough to criss-cross the back. The 2 sides cross over each other so my back is fully covered.

Work on the skirt came next. It was a fake wrap skirt. There was a fully closed skirt under that flap in the front. I cut the skirt off at my knee length and hemmed it all the way around. I made the "wrap" part a little shorter so it would be more visible. I really liked the stripes and the soft knit material.

I tucked the top in and I was done!

I went downtown and made my husband take my picture in front of these cool angel wings.

And in front of this cool mosaic mural one block over. He got artsy with it.

I gave him a lot of advice even though he is a photographer and his pictures always look so much better than mine. He was a great sport about it though.

Thanks for reading along, now go make something fun for yourself.
***Year End update-  I really liked the 2 patterns together. It was really comfortable and fun for a date outfit.

Friday, June 7, 2019

Save the Jewels!

Hello Readers. I found this brown knit dress at a clothes swap and loved the jewels around the neckline. The dress was too tight around the chest and the high/empire waist made me look pregnant. I couldn't wear it but, I really wanted to. It had jewels on it! It was shiny! It was sparkly!

The dress really needed a new top, the skirt was fine. I decided to use this big t-shirt for that. I could make it into whatever kind of top I wanted.
It doesn't look like it but, I was wearing shorts in this picture.
I started by cutting the top off the skirt. The skirt had a nice waistband already. That would be really handy. And the knit material wouldn't fray so I could just cut it off.

All I needed to do was make a small hole in the waistband, thread some elastic through, connect the elastic ends, and close the hole in the waistband. In no time I had a skirt.

I cut the entire collar piece off the dress. 

I used a favorite tank top as a guide and cut out a new tank from the green t-shirt. I thought green would work well with the jewels because some of them had a green tone to them.

Here is the tank top after I cut it out. I made new side seams first. The arm holes look rough but I turned them under, stitched them down, and they looked great.

Here is the finished tank top. The collar is sewn on the neckband of the shirt. It covers the original neckline of the t-shirt.

The skirt sits at my real waist now. I like that better.

Thanks for reading along, now go make something fun for yourself.
***Year End update-  I love this shirt. I wear it all the time, even in winter. It is great to layer under a sweater. I like the skirt but I wear the shirt more.

Friday, March 1, 2019

Wool Shrinks in the Washer?

Hello Readers. I am not the only one that gets careless with the laundry right? Somebody out there has accidentally shrunk a sweater. What can you do with it? Well, here is an idea.


This wool sweater was tragically put in the washer and dryer. Wool usually doesn't like that. This wool is now about half it's original size. I found it at a clothes swap and I could see why they gave it away. When wool shrinks it gets thicker and you can cut it with no fraying. It is very easy to work with. Sometimes people shrink sweaters on purpose to make different projects.


This little tank top was also from a clothes swap. I liked the floral pattern, but that's it. It is way to skimpy and sheer to actually wear. It wouldn't really cover the things I like to cover. ( I have 3 kids. I breastfed all of them. I'm 46. Y'know what I'm sayin'?)
 I have been saving it for the right project. And here we are!


I wanted to make a travel cosmetic bag. I cut the sweater up. It was like a science class dissection. (I remember dissecting big worms in school.) I wanted the chest of the sweater with the zipper attached and the little front pockets for this project.


 I folded the chest piece of the sweater in half, with the zipper along the top. I pinned the little pockets on the front. I used my sewing machine to attach the pockets to the piece of sweater. You can see how the wool material doesn't fray at all.


My next step was to sew my little bag shut. I made little seams at the corners to make the bag more box shaped.  I didn't want it to be flat like a clutch bag.
 I also used it as a size guide to cut lining from that floral tank top.


Here is a look at my lining. I am using the hem of the shirt at the top of the lining.


Here you an see I was sewing the lining into the bag by hand. The lining will cover the interior seams and look nice when I open the bag. It was easy to attach the lining to the opening of the bag by hand.


 I put a bunch of stuff in the bag so you could see how it looked. This was totally staged, I am not planning to travel anytime soon. But if I win a trip around the world, I am ready!


 I had some sweater pieces left and I thought the sleeves would make a good eyeglass case. The material is thick and squishy. The cuffs of the sleeves had a nice finished edge that would look good on the case.


There were 2 sleeves so I made 2 cases. I adjusted the size based on the size of the glasses.


Thanks for reading along, now go make something fun for yourself.
 *Year end update-I just used this bag on a trip. It is still a winner.