Showing posts with label Men's Shirt Refashion. Show all posts

Wednesday, July 16, 2025

2 Striped Shirts

 Hello Readers. I had 2 striped button-up shirts. I was surprised at how well they matched. I knew that they could make something fun if I put them together. But what should I make?

Before and after. 

I had 2 shirts. I like the one I am wearing in this picture. I wear it often. The shirt on the hanger was from a clothes swap. I didn't realize how much they matched until I brought it home. How should I put them together? I thought about making a skirt so that it would look like a dress when I wore them both together. 
 
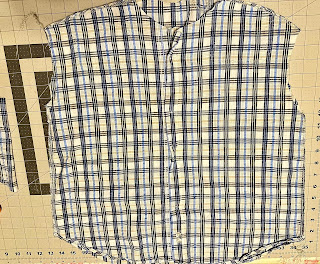
But then I thought matching shorts would be better. It would make a cute 2 piece set. And I could continue to wear the shirt alone if I wanted to. I cut out my shorts from the body of the shirt. 
 
I just had to put these 2 pieces together. What an easy project, right? Well, it was about to get messy. 
 
I decided to add the shirt pocket to the back of the shorts. That would be useful and the pocket was already put together. I wanted to use it. 
 
I put them together and I thought everything would be fine but I was wrong. 
  
I attached the pocket and I thought I was almost done. I added an elastic waistband and then... I realized that the shorts were a little tight. I didn't want tight shorts. I wanted a looser fit to match the fit of the over-sized shirt. 
 
All I had left were the sleeves. Let's try to enlarge these shorts. 
 
The only fix I could think of with the fabric I had available was to add panels to the sides. The stripes on the sides would have to be horizontal but I liked that so I got to work. 
 
I cut the shorts open on the sides. It was a straight cut and straight new seams to sew in the extra fabric. 
 
I added the side panels and hoped for the best.
 
Here are my new shorts. They would be looser now and I thought they would work. 
 
I liked this new 2 piece set. The loose fit is comfortable and casual. Life is too short and too difficult for uncomfortable clothes. Thanks for reading along, now go make something fun for yourself. And if it doesn't work out at first keep going, keep trying, you'll get there.


Wednesday, May 28, 2025

Plaid Shirt

 Hello Readers. I have had this XL men's shirt for a while. I liked the seersucker fabric and wanted to use if for a summer top. You can see here what I did to make a top for myself. 

Before and after. 

My son told me it looked like I was wearing someone's grandpas's clothes. He wasn't wrong. I liked the fabrics and was determined to make something new from the materials

I used this shirt as a pattern to cut out a new shirt. I cut it at the bottom so the hem of the blue shirt could be the hem of my new shirt.

I used my seam ripper to remove the front pockets.

I used my serger to sew the sides and shoulder seams together.

I cut the sleeves off what was left of the shirt. I also cut the sleeves down in size and length. 

I sewed the sleeves in with my serger. 
 
The new sleeves look different. I wanted small cap sleeves. I thought that would look more feminine and like this was my shirt and not grandpa's. 

I cut the pants down as well. I cut the pockets out of the way and cut the sides of the pants to make them more narrow. I cut the length so that I would have shorts instead of pants. 

Now I has a new summer top and shorts. 

This was a great outfit for a day at the beach. (And some ice cream.) Thanks for reading along, now go make something fun for yourself.


Thursday, October 10, 2024

Crop A Button-down

 Hello Readers. I wanted to make a loose cropped shirt that tied in the front. I found this striped shirt at a clothes swap and it seemed perfect for this project. I went right to work.

Before and after. 

This was a men's shirt but it fit well enough. I loved the fall colors and stripes. 

I cut the bottom of the shirt off. I wanted the shirt to end at my waist. I didn't throw it away that extra fabric though. I wanted a waistband that would tie in the front. I would need to make that.

I cut that extra fabric into 2 narrow strips and connected them so it was as long as possible. I sewed it together with the right sides facing each other.

I had to turn the long waistband right side out. It was very wrinkled
so I ironed it flat.
 
Here is my long waistband now I need to connect it to the shirt. 
 
I wanted to match the stripes in the back of the shirt as best as possible. I took this to the serger. I sewed the long strip to the bottom of the shirt.
 
When the waistband was on, I could tie the shirt in front. I liked the finished look so...
 
I liked the shirt tied over this blue knit dress. Thanks for reading along, now go make something fun for yourself. 
***Year End Update***- I love this top and it worked so well with the dress. I have worn it a bunch.


Wednesday, May 22, 2024

Buttondown to Tie Front Shirt

 Hello Readers. Check out this preppy button-down shirt. It was too stiff and formal for me. (It looks like I skipped class at my ritsy private school to meet with my banker about my investments.) But I did love all the different colors. Let's make something fun.

Before and after.

I cut the sleeves into a short sleeve length. I saved the sleeves for later.

I also cut off the collar. 

I cut the button plackets off. I won't need them.

I cut the length of the shirt shorter. I wanted it to be shorter and I didn't want that high-low hem. 

I used my serger on all the cut edges so they wouldn't fray. 

Then I turned the edges under and used my sewing machine to sew them down. 

It was all looking nice and neat. 

I cut one of the sleeves into strips. I needed to make ties for the front of the shirt. 

I folded them in twice and sewed them together.

I tied the ends in a knot to finish them.

I used clips to arrange the ties evenly on the front of the shirt. 
 
Then I took this shirt on a road trip.

This shirt is so much more fun than a button-down shirt. Thanks for reading along, now go make something fun for yourself. 
***Year End Update***- This top got a lot of wear until it got too cold. It will come back in spring for sure.


Tuesday, May 21, 2024

The Duck Shirt

 Hello Readers. When I saw this fun shirt at a thrift store and I knew I should bring it home with me. It is absolutely ridiculous and I love it. Who made this? They need a raise immediately!

Before and after. Yawn!
 
The little ducks had orange beaks and for a quick minute I really wanted to put these 2 pieces together. That is crazy right? I was going quackers. (hahaha, I'm sorry. I couldn't help myself.)
 
I cut the sleeves and shoulder of the shirt away. I just wanted the body of the shirt. 

I used my serger to make sure all those cut edges didn't fray.

I pinned this yellow ribbon around the top of the shirt. I folded the shirt over on itself so that it would fit the ribbon.
 
 I sewed the ribbon to the top of the shirt. The ribbon is a fun pop of yellow.

I used the same ribbon to make shoulder straps. I sewed them in the front first. Then tried it on to make sure I had the length right before attaching the straps in back.

I thought this would be a sundress but it really looks like sleepwear. That is OK with me. I needed summer sleepwear. Thanks for reading along, now go make something fun for yourself. 
Quack.
 
 ***Year End Update***- I wanted to wear this more than a nightgown so I made a tank top that I could wear during the day.