Showing posts with label Dress to Shirt. Show all posts

Tuesday, July 8, 2025

There's a Problem With This Lining

 Hello Readers. This dress was cute and I liked the colors of the fabric. But the lining was not right. It seemed to have shrunk  Why did the lining shrink? I don't know. But it was not hanging smooth and it was not long enough for the dress anymore. I didn't want to wear it like this. What could I do with it?

Before and after. 

I liked the scattered stripes all over this dress but the lining barely covered my bum. That's not going to work in a light weight white dress. The lining was bunched up and gathered in a lumpy way. Ironing the lining didn't help. I decided to remove it.
 
I started cutting the lining out of the dress. 
 
I cut the lining carefully. I wanted to cut as close as possible to the seams but I did not want to cut the seams anywhere.
 
I cut and cut and cut.
 
I cut the dress shorter so it would be a shirt. I wanted to wear it but without a lining it would be very sheer, a shirt would be more comfortable (Less revealing.) for me. 
 
I liked it as a shirt. It was still just as great as the dress was.
 
Summer means shorts for me and this shirt is perfect with these shorts. Thanks for reading along, now go make something fun for yourself. 


Tuesday, January 21, 2025

Dress to Shirt

 Hello Readers. I liked this dress but I didn't need it. I really needed some long sleeve tops to layer under sweaters. My part of the world has become arctic and I need more long sleeves. Could this dress be a shirt? Sure it could.

Before and after.

This knit dress was like a long T-shirt. I needed some long sleeve shirts so I decided to make this dress into a shirt I could wear more often. Especially in the cold weather we have been having. 

This dress had a waist seam and I decided to cut the skirt off about 3 inches below that seam.
 
I removed the zipper from the back of the dress. I had to cut it in the middle when I shortened the dress anyway. I unpicked all the stitches and took out the zipper completely.
 
The back of the new shirt was open like this. That's OK. I can now sew the 2 sides back together. It went over my head fine without the zipper. 
 
I sewed up the back seam and it only took a minute. 
 
This is the inside of the new shirt. I wanted to sew the bottom of the shirt to the waist seam. That would create a waistband of sorts at the bottom of the shirt. 
 
Here is a look at the shirt from the outside. You can see how the bottom looks like a waistband. It's an easy way to finish the shirt without buying anymore sewing supplies. 

I liked to little floral pattern with this cream colored outfit. Thanks for reading along, now go make something fun for yourself.


Wednesday, May 29, 2024

Dress to Shirt Refashion

 Hello Readers. This shirt was made from a linen dress. It was a pretty dress but it had a terrible nylon lining. Nylon makes me itchy and it's is hot in summer. I am trying to eliminate it from my wardrobe completely. I didn't mind removing the linen from the nylon and using it for something else.

 I love to thrift and when I do I look for fabrics that are unique and catch my eye. I saw this linen dress at a thrift store a few months ago and the fabric was so pretty. I had to bring it home even though I did not know what I was going to do with it yet.

Look at this fabric. It looks like an Impressionist painting. And it is linen. It's going to be great to wear in the heat.

I cut the skirt of the dress off away from the rest of the dress. I thought the skirt of this dress would make a nice shirt. Was there enough fabric? I thought there was just barely enough to make the body of a shirt. 

I used this pattern for the body of my new shirt. It is Vogue #  I cut out the body pieces and did not have enough fabric for the sleeves that were part of this pattern. I was going to make a sleeveless shirt if I had to.

I had 2 little pieces from the hemline of the dress. Could they be little cap sleeves? That was my plan. I pinned the pieces to the armholes to get an idea of how they could fit there. I wanted sleeves if I could figure out a way to make them. I really liked the pleated hemline of the dress. It would look cute at as the sleeves too.

I marked the sleeves with pencil so I knew where to sew the shoulder seam. Pencil washes out so I could mark as much as I needed. These were going to be the smallest little sleeves in the world.

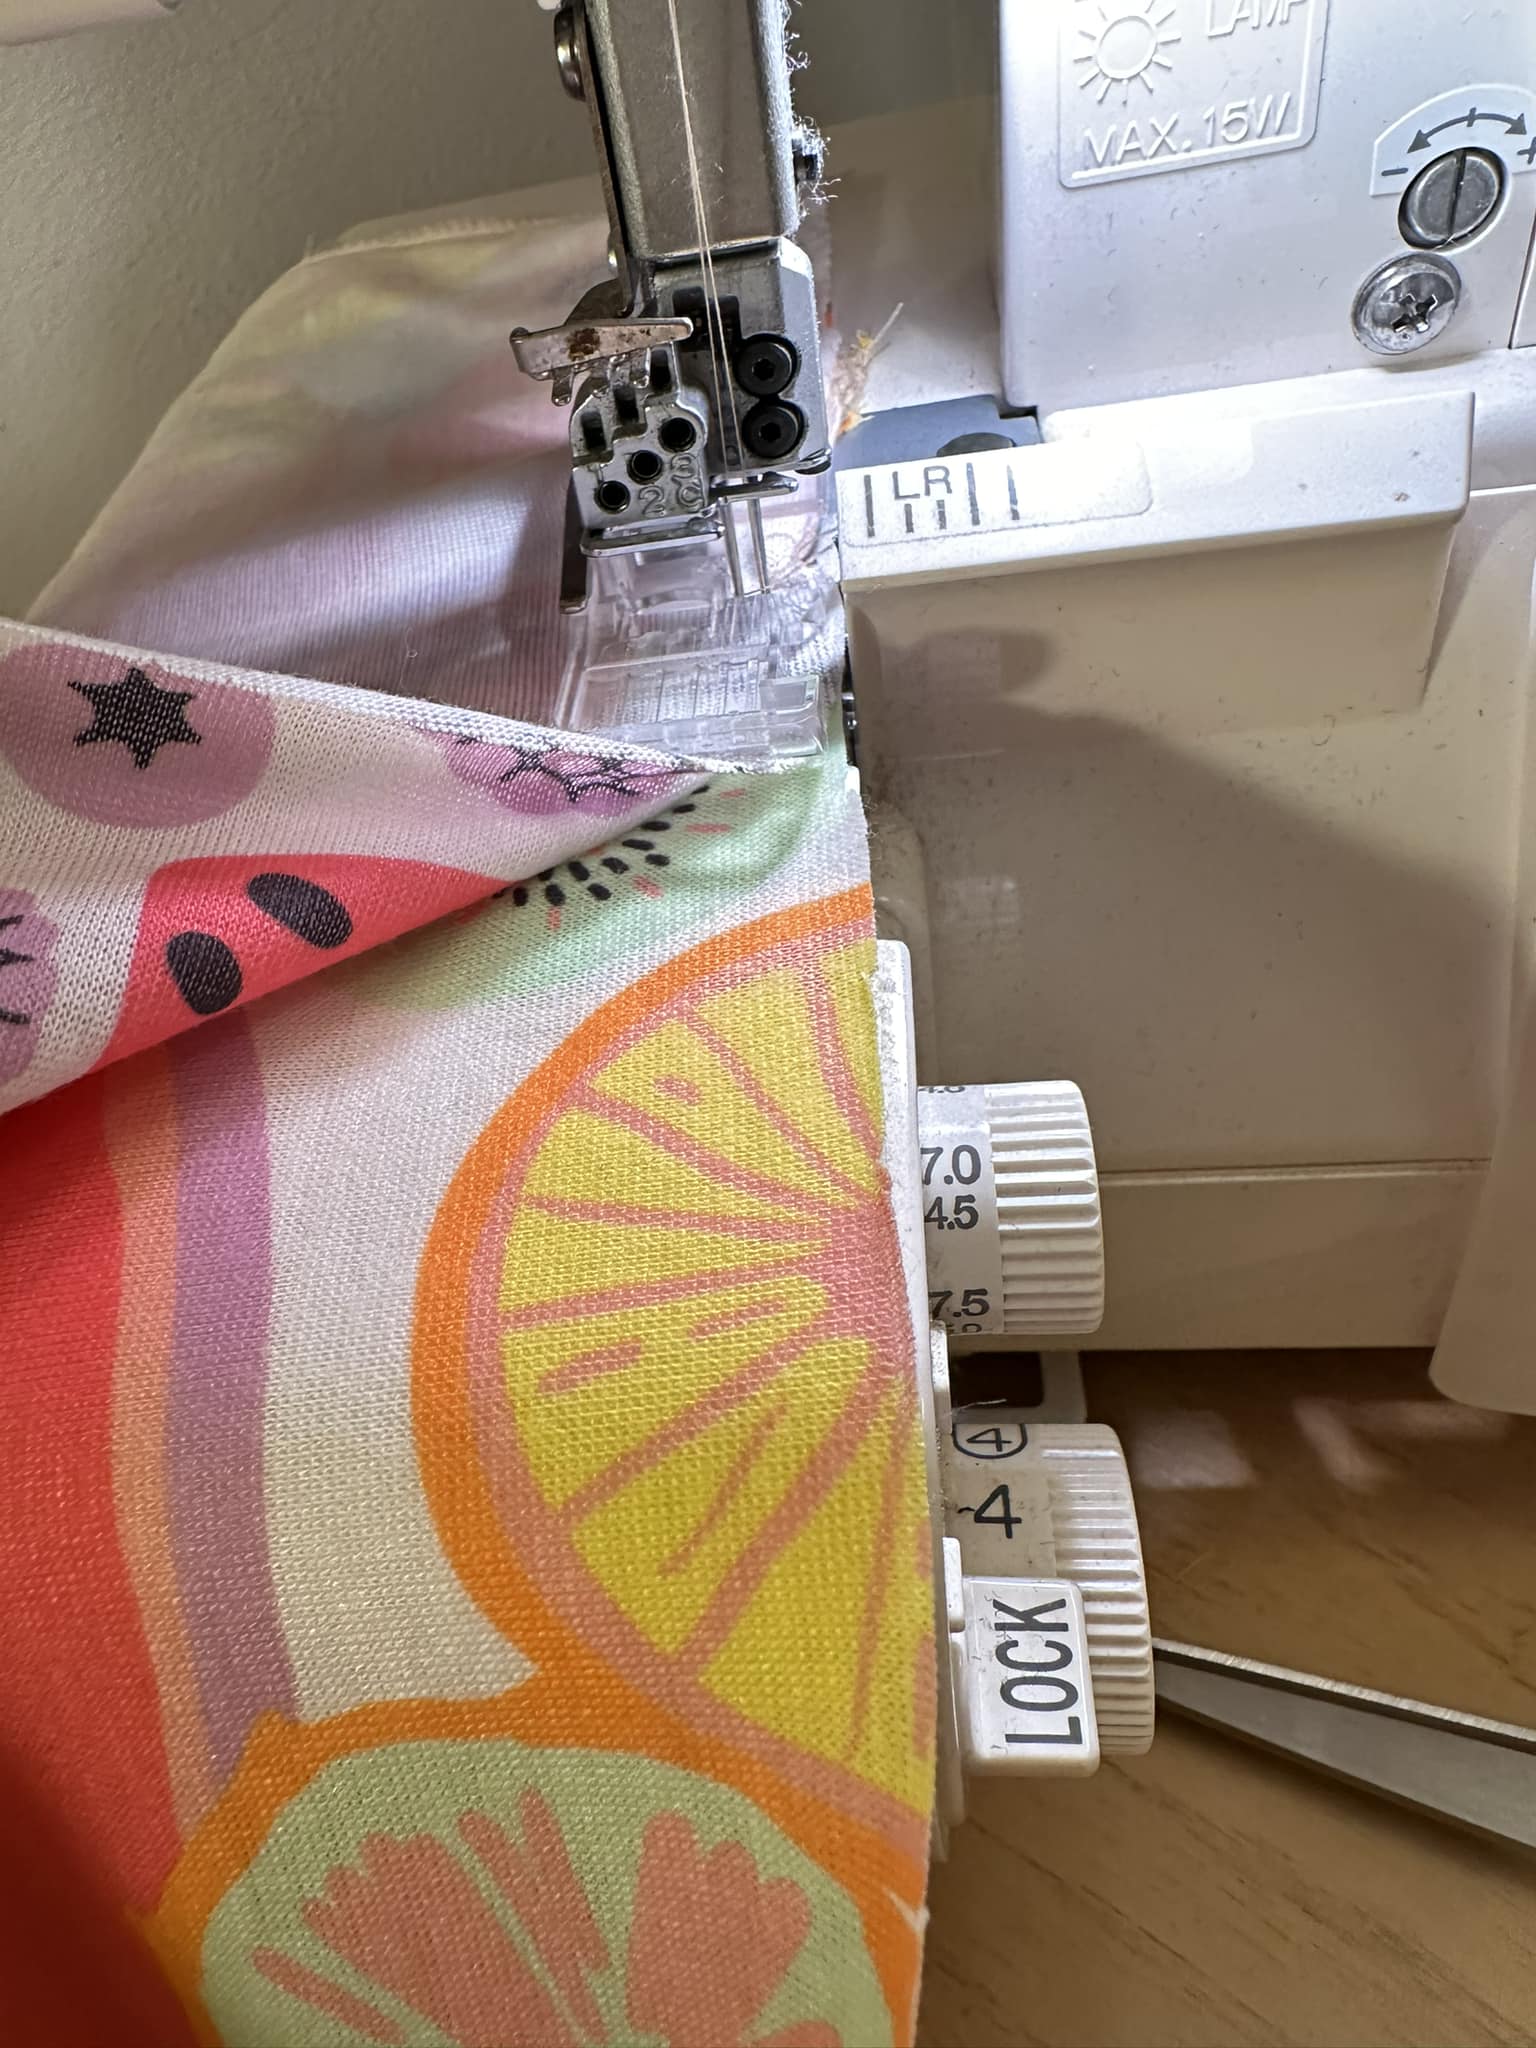
I used my serger to sew the sleeves. Linen frays so this will keep it neat and strong inside. 

I liked my new shirt. It was light weight linen would be great for summer and the colorful flowers were so great for summer too. The very tiny sleeves worked out well. I like them. They balance out the shirt. Thanks for reading along, now go make something fun for yourself.

***Year End Update***- I love this top. The colors are so soft and the impressionist painting vibe is so pretty. I still love it.


Tuesday, May 7, 2024

Orange Week Part 1:Dresses to T-shirts

 Hello Readers. I went all in on the color orange this week. I really like this color and I realized I had several orange pieces on my refashion rack and it was time to get them finished. Nothing was wearable so, I needed to get cutting and sewing.

I think if you are going to wear brights, you have to commit 100 % to it. I tried to go all in.
 
I found these wide leg orange slacks at a thrift store. They were new with tags, so were the matching sandals. I loved the wide leg style but the length was no good. 
 
I gave them a big cut in length and a new hem. 
 
This was much better. Now let's make sure I have some tops that match. 
 
I had this t-shirt dress with orange stripes that I did not wear often or ever. Lets make a t-shirt. I don't need to dress up for work anymore so I could really used a few casual t-shirts.
 
I cut the length I wanted. The best thing about t-shirts is that they don't fray. Even after washing and wearing repeatedly. I did not need to hem this if I did not want to. (Guess what? I didn't want to.) I knew I was going to tuck this in so no one would ever see the hem anyway. (Shh, don't tell.)

This mini-dress was wild and wonderful. I found it at the thrift store when I found the orange pants. I loved the bold fruit print on it. Let's make a t-shirt. 

This dress was an A-line shape so when I cut it shorter, I also had to cut the sides straight.

I put the right sides together and sewed down the sides to put them together. 

 
I loved these shirts and these orange dressy pants.
 
But my orange binge wasn't over yet. I will be back with more tomorrow. Thanks for reading along, now go make something fun for yourself. 

***Year End Update***- I love bright colors and these are favorites.


Thursday, March 21, 2024

Dress to Top

 Hello Readers.I recently made some new bedding from clothes. The color and patterns were a fun mix but I had some scraps left over. I don't like to waste scrap fabric so I made this top from some dress leftovers.

Before and after. 

I cut the skirt off this dress to make a pillowcase. That left the top of the dress. Lets use that top piece. 

The top had a zipper down the back and a nylon lining. Ugh! I hate nylon. 

I decided to remove the lining and the zipper. It took a while to unpick the stitches but it wasn't difficult.
 
When I removed all the lining the neck, armholes and hem were all unfinished. I had to fix that. 
 
 I used my serger on all the edges that would fray with out the lining covering them. Then I turned the edges in and used my sewing machine to stitch the edges down.

I sewed the back closed and hemmed the bottom of the shirt.
 
It looked just like it did when I started. The only difference is that the lining was gone. I thought it needed a little something.
 
I decided it needed some sleeves. I wanted to use part of the sleeves from this white sweater. 
 
I cut the ends of the sleeves at an angle. 
 
I thought the sleeves would look cute and sometimes I don't want to go sleeveless.
 
I was almost done. 
 
I added some trim to the seam around the waist. I wanted another white detail. 
 
This was an easy way to use the top of the dress. Thanks for reading along, now go make something fun for yourself.
 ***Year End Update***- I made another top with the same rosy pink color and I wear that one more. I gave this one away.