Showing posts with label Backyard. Show all posts

Wednesday, September 27, 2023

Making the Garden Pretty in Day & Night

 Hello Readers. Fall is here and the trees will turn colors soon and look glorious but my flower garden looks dry, dead and depressing. I wanted to have something pretty to look at it the garden but what can survive the fall weather? What could look good like day and night? It might sound unusual but what about a vintage bike? Don't close out the tab! Let me show you what I mean.

 Day and night.

The current state of my flower garden is not good. There used to be tulips and daffodils, peonies and day lilies, a cherry tree and a butterfly bush. But now everything has gone dormant and it looks dead and empty.

This sad tired peony has seen better days. It won't look better until spring when it comes back and blooms.

The garden will never look pretty with all these dead looking plants.
 
I cut the stems down to ground level with some pruning shears.The cuttings can be composted over the winter. (My son's soccer goal was in my flower garden for some reason. I put that away too.)
 
  I used the kiddie pool to hold all the cuttings. It was easy to throw them all in there and drag the whole thing to the compost pile. It was a big help.
 
I hung a small string of solar powered lights I had from the low tree branches.
 
Using solar powered means I can put these lights anywhere. No electric outlets needed! I made sure to put this small solar panel at the end of the string in the sun. It needs to get the sunlight to charge itself everyday. (As you can see my lights are getting old but they still work great.)
 
I wrapped the string of lights around and between the branches so it would stay up in the tree even on a windy day. I know fall will blow in with some cold weather and I don't want to have to rehang this.
 
I found this vintage bike on the side of the road a long time ago. (It had a sign that said "FREE".)  It is going to make a really fun focal point in my garden.  Instead of a bike you could also use items like a child's wagon, a tree stump, or old outdoor chair or table. Anything to set the plants on or around.
 
I added a basket to the front of the bike. I wanted to put something pretty in the basket.
 
I had 2 ideas for flowers and I decided to show you both ideas. I put some artificial white flowers in a basket and put the basket into the bike basket. I know some people do not like to mess with real flowers. And I know fake flowers really bother serious gardeners. 

I put a rubber band around the end to hold the stems in a bouquet position. 

I separated the flowers to make the whole bouquet look big and full.
 
I also went to a farm stand and bought a real living white mum plant to go with arrangement.
 
I put both my floral choices on display. Make the floral choices that works best for you. I like the white combination and it fills in my empty garden nicely.

When the lights start to shine at dusk the whole arrangement looks very sweet. It is nice to have some soft lighting in the backyard at night too. I have to water the mum plant but otherwise I don't have to tend to this at all. Thanks for reading along, now go make something fun for yourself.

***Year End Update- I don't like gardening that much but I enjoy this lovely little spot.


Sunday, April 23, 2023

Budget/Renter Friendly "Screened" Porch

 Hello Readers. Spring and summer is a beautiful time to be outside and enjoy some fresh air. But when you do.... the bugs will attack. Mosquitos, bees, wasps, gnats... they're coming for you. What would help is a screened porch but if you are renting that might not even be possible. I have a budget friendly and renter friendly idea.

Before and after.

 
This is my daughters apartment. Its very pretty. It has a beautiful little garden space. The second story porch is large enough to sit on and shielded from the rain or hot sun. But it's not protected from the bugs.
 
The most budget friendly screen we could find was a canopy style mosquito net for a bed. It was the right shape for the porch, I needed something rectangular to fit the porch well. The dimensions do not need to match exactly because the net material is so flexible. The net we chose was a little bigger than the porch itself. There are a lot of options for beds and for camping that can work for this project. The one we chose had loops at the top to hang it from. 

Here is a look at the roof of the porch. It has beams and posts that we are going to use to hang the net. We couldn't drill holes so we had a different plan.
 
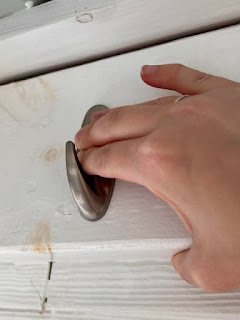
My daughter got these Command hooks to hang the net from. They won't damage the posts if/when they are taken down. 
 
These hooks are very easy to use. There is the hook piece and 2 sticky pads. The sticky pads are labeled so you know what side goes on the wall and what side goes on the hook.
 
We stuck the hooks on the posts and beams. We made sure the places where the hooks were going was dirt and dust free. The canopy would be easy to hang on the hooks. We placed to hooks at the 4 corners where the loops were.
 
We made sure to press the sticky side of the hooks to the wood as firmly as possible.
 
We hung the net up at the four corners using the hooks. Easy-peasy right?
 
To add more support and make sure the canopy would never come down. We added some string ties to the seam at the top of the canopy. (Our area can get some strong summer storms.) We used some narrow string that came with the canopy to hang the net from the rafters. We attached the string to the top of the net along the seam line. We used a needle and thread to sew the string to the seam line. We sewed the thread through the seam at the top of the screen and through the string so they were connected and then tied a double knot.
 
The net also had loops in the center of the 2 longer sides. My daughter put a hook up on the beams  in the center of the long sides for those loops. Because we were a little concerned about storms, we tied the net to the beams in between each hook with the string.
 
It is difficult to see the white ties on the white beams. I edited this pic to make it more clear. The arrows are Command hooks that hold the loops. The pink bows are where the string is tied around the ceiling beams.
 
We hung the curtain so it would pool on the floor. We thought that would keep bugs from flying under. 

The dog loves it out there.

And its a great place to sit with morning coffee and work from home without the mosquitos and gnats  attacking.
Thanks for reading along, now go make something fun for yourself.

***Year End Update- The curtains kept the bugs out all summer. It made sitting outside so much nicer.


Monday, November 21, 2022

Making an Outdoor Space Look Cohesive

 Hello Readers. My backyard has gotten a lot of wear and tear over the years. 3 kids, 2 dogs, lots of friends will do that. I wanted to simplify and refresh the whole thing but I am not a decorator.

I thought that if I chose one color and made that color the focus, it would help everything work together. You can see I chose blue. I love blue, it's calm and peaceful. (Don't we all need that?) This deck is right off my kitchen which is also blue. I thought it would harmonize well. Before I spent any money I planned and searched online. Could I find everything I needed in coordinating shades of blue? I verified that before I bought anything.

I used to have metal patio furniture. The glass-topped table and chairs were green and they were fine at first but over time they got some marks and rust on them. I had sanded and painted them to make them last but we never ate at that table. When the table and chairs needed repainting again, I gave them away and started over. These blue chairs are a resin (Plastic!) and weigh a lot. I chose them because they can't shatter in a storm and they can't rust. I also bought the little matching table to hold my iced tea. I hope these will be maintenance free. I do not want to sand and repaint ever again. These chairs are more lounge chair styles and I thought that would work better for our life style. I found the rug at Wegman's when I wasn't even looking and it was half price. It went with my blue theme so I got it when I was buying groceries. (Link to something similar.)


I made sure to get an umbrella for some shade and I made sure it would coordinate with everything else. I went all out for this blue theme. The umbrella went in my old umbrella stand. I reused what I could to keep costs down.

We were given this kids picnic table and it was great for the deck. It was blue on the sides already so You can probably guess what I did.
 
That's right, I painted the table blue! I only had to paint the top and seats. This would be easy. I washed the table all over and made sure it was dry before painting. This paint said it would bond with plastic so I bought it.
 
I put on gloves and started spraying. I kept the can moving and tried to spray an even coat of paint. 
 
I covered the whole table and let it dry. Then I went back and checked for any spots I missed. 
 
The paint went on really well and the table looked great. It gets dragged around and used for all kinds of kid fun. I also use it as a foot rest sometimes too. 

Even on cloudy days everything looks good together. 
 
 We use it a lot. Even on chilly days. Thanks for reading along, now go make something fun for yourself. And your yard!
*Year End Note From Chickie- I love my blue backyard area. It looks so put together.